
Cut Foam Block Prints
There are many different ways to create block prints. Using cut foam, mounted on a wood block or cardboard is an easy way to get started without needed a bunch of specific tools. The materials are forgiving and the results are fantastic. You can create designs that are abstract or representational. You can use your motif singly on a card or napkin or use it to create a repeat pattern for your own personalized wrapping paper. These foam stamps are reusable so the possibilities are endless.
Don’t forget to share your work by tagging us in your photos — @gather.make.inspire
-
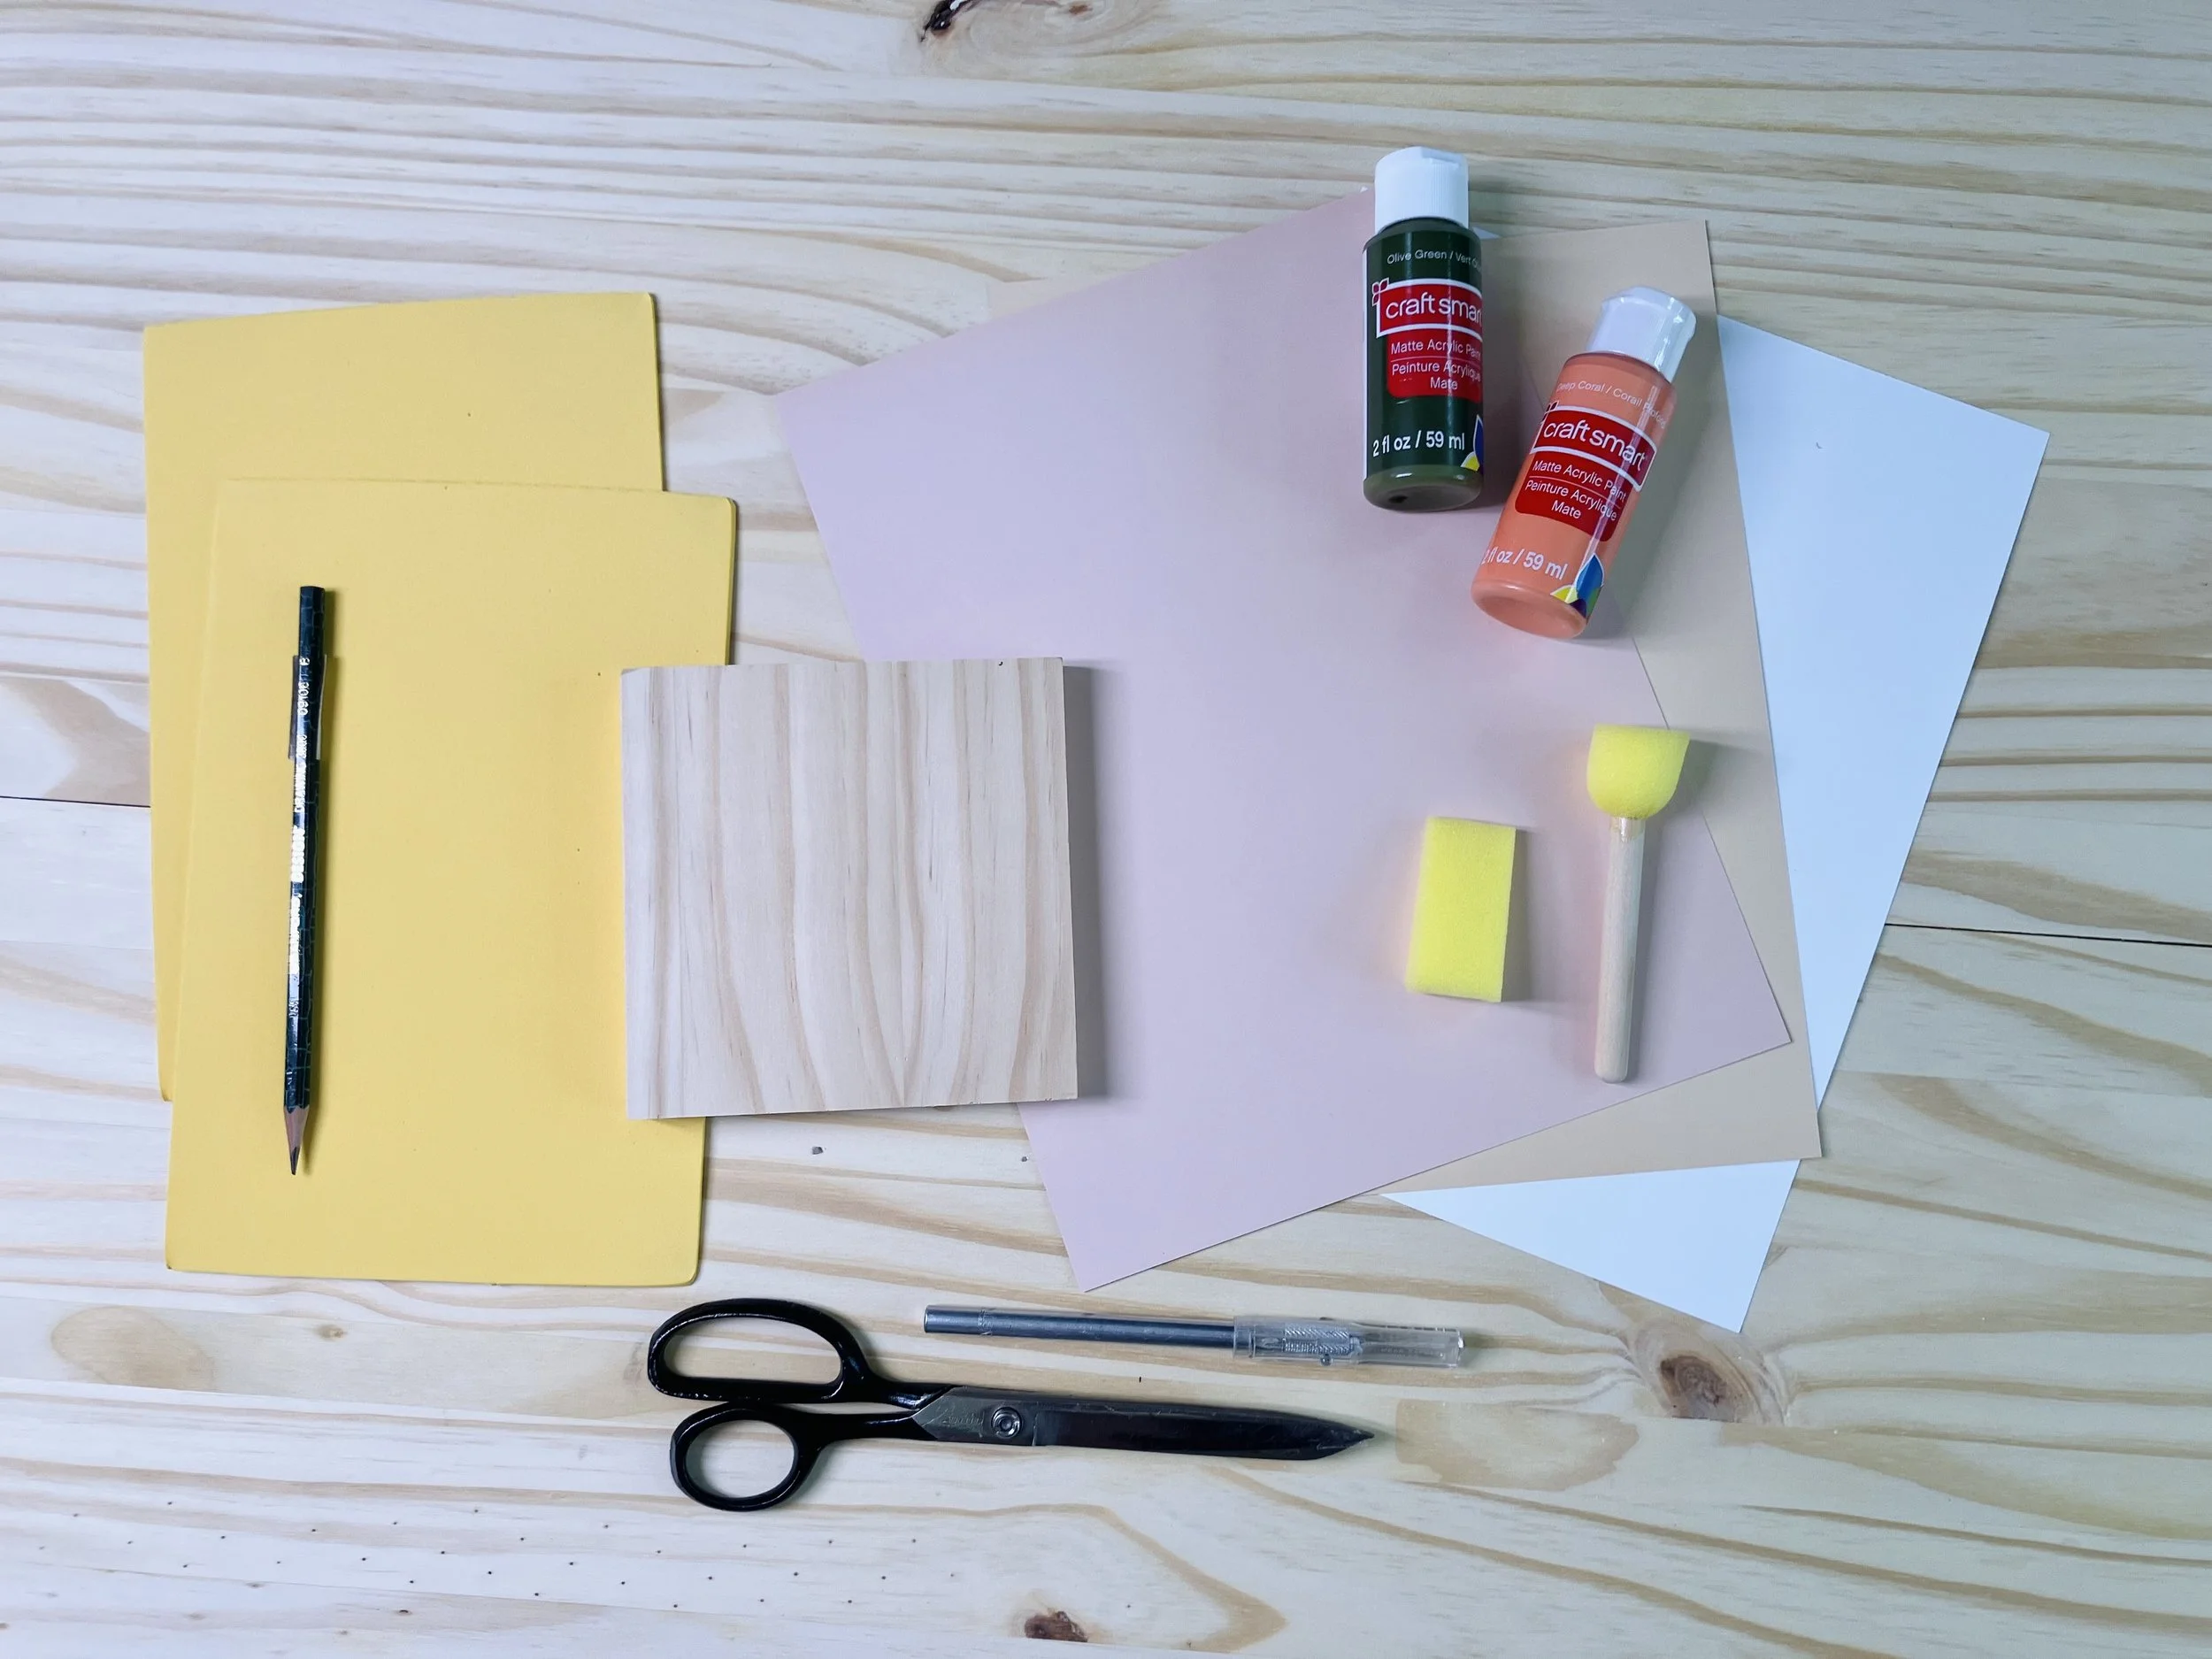
Wood Block or Sturdy Cardborad slightly larger than the print you wish to create
Sticker Back Foam Sheets or Plain Foam Sheets
Craft Glue, (like Aleene’s) if using Plain Foam
Scissors or Exacto Blade
Pencil
Small Foam Sponge or Dauber
Acrylic Paint
Paper to print on- Card Stock, Mixed Media or Cotton Printmaking Paper
Scrap paper to sketch ideas and print proofs
Small palette or plate to put paint on
-
There is no real prep for this project, you can dive right in!
-
1) Decide on your motif. Sketch out some ideas for what you would like to print. Remember, you will be cutting pieces out and putting them back together on your block or cardboard, so if you are a beginner, scale back on any heavily detailed bits.
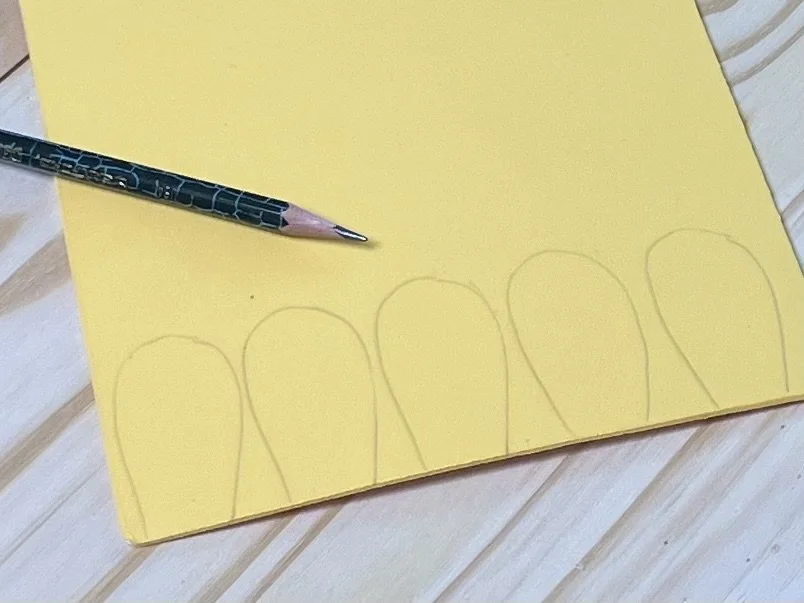
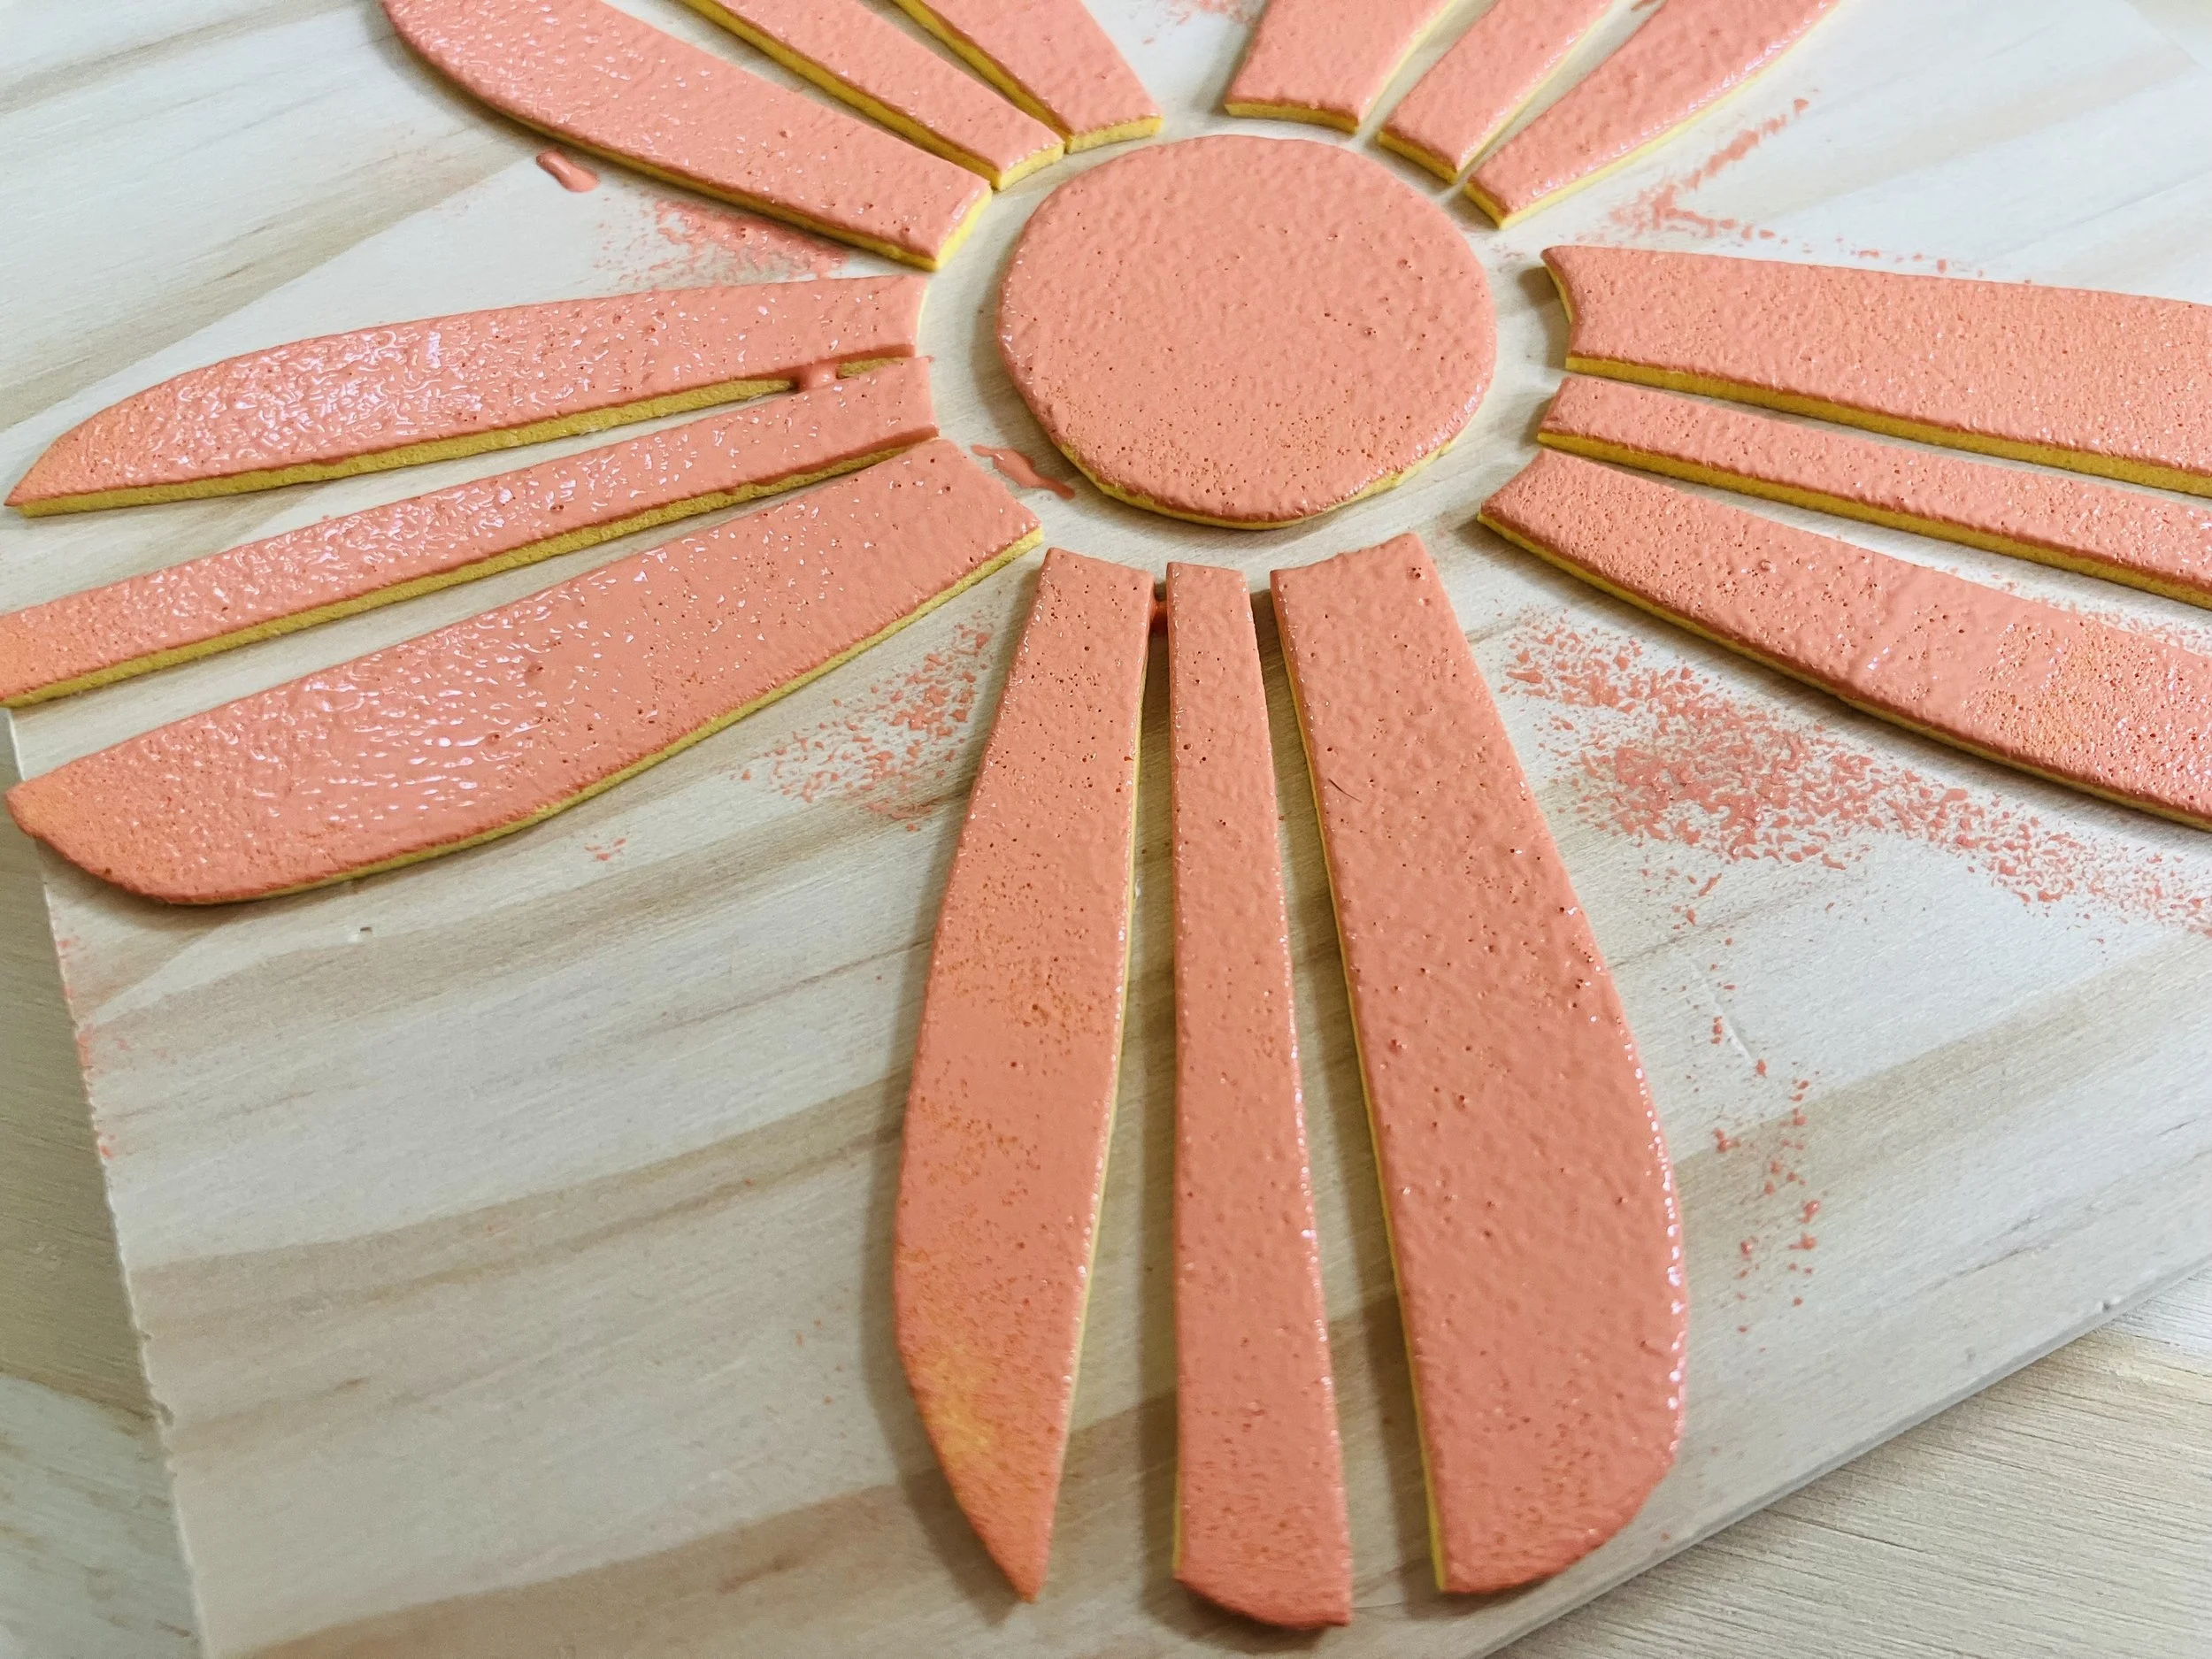
2) In pencil, recreate your design on your foam, considering the shapes or forms that make up your design.
3) Cut out your shapes. Remember that anything cut in foam will print. If you wish to have fine lines in the negative space of your print, plan to leave a gap between the foam pieces. Try not to make any indentations on the foam face because these will leave blank spaces when you go to print.
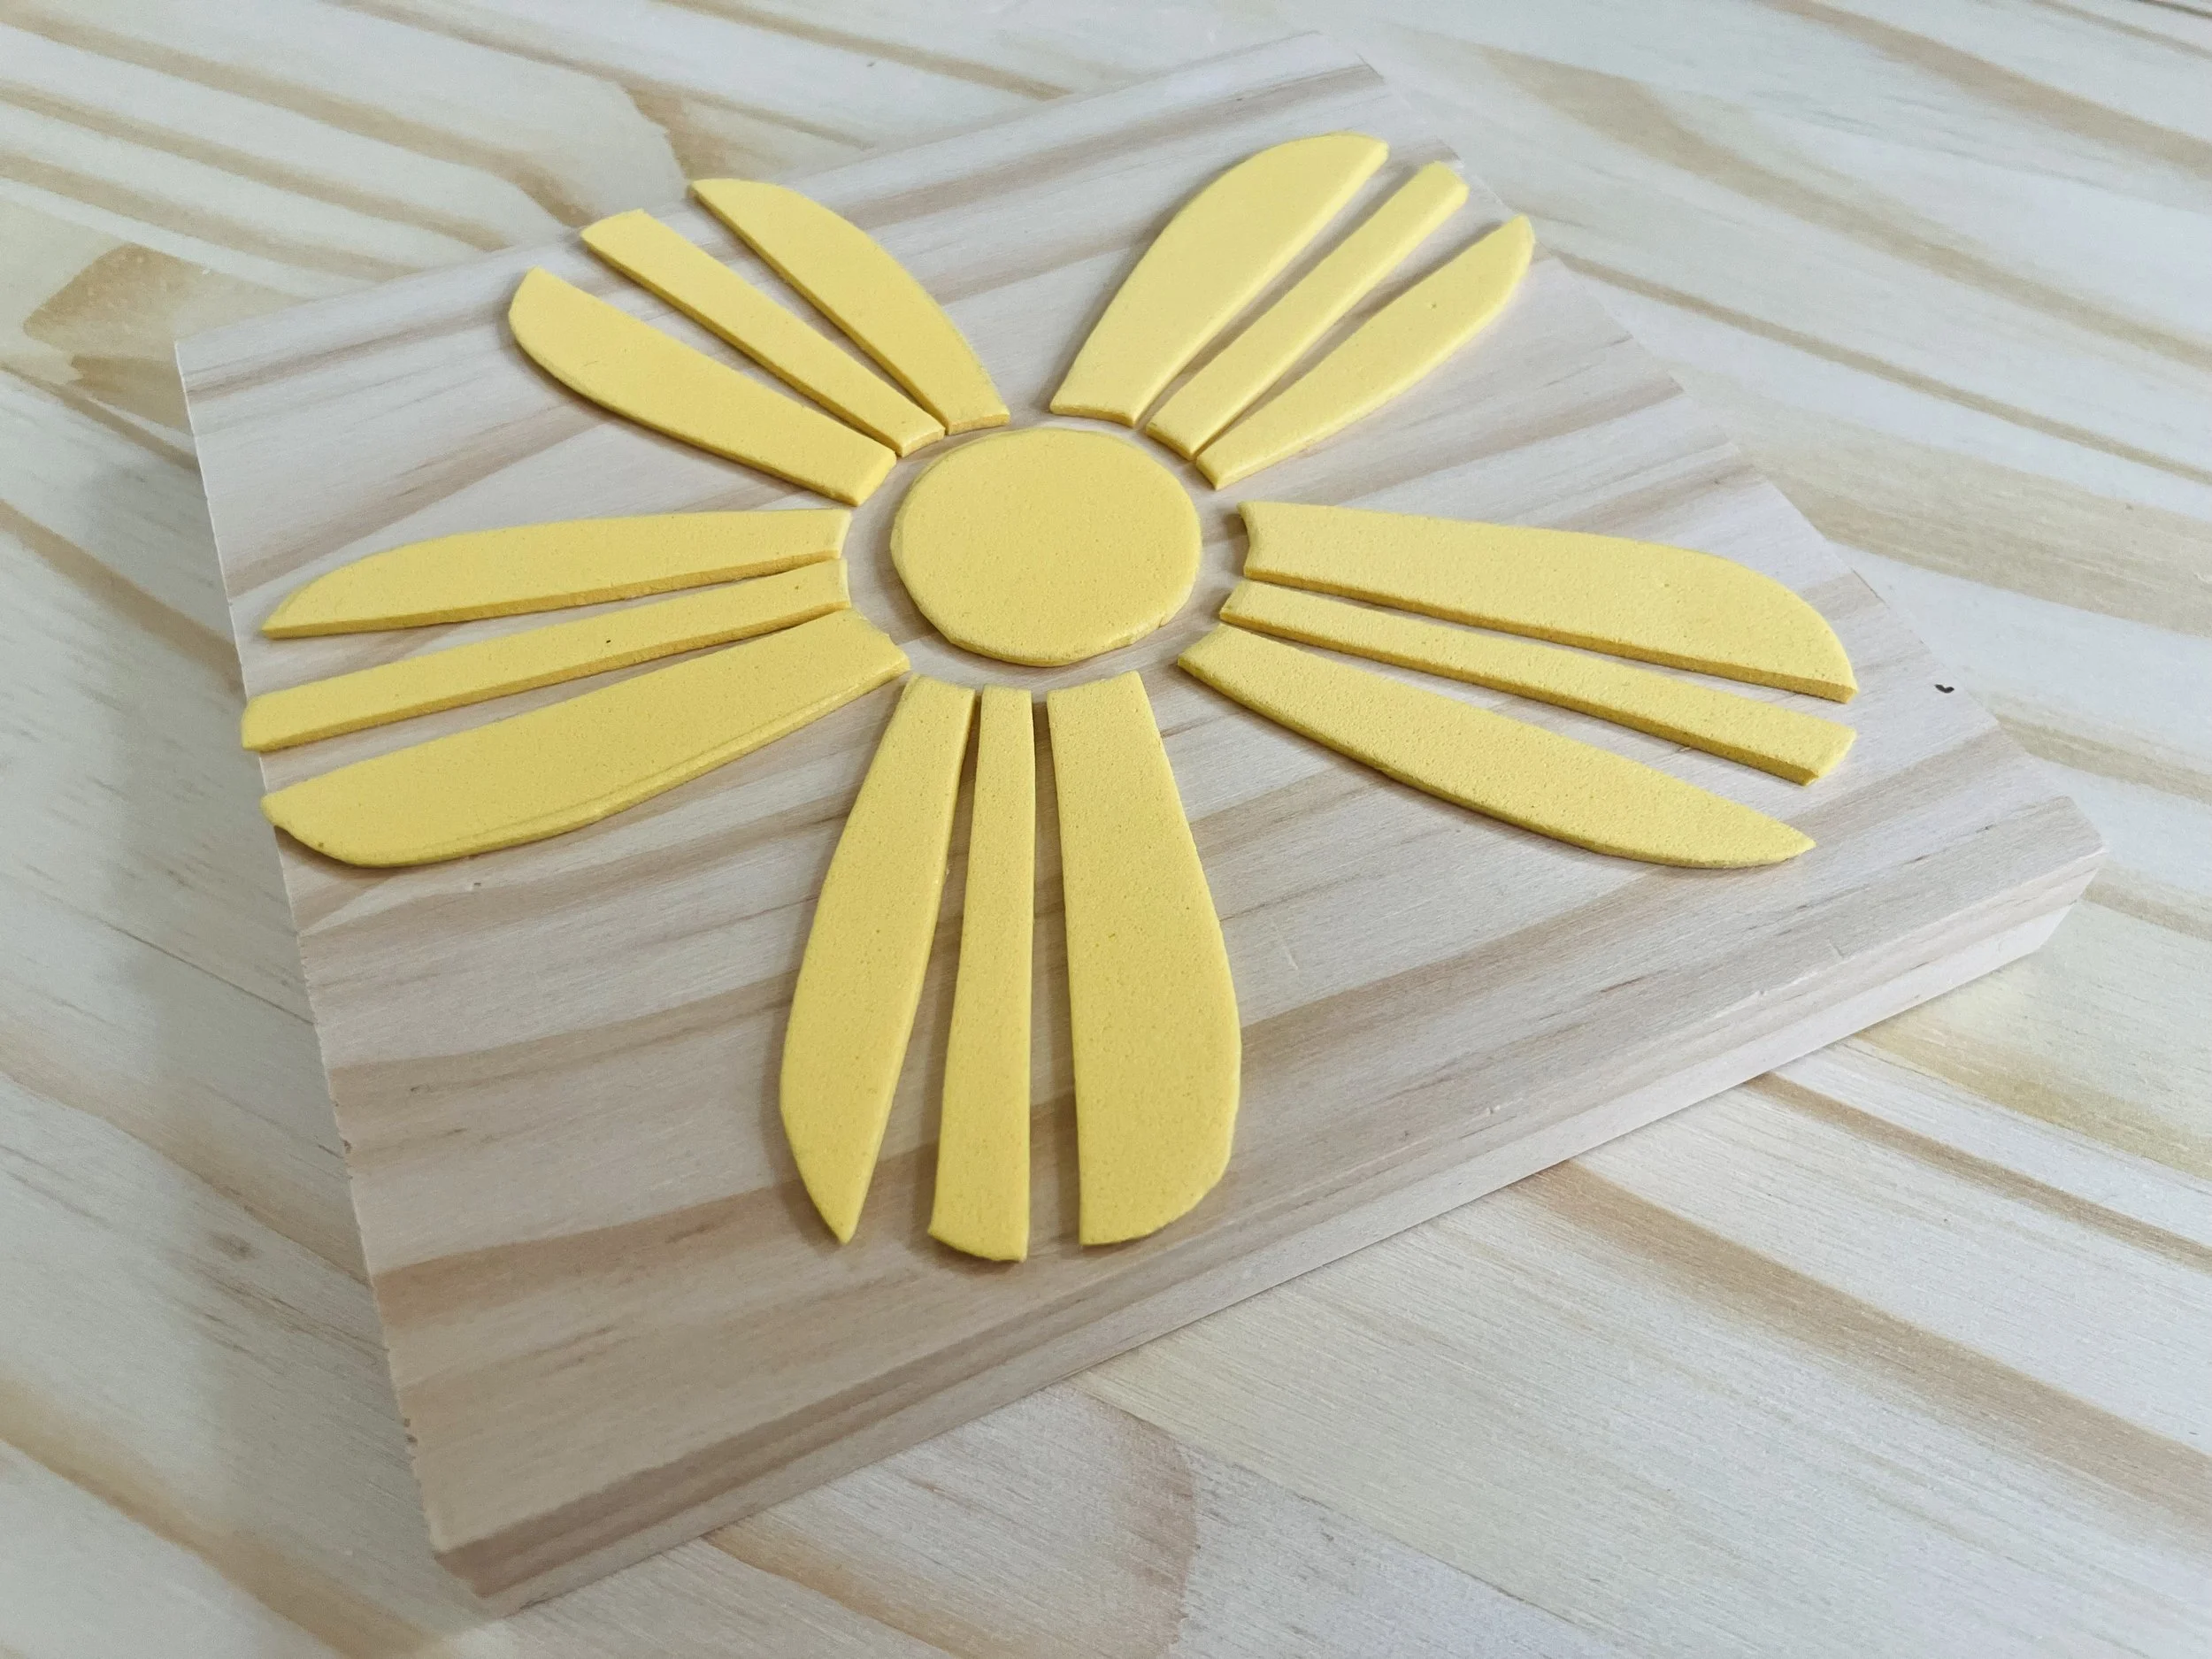
4) If using sticker backed foam, simply peel off the backing and apply to your wood, recreating your motif as you go. If using plain foam, coat the back of the foam with craft glue and apply to your wood or cardboard, recreating your motif as you go. Press the pieces down firmly and let dry completely before moving on to the next step.
5) Add a small amount of acrylic paint to your palette or plate.
6) Using your small foam sponge or dauber, pick up some paint, not too much, and apply it to the foam on your block in a dabbing motion. It is better to build up the paint than apply too much at once. The paint on your block should have a slight textured, evenly coated appearance when you hold it up at an angle.
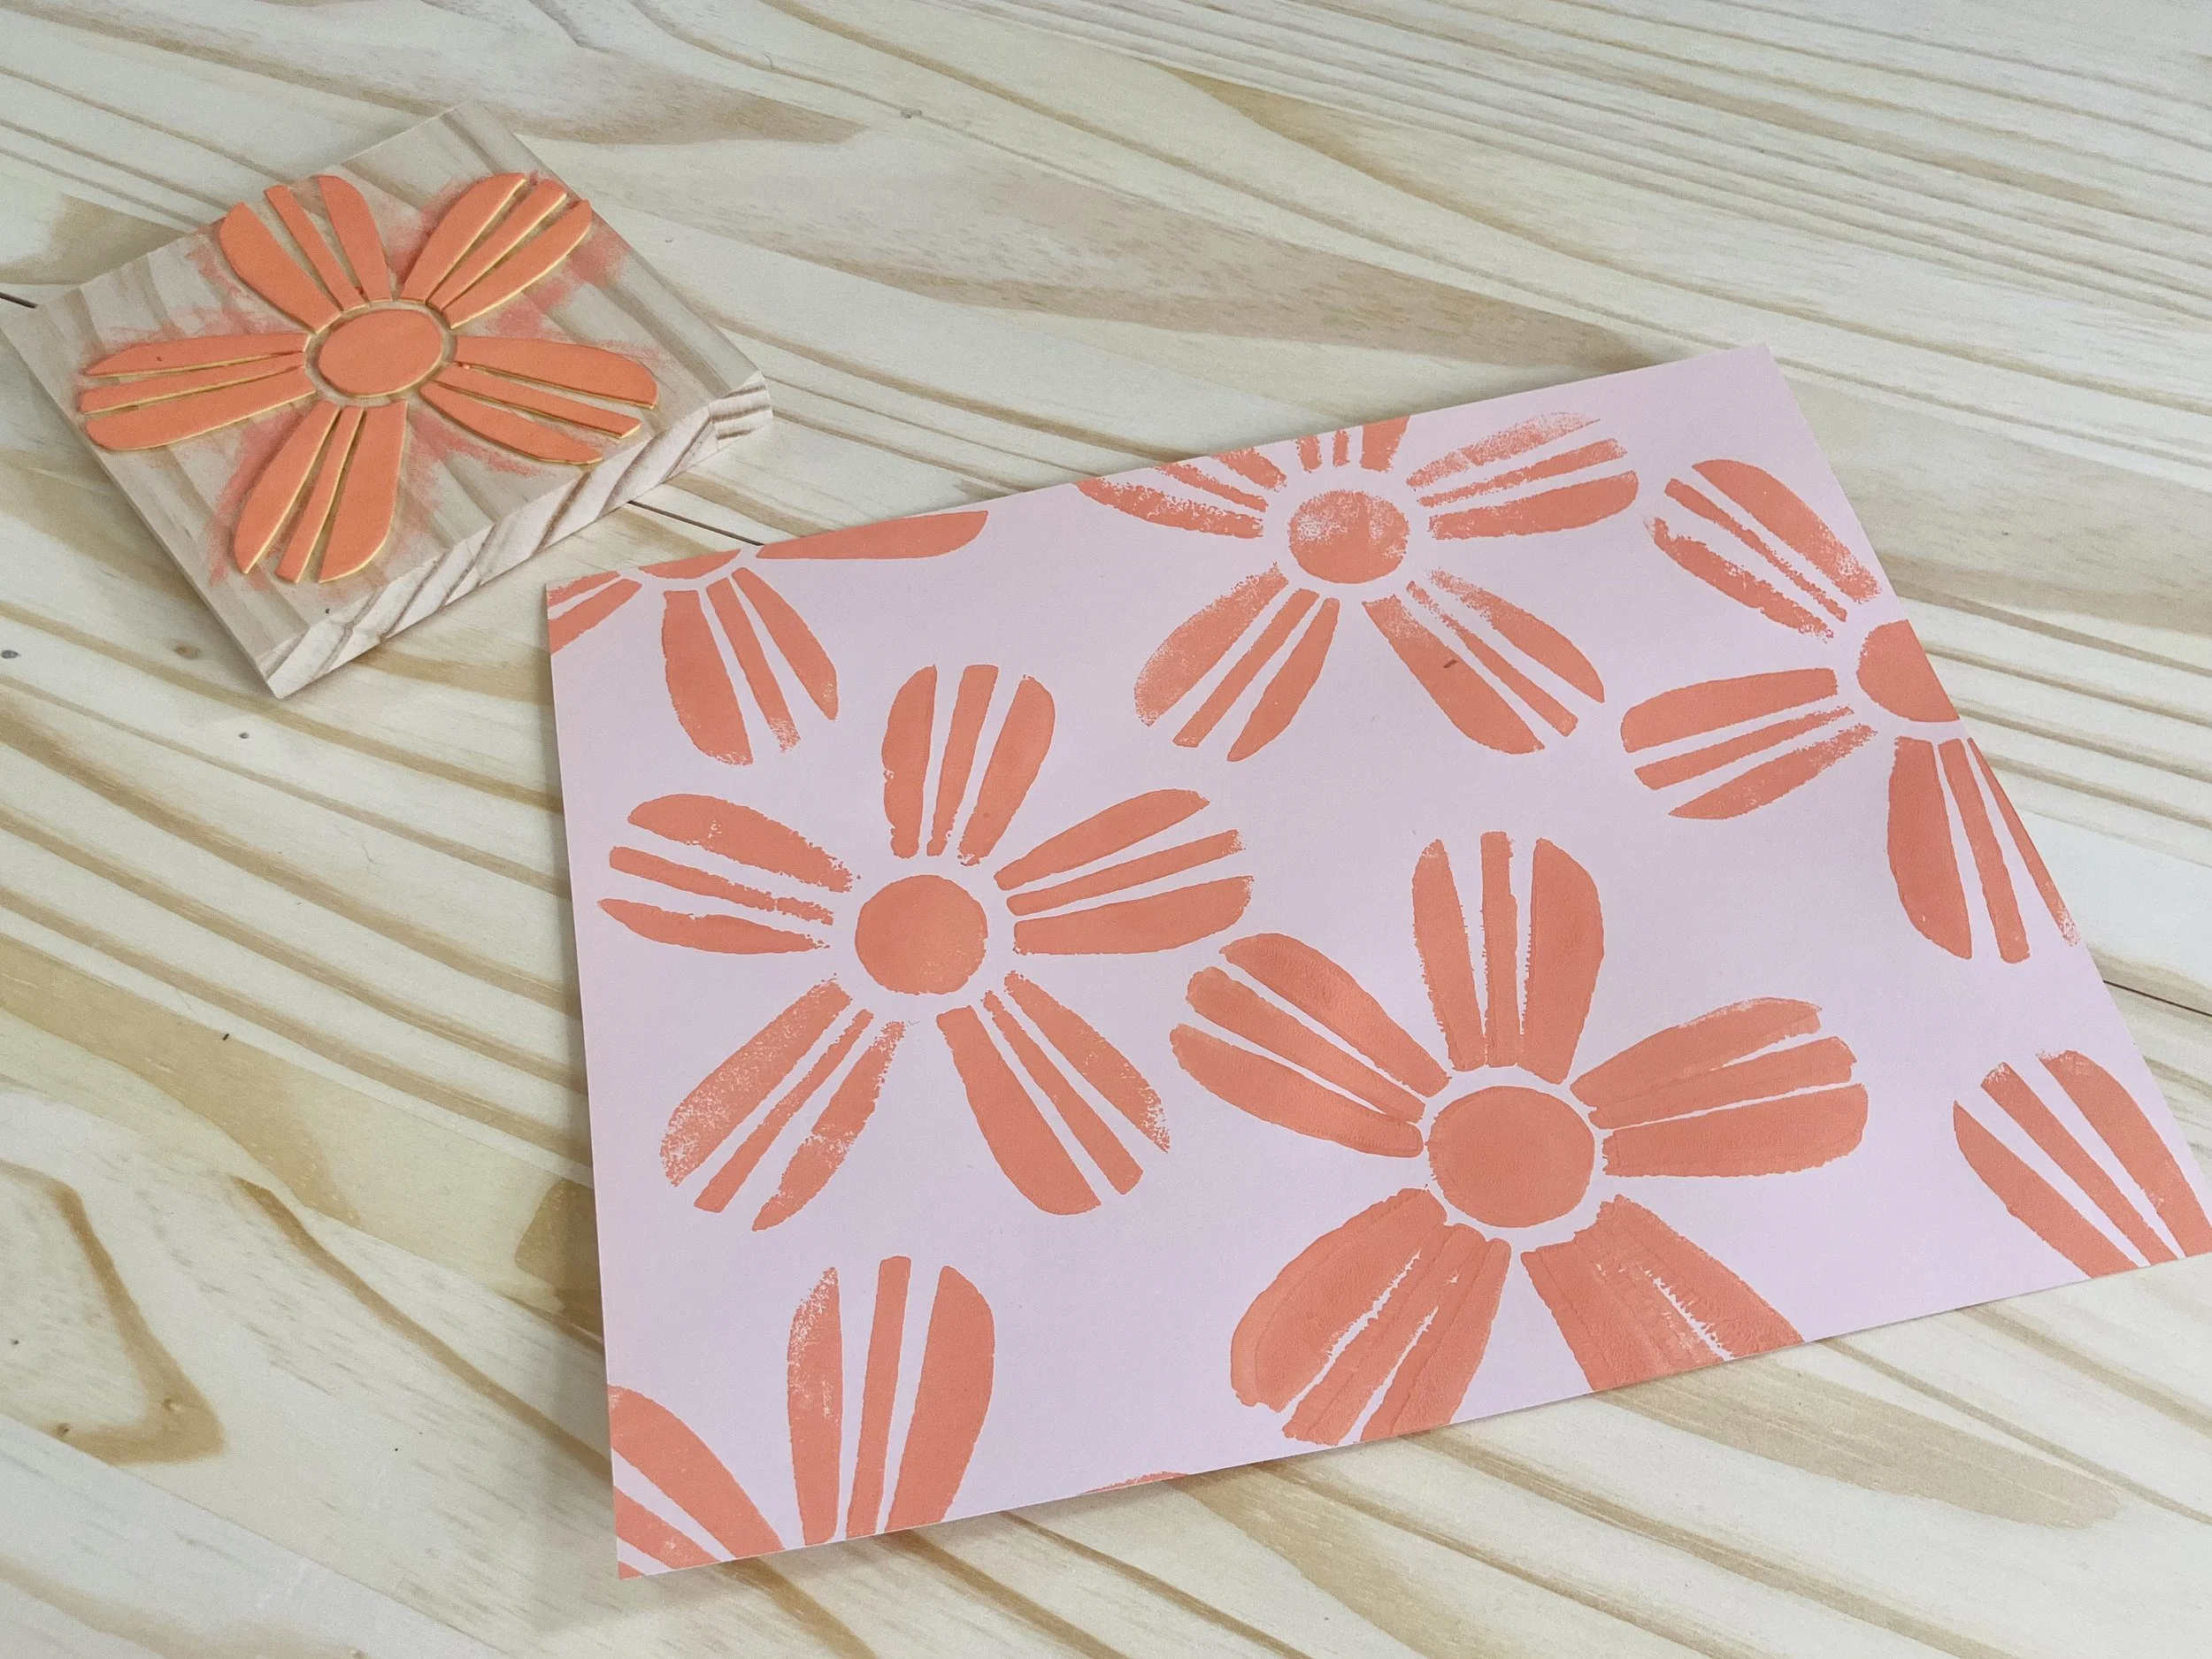
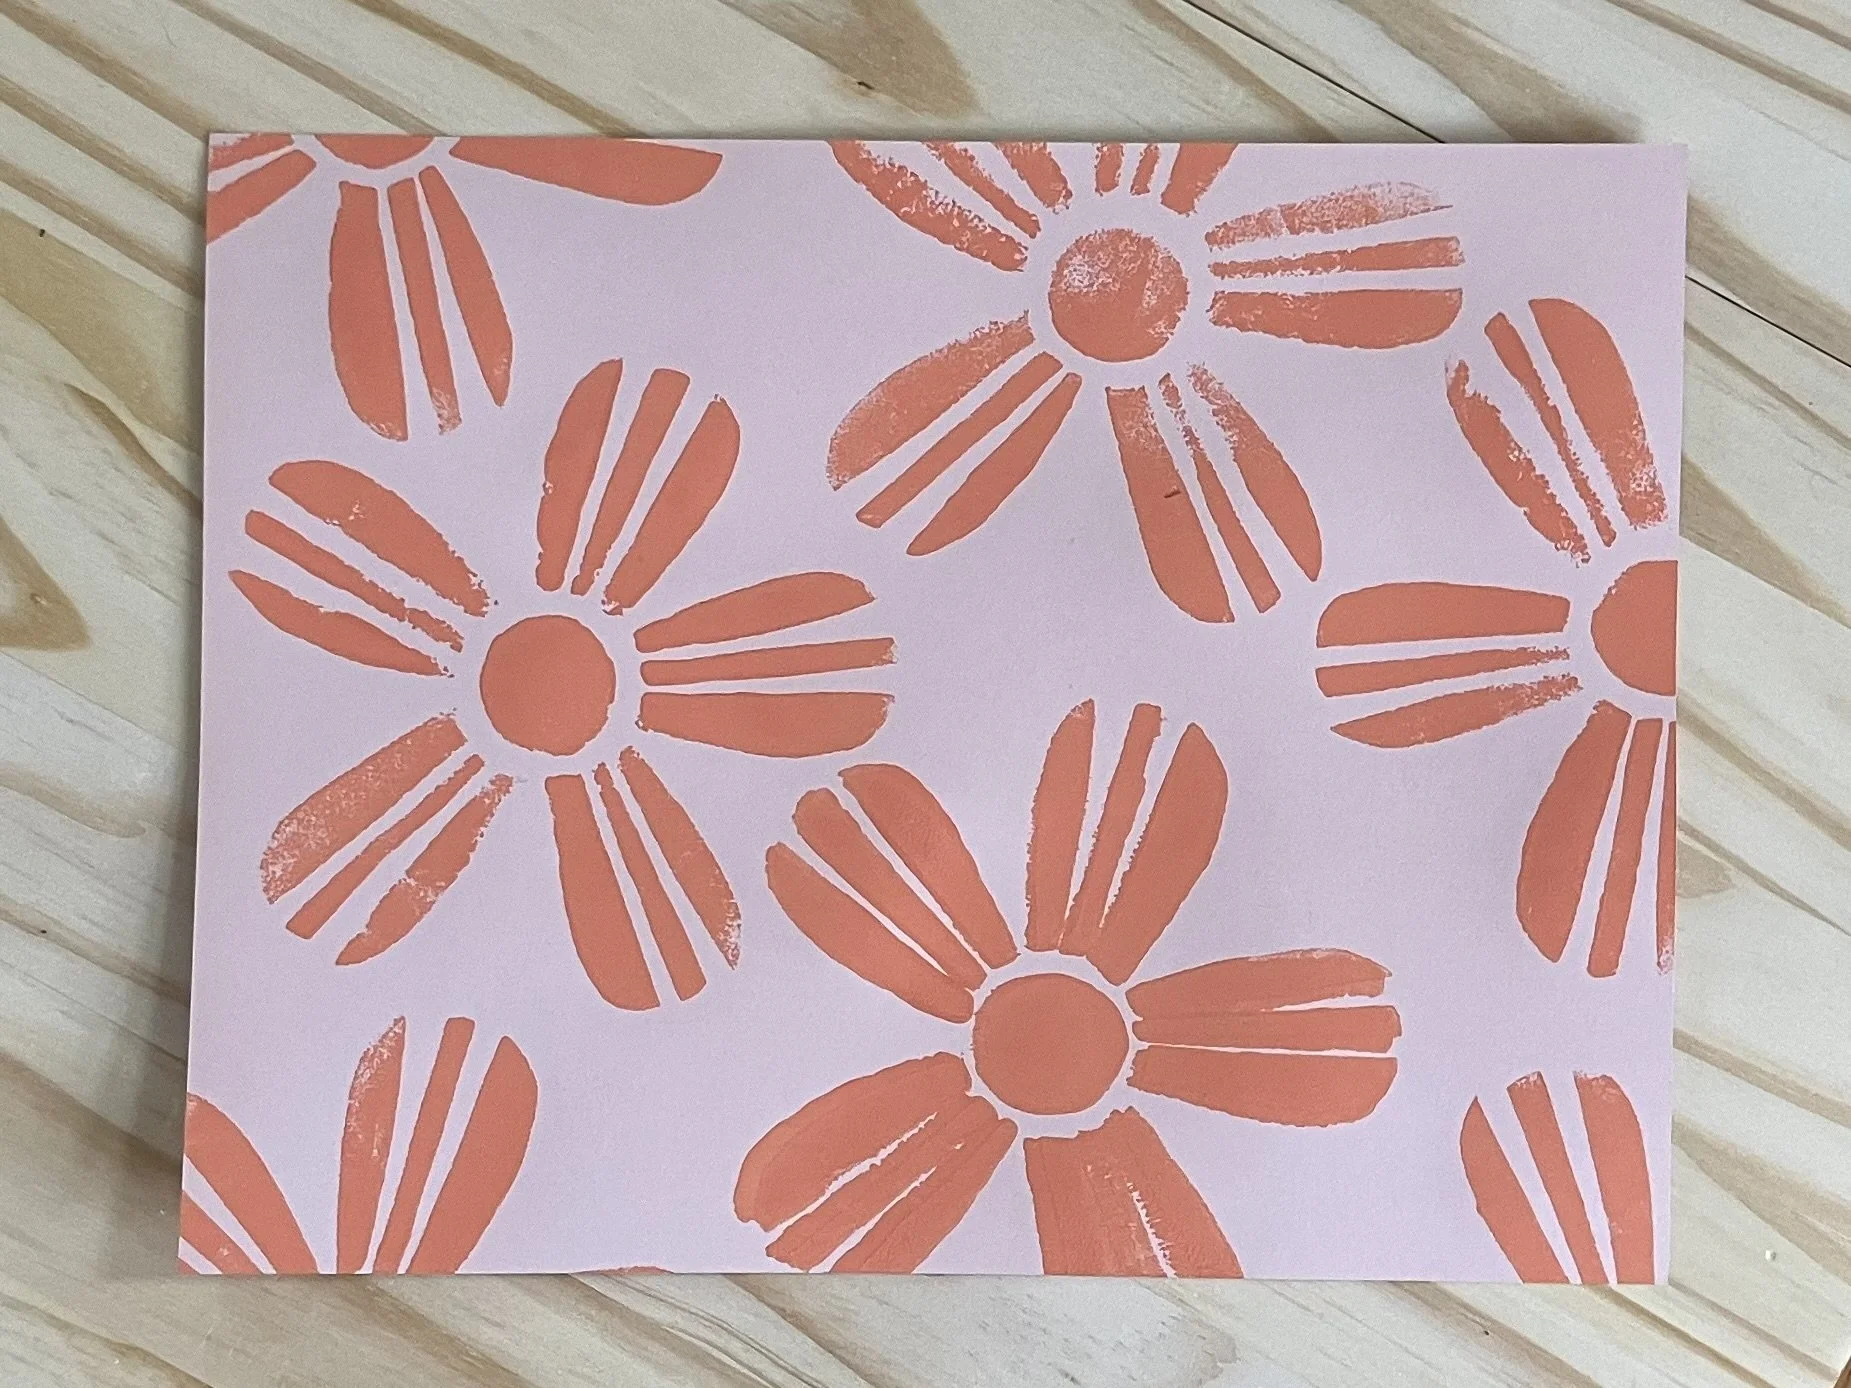
7) Flip your block onto your paper (it is recommended to print on scrap the first couple of times to adjust paint quantity and pressure if needed). Apply firm, even pressure to the back of your block to ensure clean transferal of the paint onto your paper.
8) Carefully lift up your block. You’re done! Either keep printing, or to clean your block, simple dab on scrap paper until nothing comes off and let dry. Do not wet or run under water. Once dry any paint left on the block will not come off.
Enjoy & don’t forget to share photos with us! @gather.make.inspire
-
This foam block print technique is incredibly versatile. You can create blocks of any size for many purposes. You can create your own cards and wrapping paper. You can use a fabric ink and create t-shirts, napkins or patterned fabric. Try layering prints, dabbing on multiple colors at once or create an ombre effect by blending colors on your block. Experiment and have fun!
Tip: Use both sides of your printing block to minimize materials!
We can’t wait to see what you create!