
Collage Can Pencil Holder
Upcycling items that may get thrown in the trash is such a fun way to inspire creativity. Tin cans destined for the recycle bin can be transformed into simple organizational decor with a few simple materials. This easy collaged tissue paper project is super customizable and you probably have a lot of the materials at home already. This is also incredibly low risk so if you’re feeling timid about your artistic abilities, not to worry! You can keep layering on until you’re happy. Once you’re done you will be so excited to sit your container on your desk, shelf or kitchen counter and fill it with your loveliest pens and pencils or a rainbow assortment of markers.
Don’t forget to share your work by tagging us in your photos — @gather.make.inspire

-
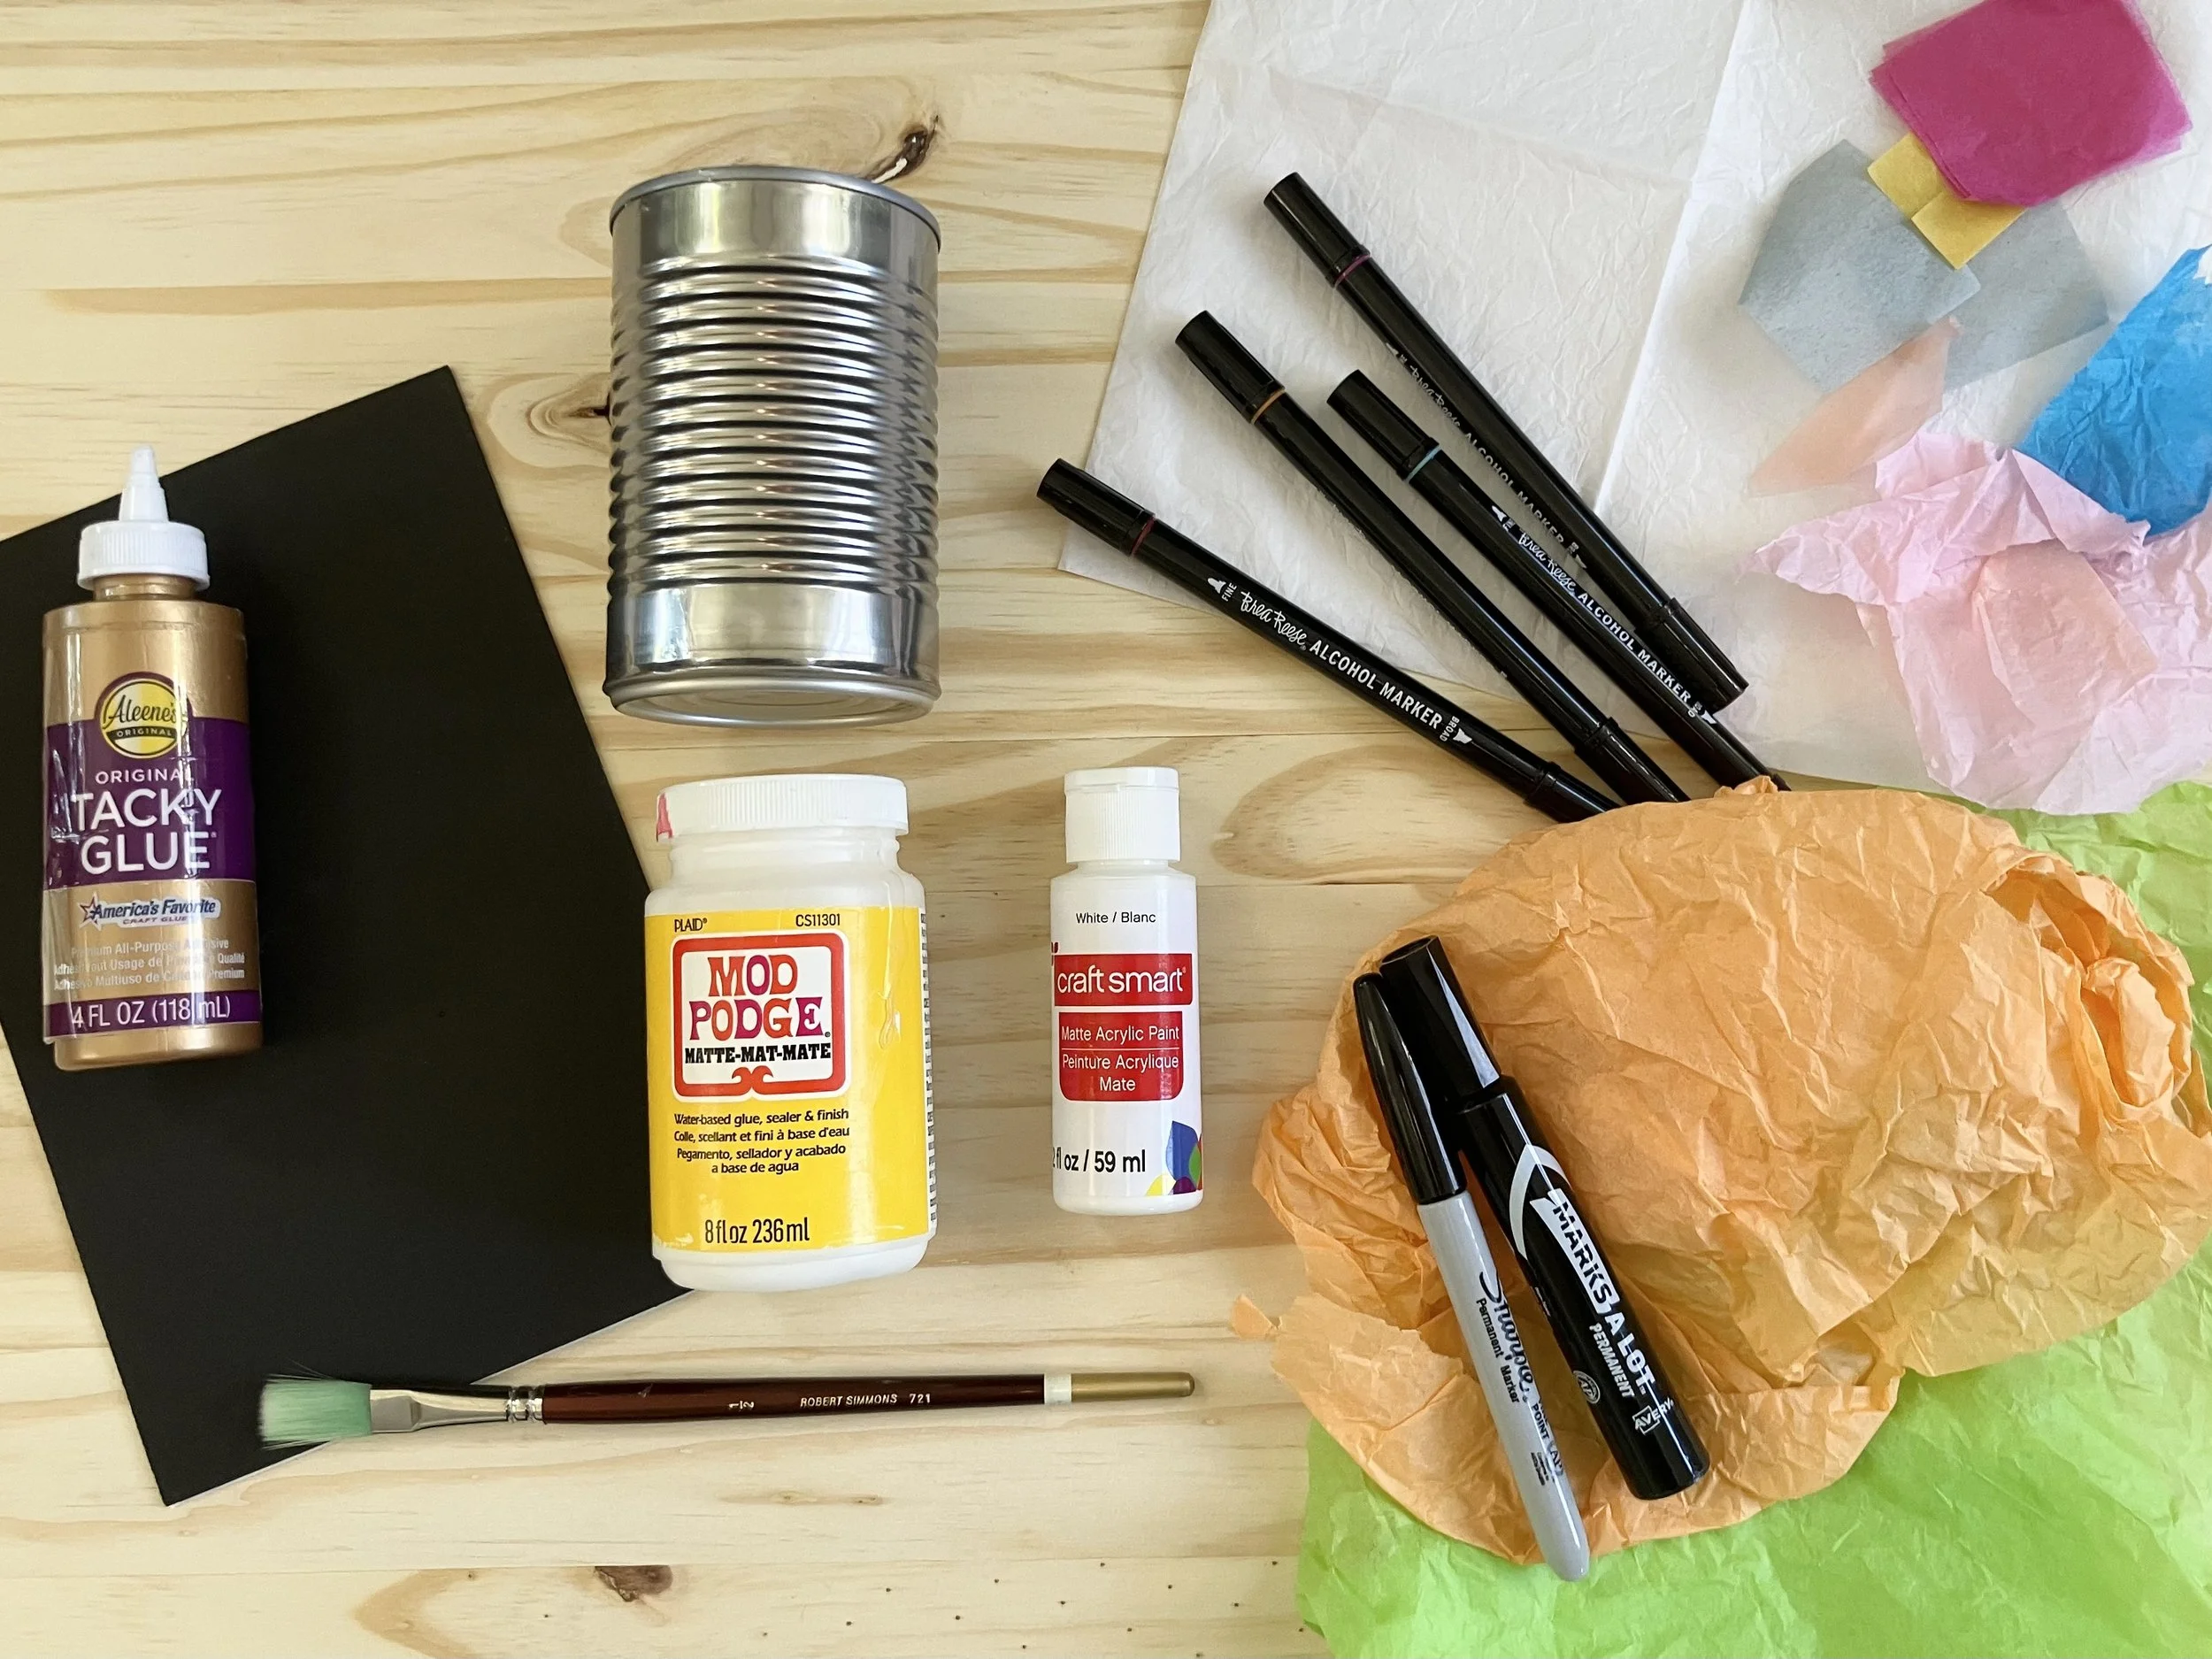
Aluminum (Tin) Can
White Acrylic Paint
Flat Paint Brush 1/2’- 1” wide
Tissue Paper- White & Colored
Assorted Colored Alcohol (Permanent) Markers- Like Sharpie (these markers will not run when glue is brushed over them)
Mod Podge Glue
Optional:
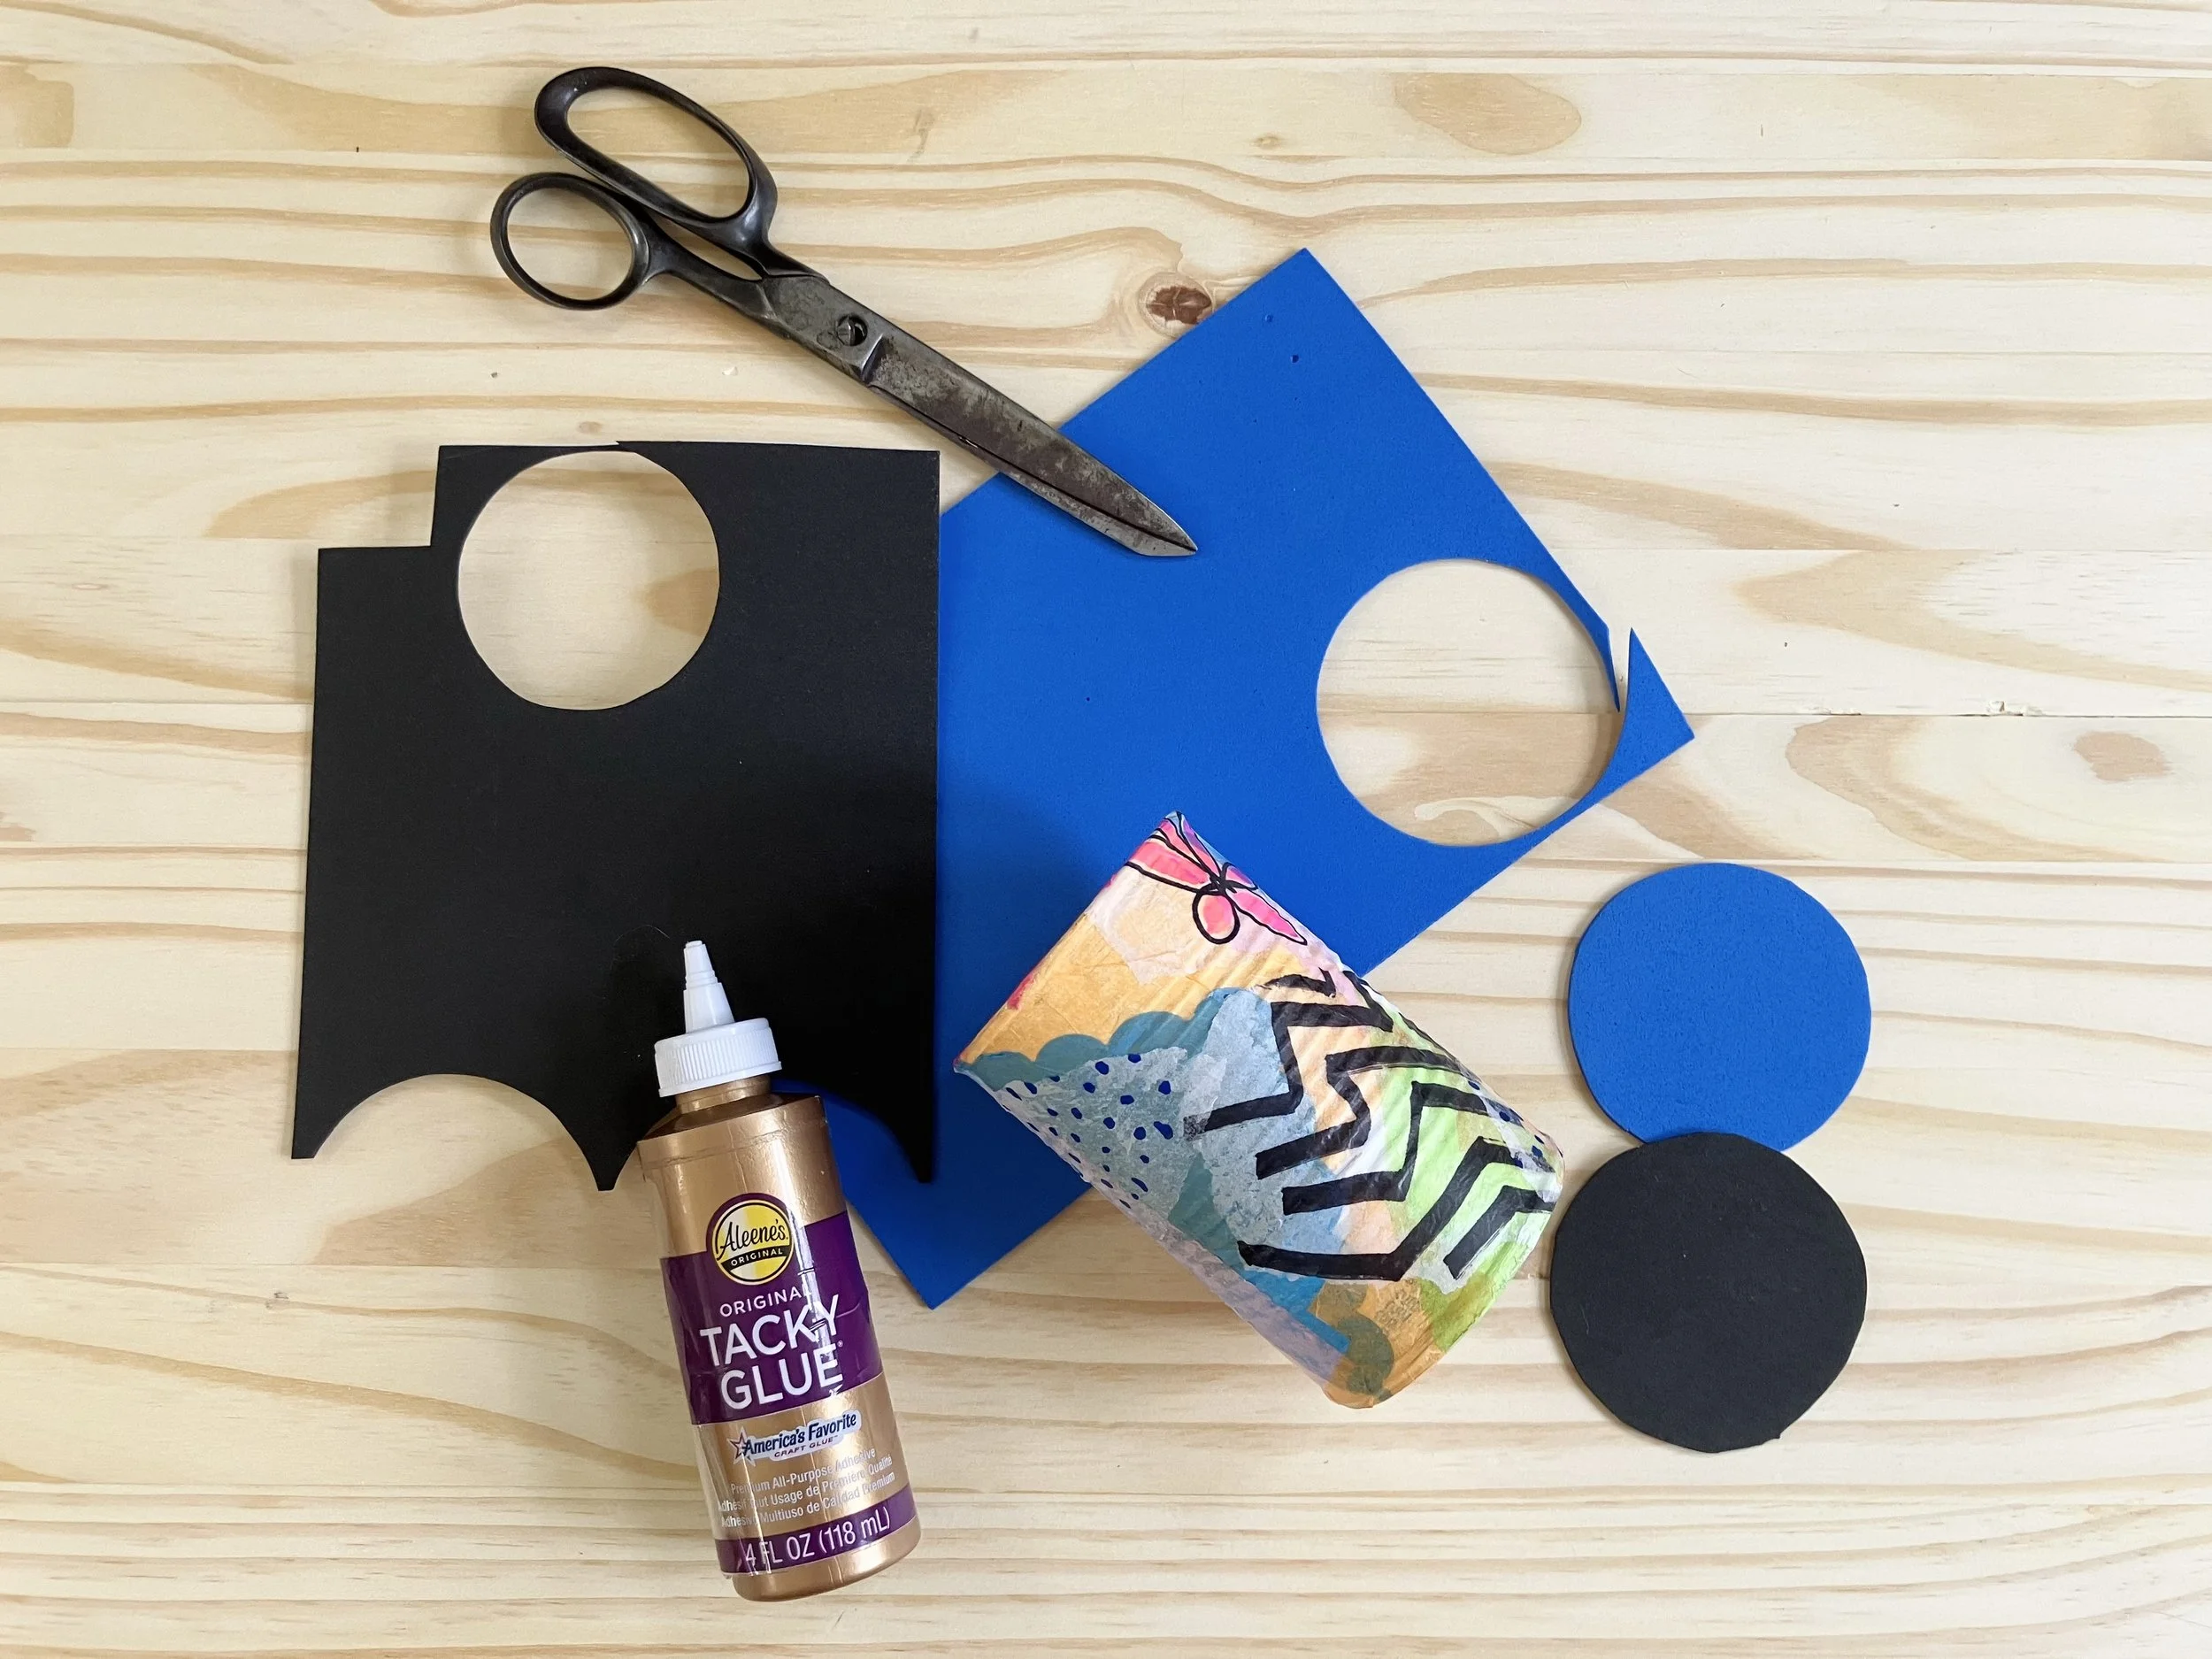
Sheets of Foam
Scissors
Craft Glue- Like Aleene’s Tacky Glue
-
Clean Your Can
Clean your can well and make sure there are no sharp exposed edges from where the lid was removed. If there are, you can use pliers or the handle from your scissors to bend them down.
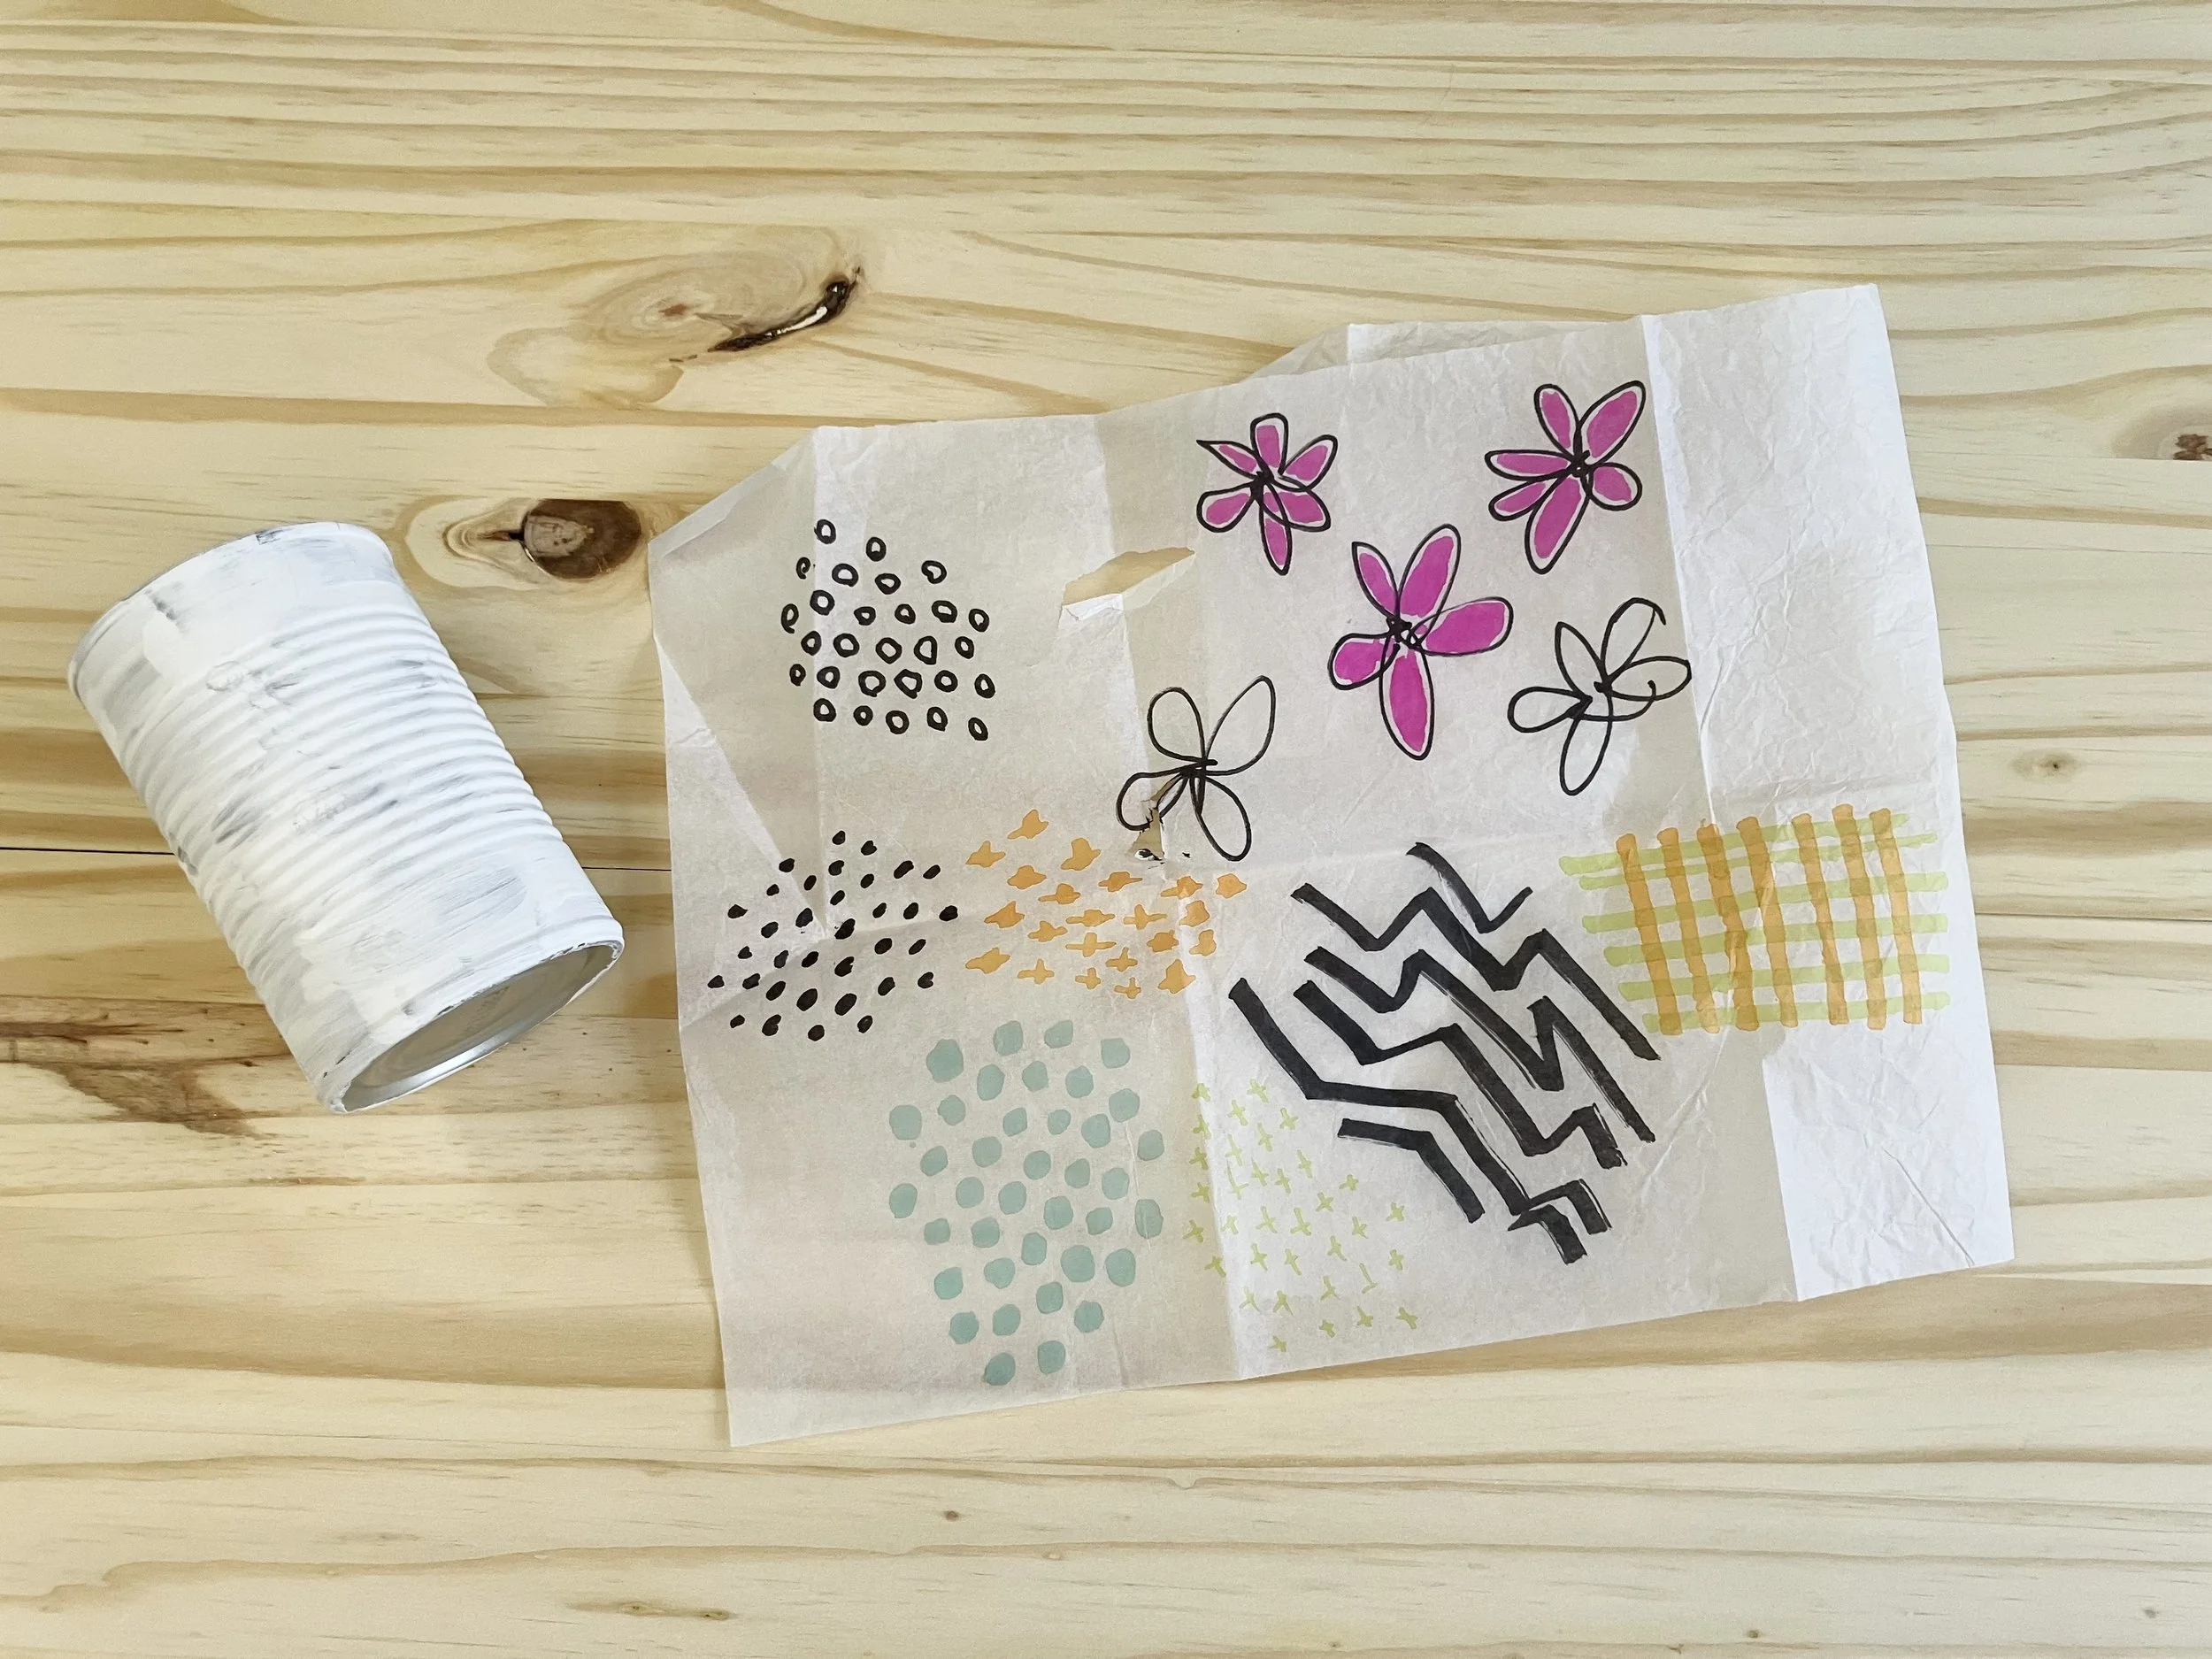
Paint the Can
Using a dry brush, paint the outside of the can white using acrylic paint. Don’t worry about it being even, you just want a nice clean base so that your tissue paper colors really show up. If you would like, you could also paint the interior.
Let it Dry
Let the paint completely dry before moving on to the next steps.
-
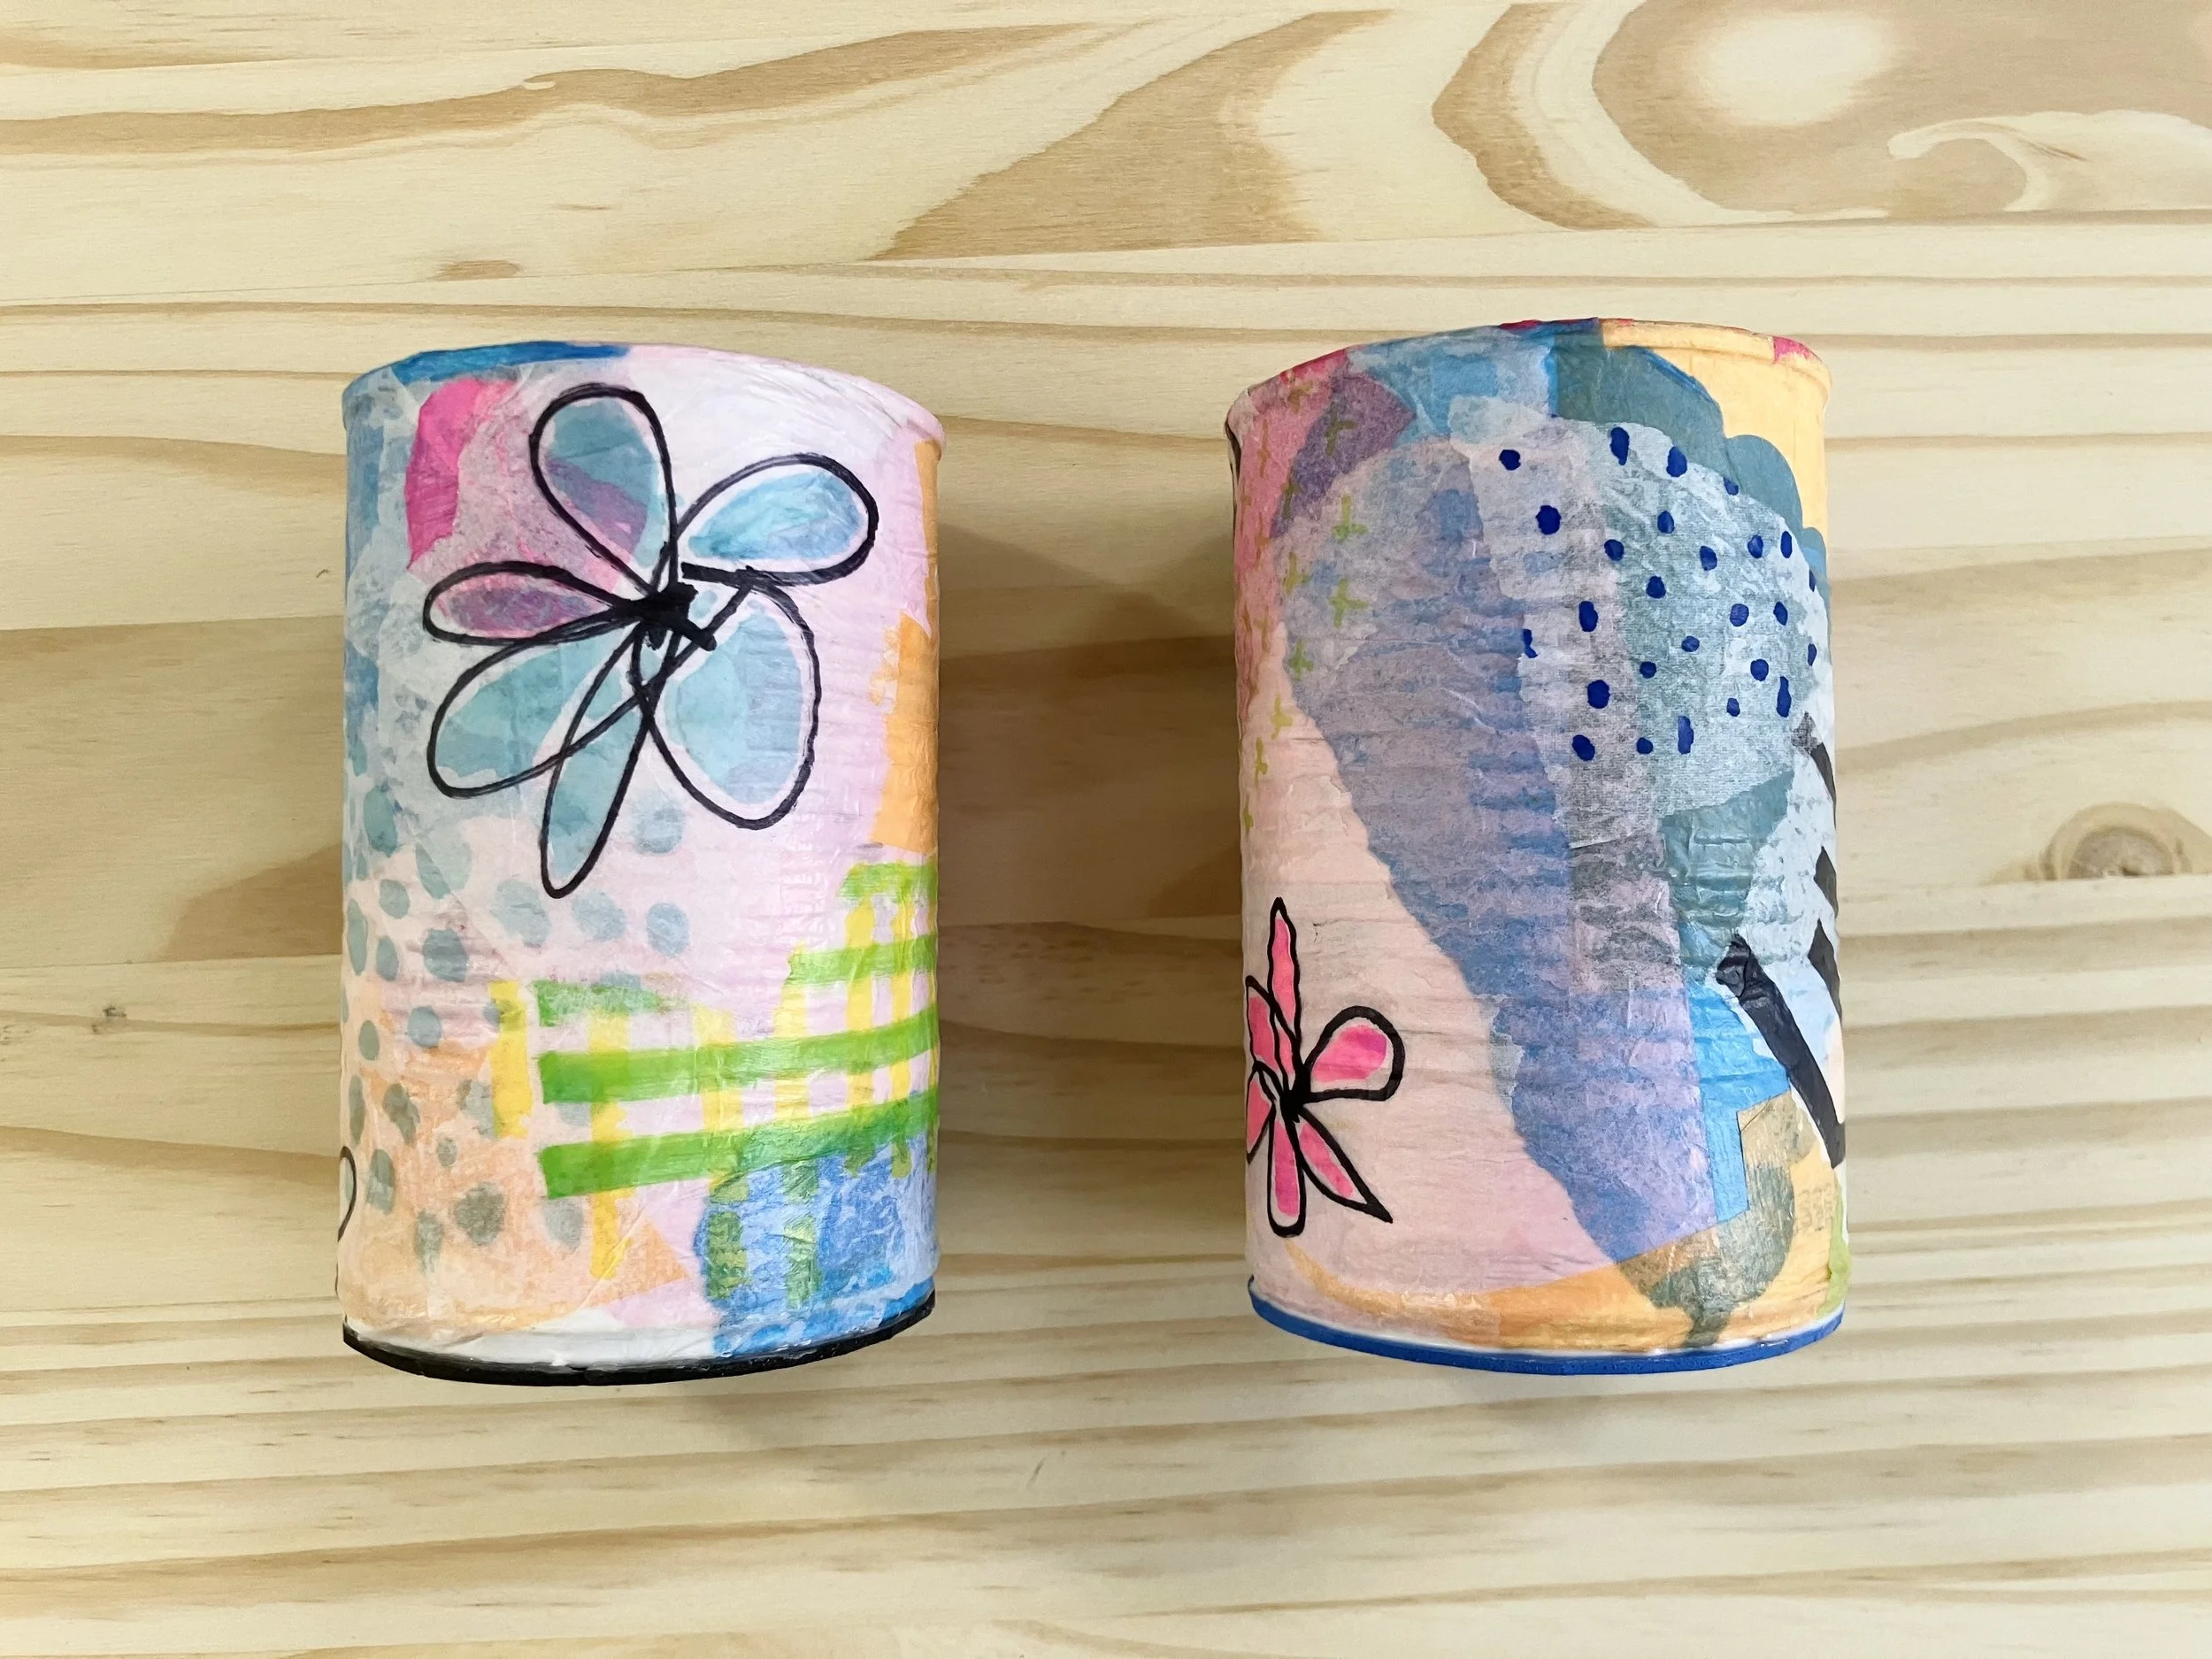
1) Place your white tissue paper on top of some scrap paper to protect your surface. The markers will bleed through the tissue paper. Using your markers, create different patterns and motifs, any kind of doodles or shapes you would like. These will be layered on top of your colored paper so consider the way the colors will interact. You can see how they may look by laying your colored tissue paper underneath, but know that the glue will create more transparency.
2) Cut or tear out your designs that you drew. Tearing will create a more transitional appearance, where straight cuts are nice against the lip or base.
3) Tear or cut out some large pieces of colored tissue paper to uses as your base colors underneath your drawings.
4) Have your tissue paper pieces close by. Using a paintbrush, begin brushing a thin layer of Mod Podge onto the outside of your can. I like to have my non dominant hand inside the can as I do this.
5) Start layering on your colored tissue paper, brushing it down and adding more Modge Podge on top as you go.
6) Once you have your base layer down, begin layering on your drawings using the same technique as in the previous step. You can layer your drawings on top of each other, layer more solid colors on top of your drawings. You can create additional drawings if you feel the need. There really are no rules here, you are just looking for a composition that is pleasing to you!
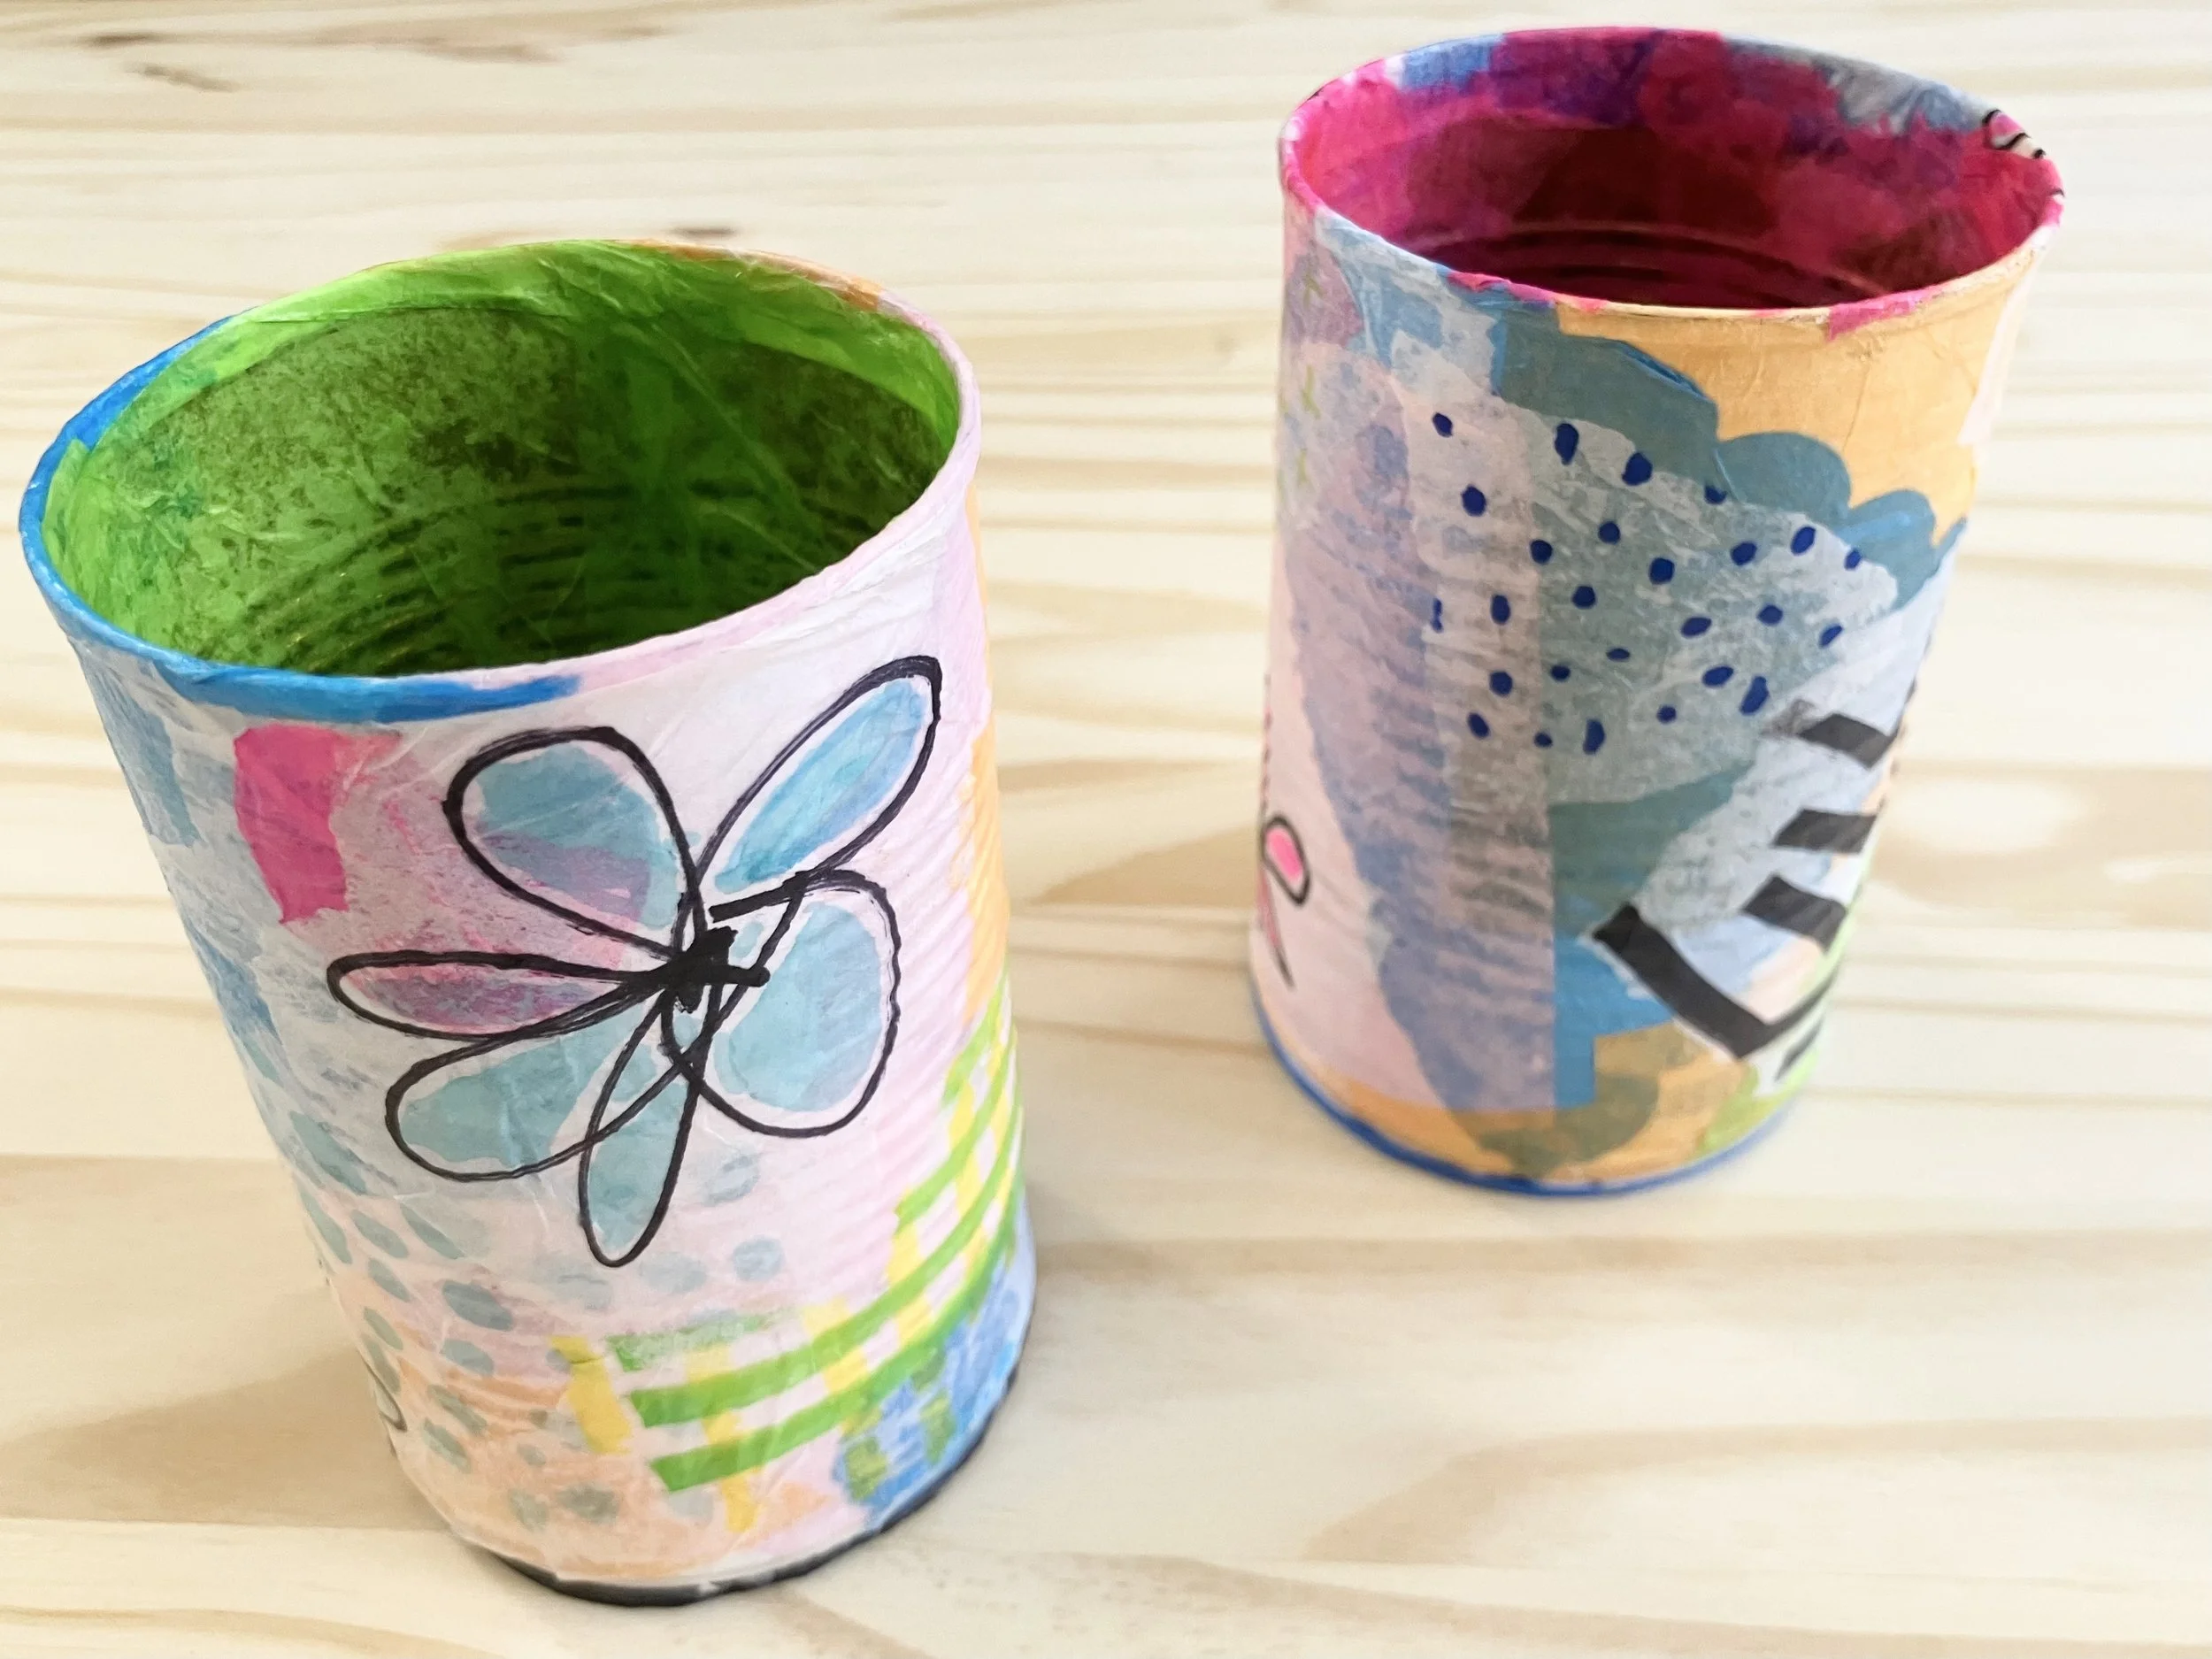
7) When you feel your outer collage is done, let it dry completely.
8) Once dry, you can add collaged tissue paper to the interior and let dry.
9) At this point, you are done, but if you would like, you can add a bit of foam to the inside bottom and outside bottom to have a soft interior and ensure your can doesn’t scratch any surfaces. To do this, simply trace the top and bottom of your can onto your foam and cut it out. Check to see if they fit, you may need to trim them back a tiny bit.
10) Using your craft glue, add some glue to the interior of the can first, not the foam. Push your foam in and give it a rub to make sure it make full contact with the glue. Flip over your can and add glue to the places where the foam will make contact with the base (tin cans can be a little bumpy on the bottom.) Add your foam and press.
11) Let dry and you are done!
Enjoy & don’t forget to share photos with us! @gather.make.inspire
-
This collage technique can be used on so many different surfaces like paper, wood or plexiglass. You can create other useful items like cards, wooden coasters,or just a beautiful work of art to hang on the wall.
We can’t wait to see what you create!