
Rolled Paper Collage
Inspired by the captivating work of Connecticut-based artist Amy Genser, known for her mesmerizing rolled paper collages and sculptural pieces, this project invites artists ages 2 to 100 to explore colour, texture, and form through dynamic, organic, three-dimensional creations. We’ve done this project with children as young as two and have been amazed by both the process and the results. We hope that it inspires you to explore Amy’s work as well as this medium.
Don’t forget to share your work by tagging us in your photos — @gather.make.inspire
-
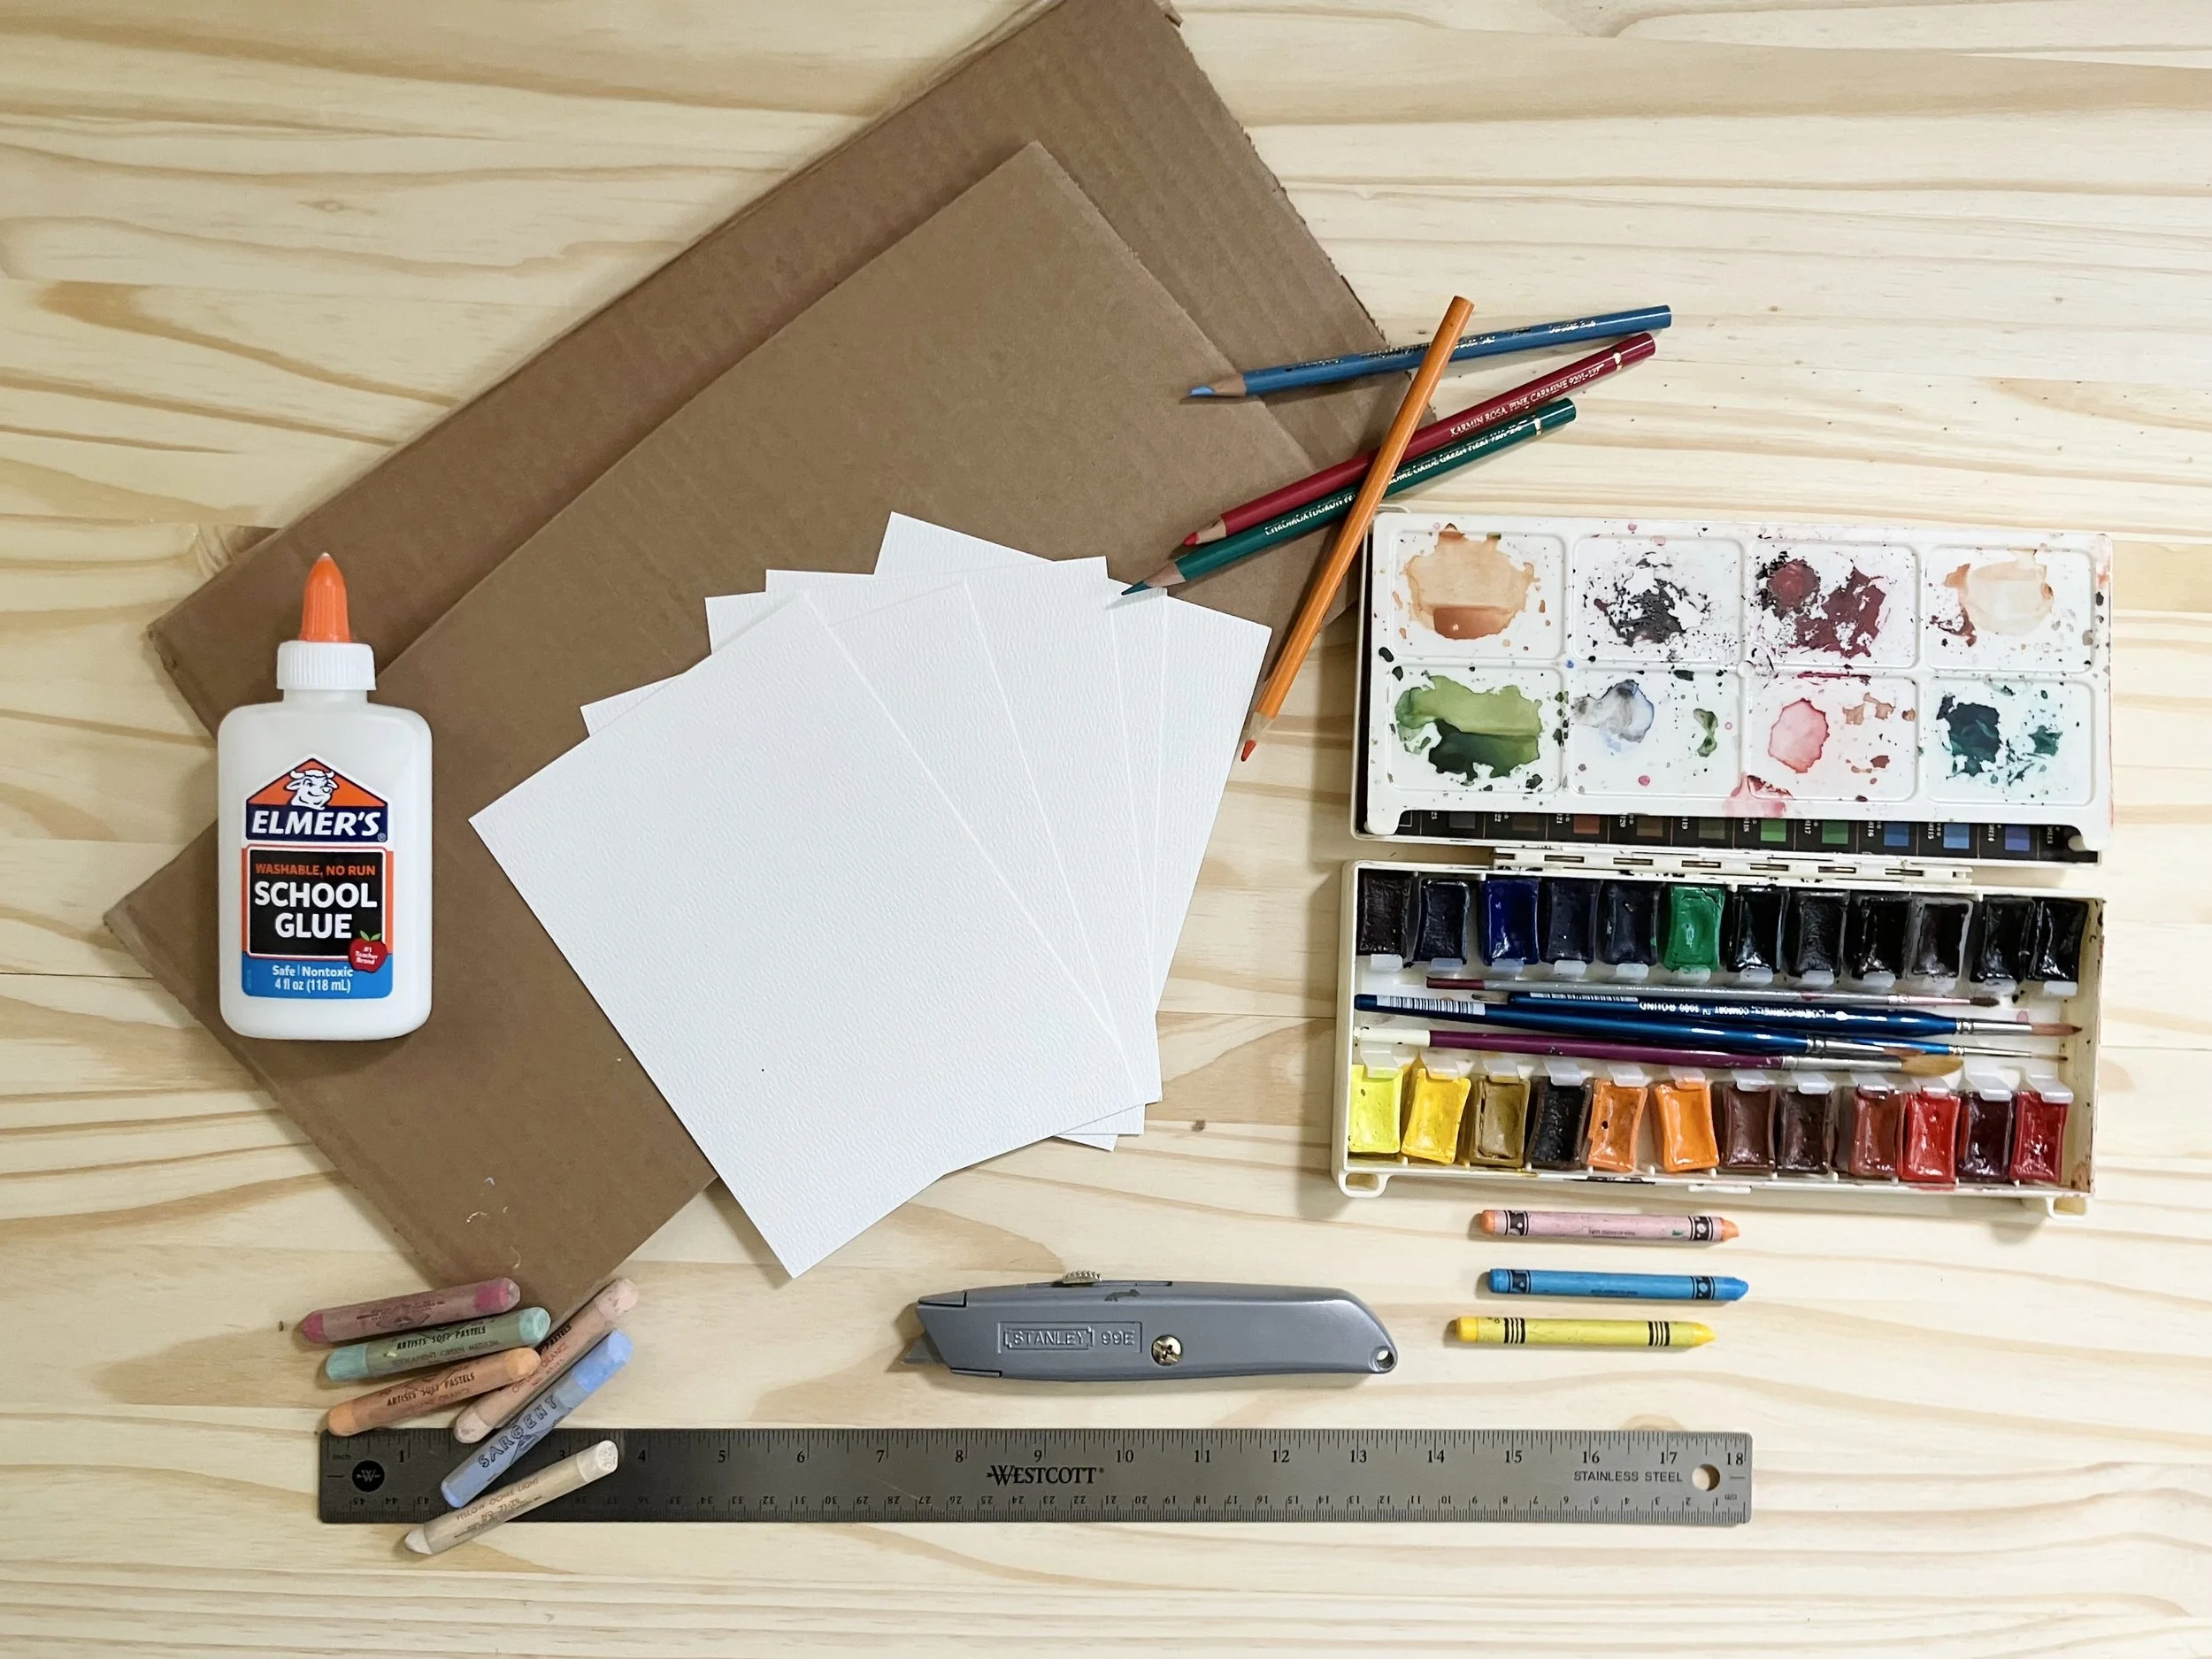
Cardboard
140 gsm watercolour paper
White glue
Watercolours
Paint brush or paint brush pen
Glass with water
String (for hanging)
Tape (for attaching string to backside of piece)
Optional:
Glue gun (if prepping cardboard backing/frame beforehand)
Double-sided tape roller (a personal fave - can be used instead of glue gun. Children break these every time, so as tempting as it is, keep for your use only!)
Paper cutter (helpful if cutting strips for group of children)
-
For artists under 6, we recommend that a capable adult or supervisor assist with the project preparation. Cardboard can be tricky for little hands to cut!
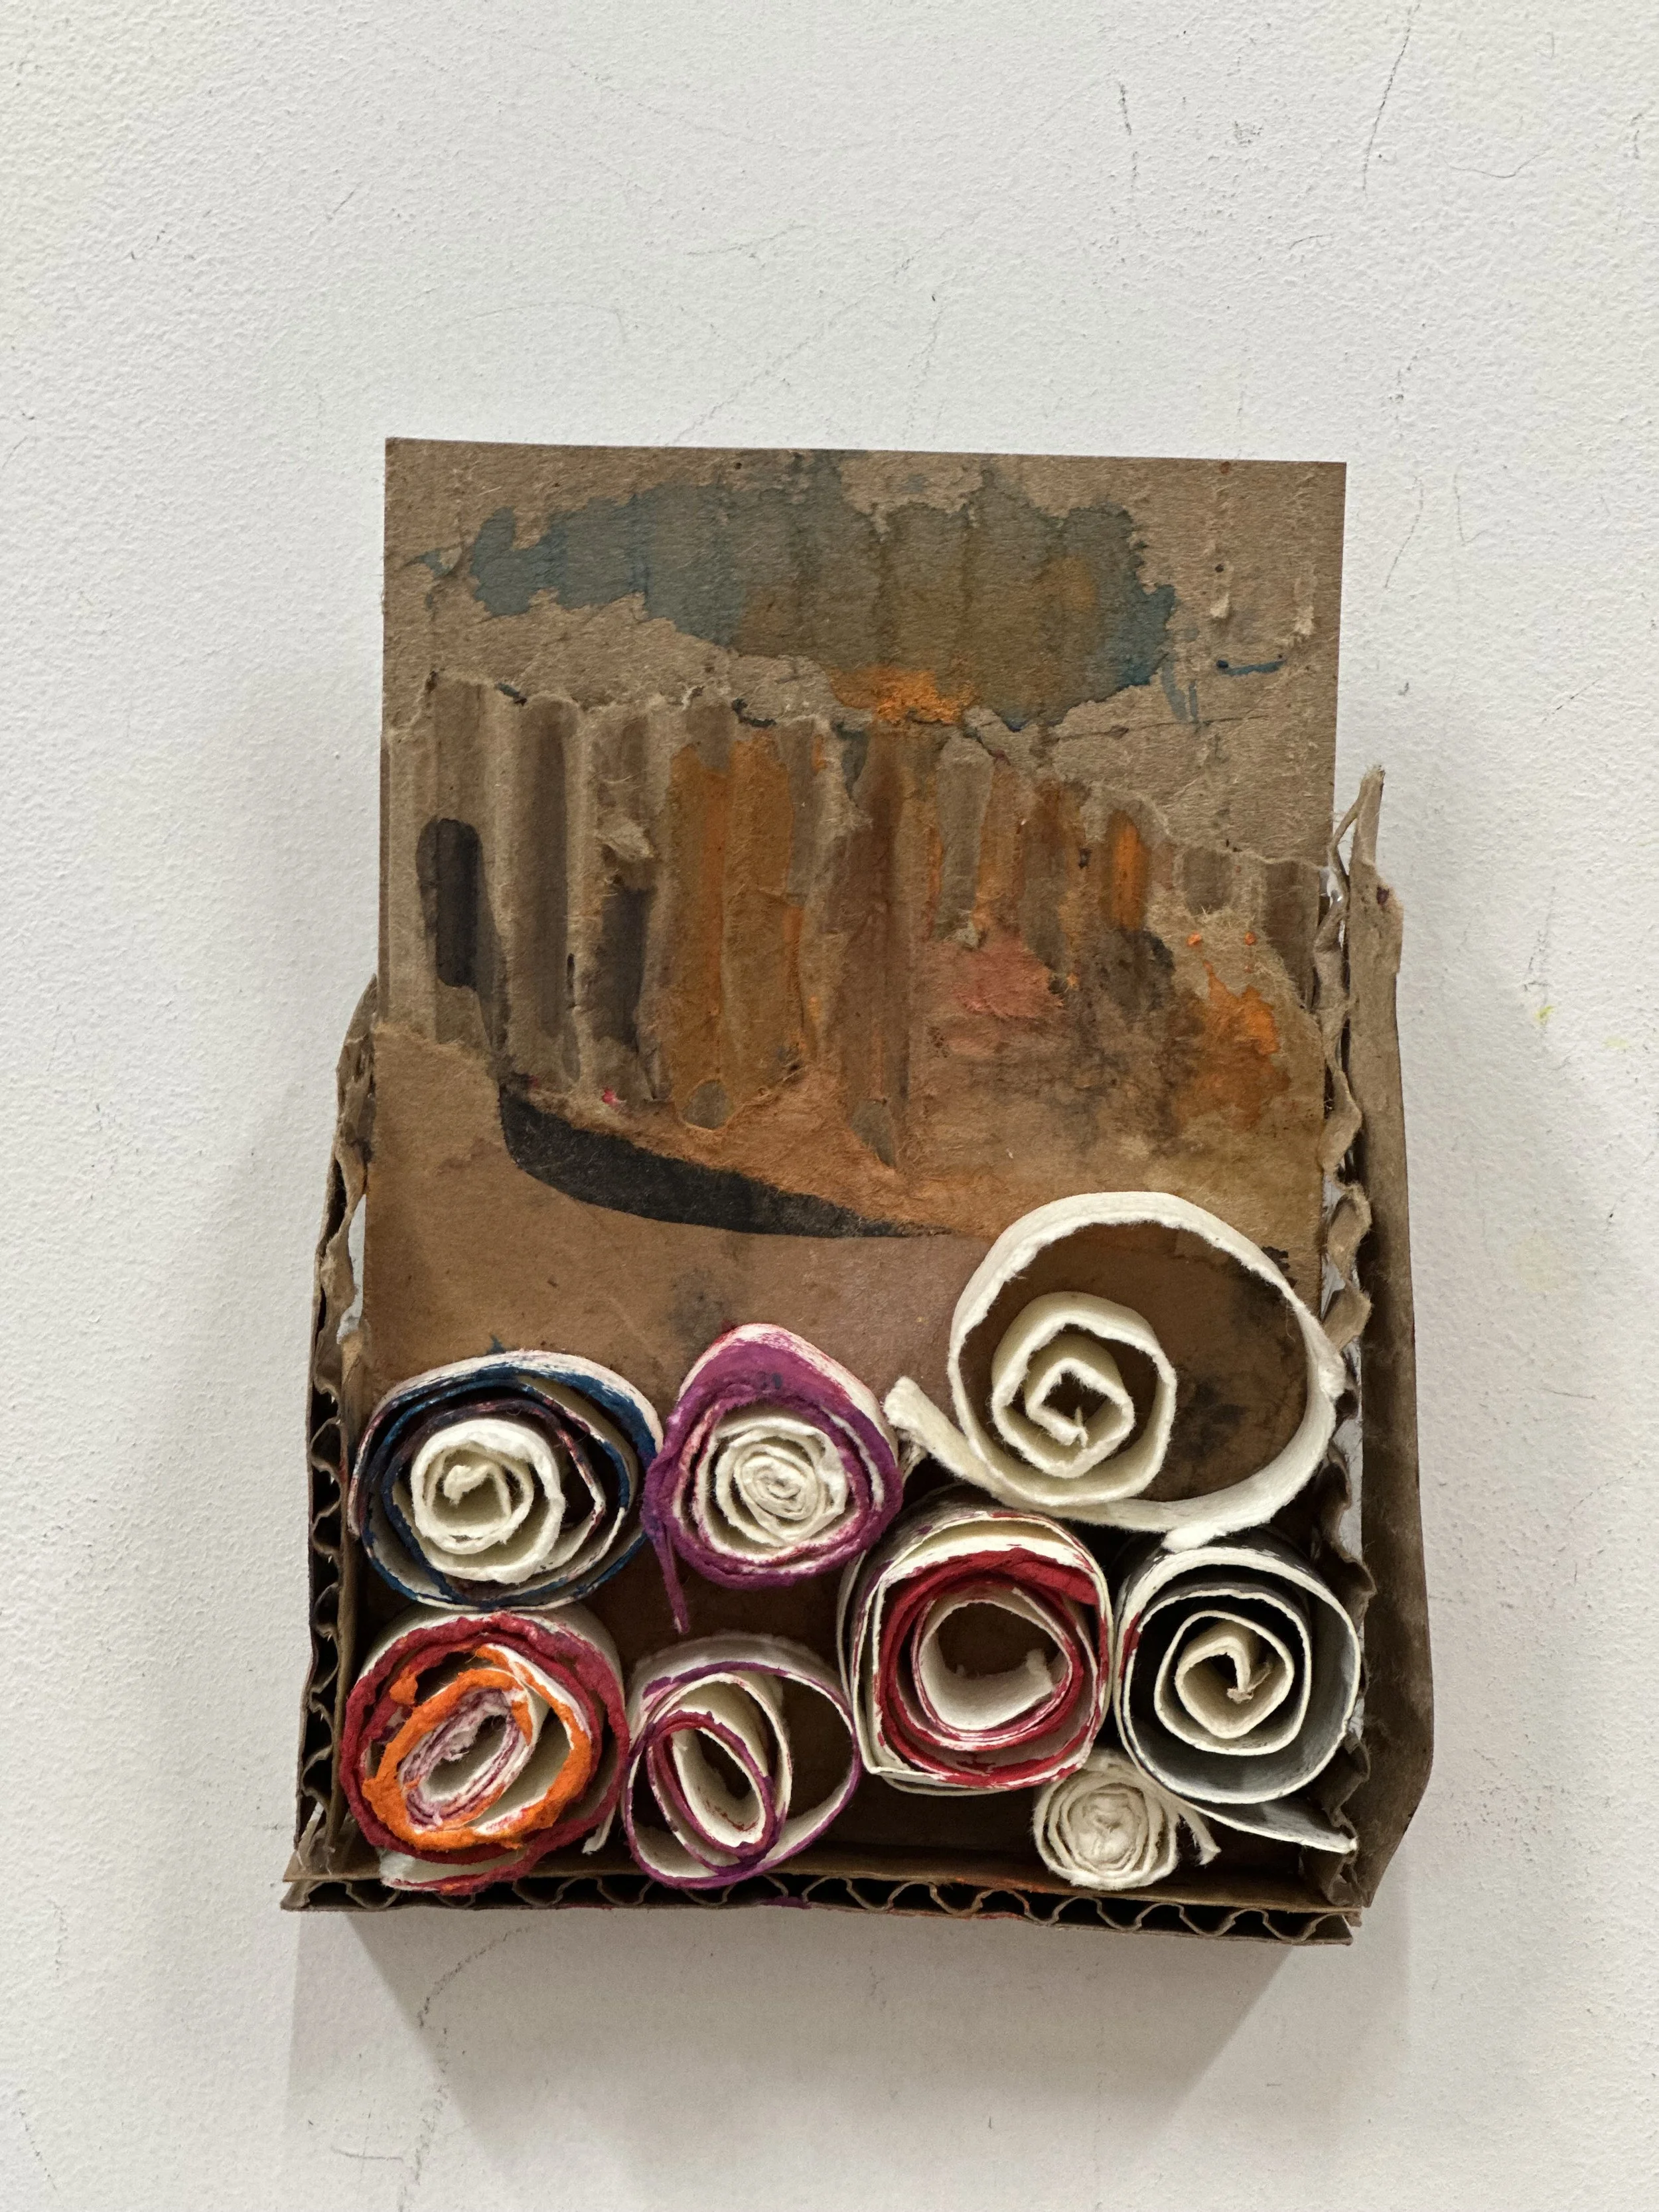
Prepare the Cardboard Backing
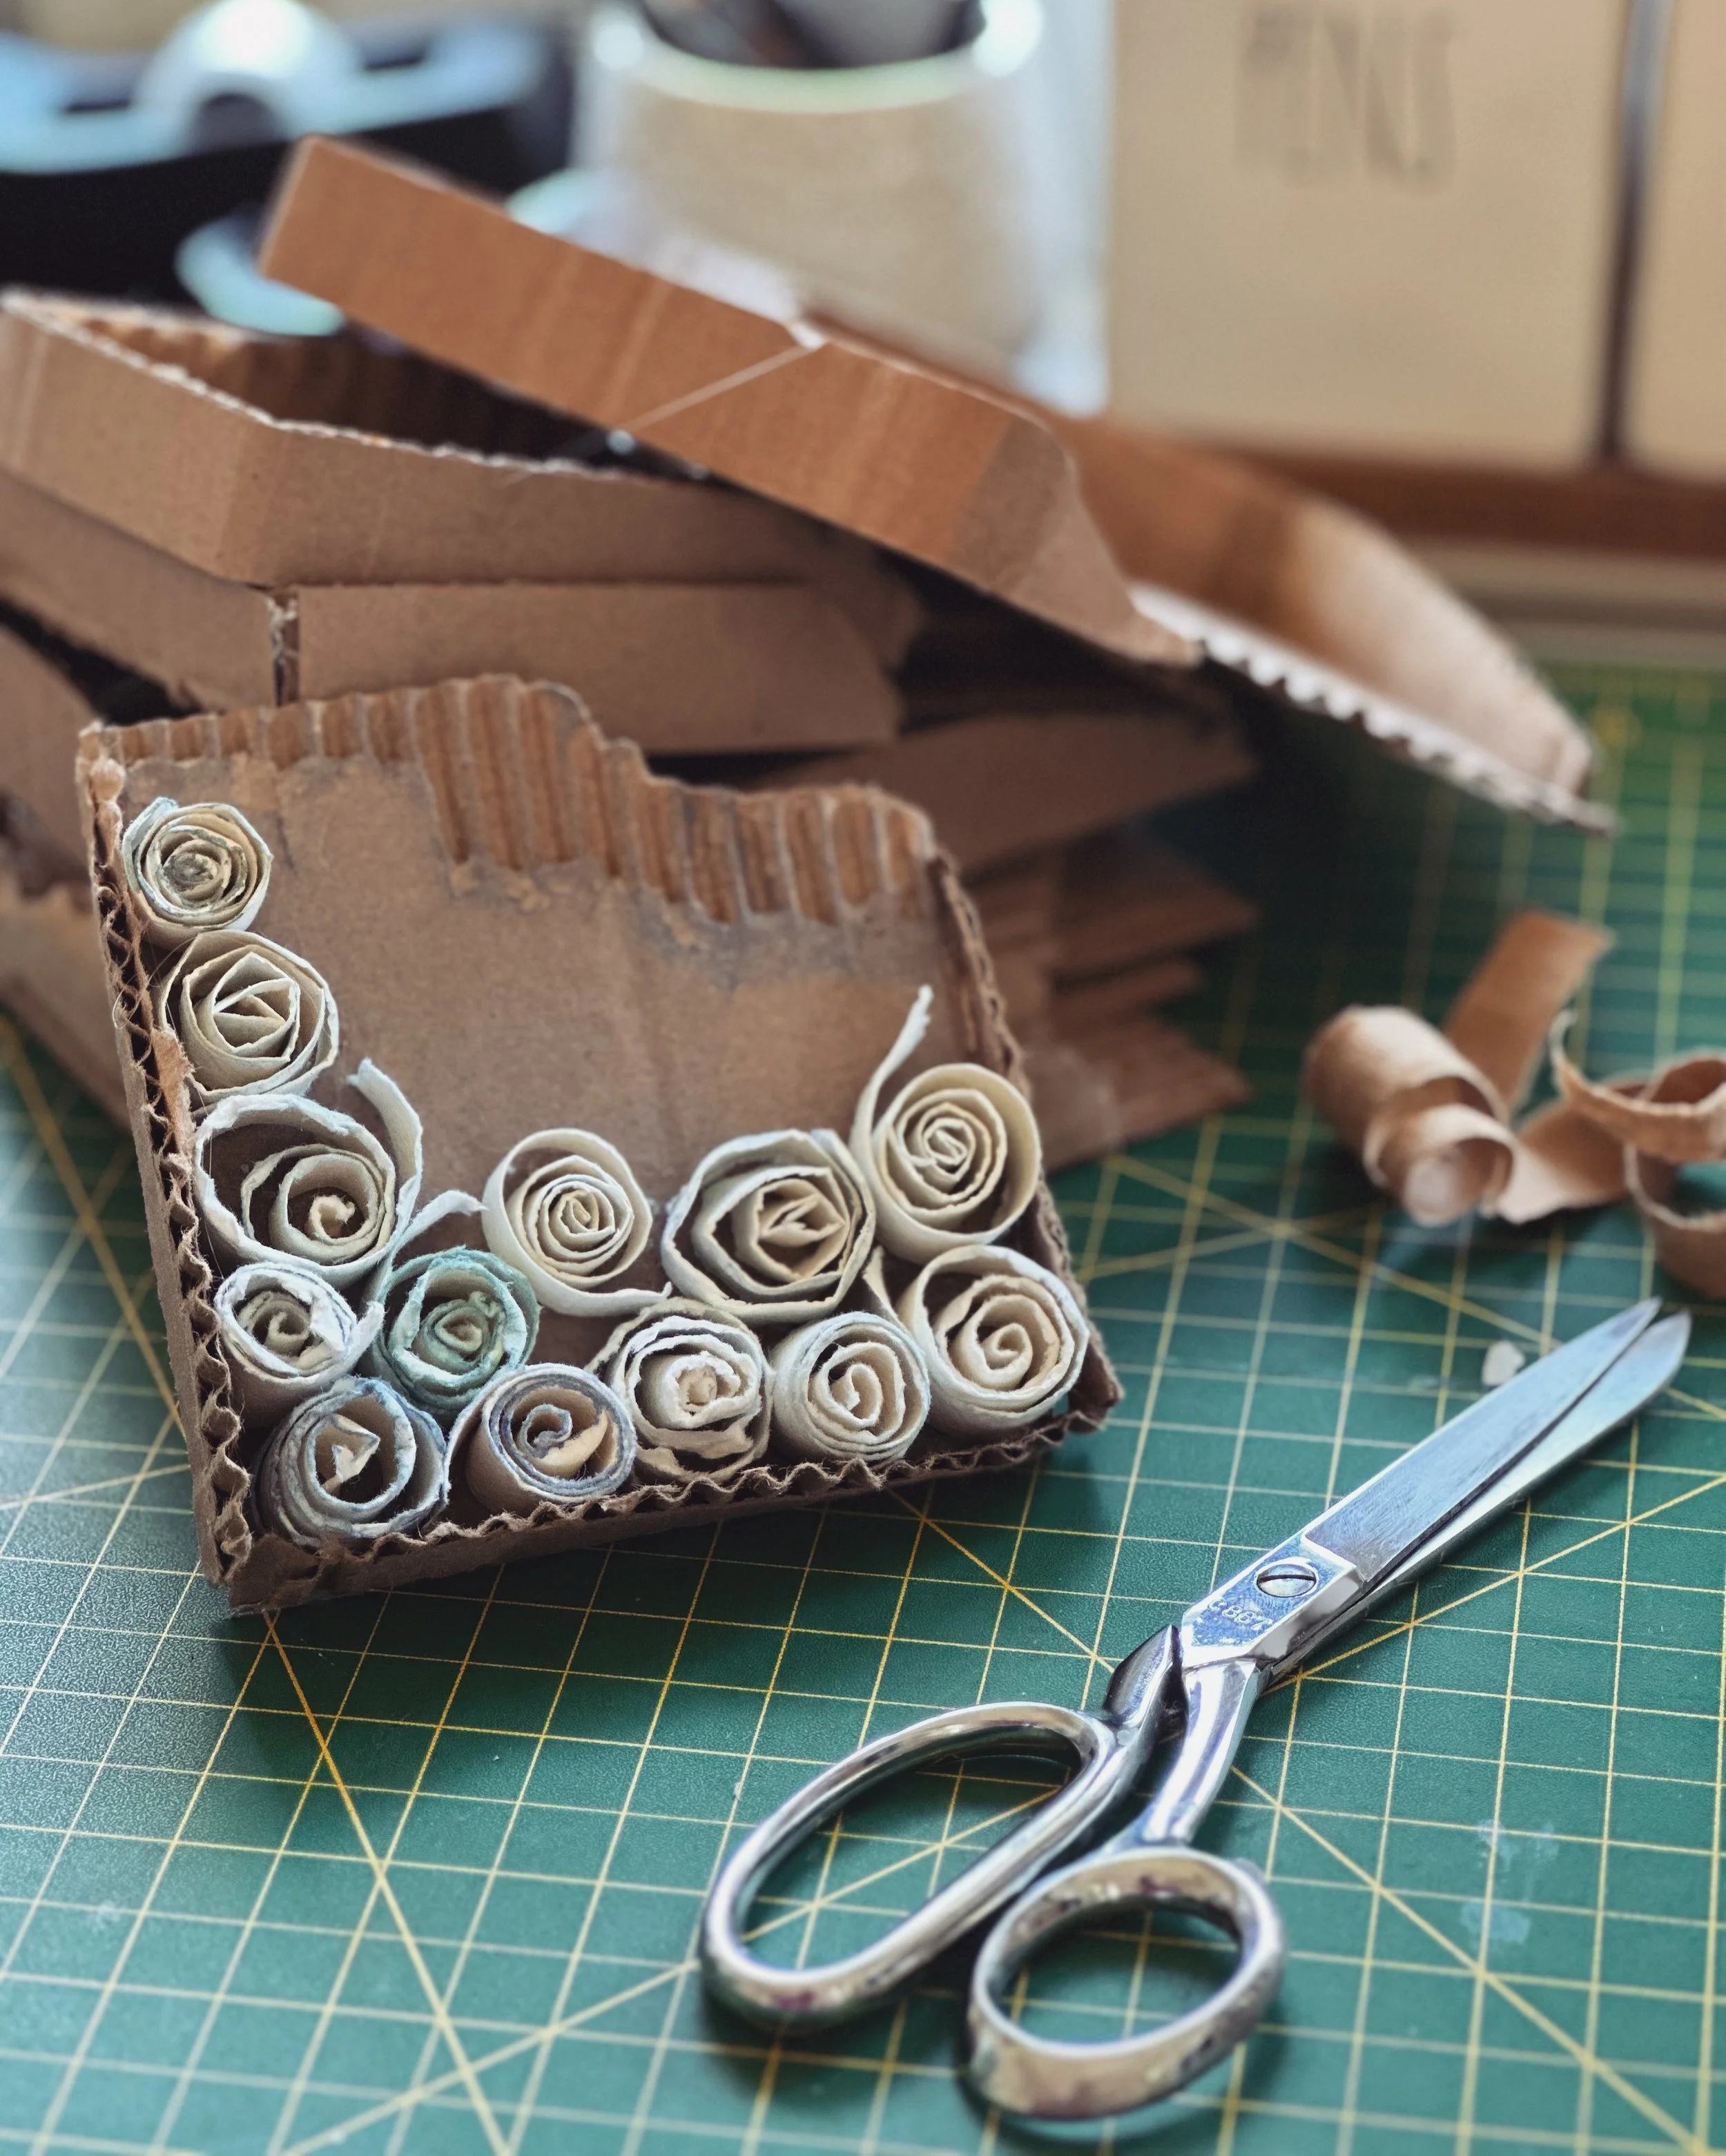
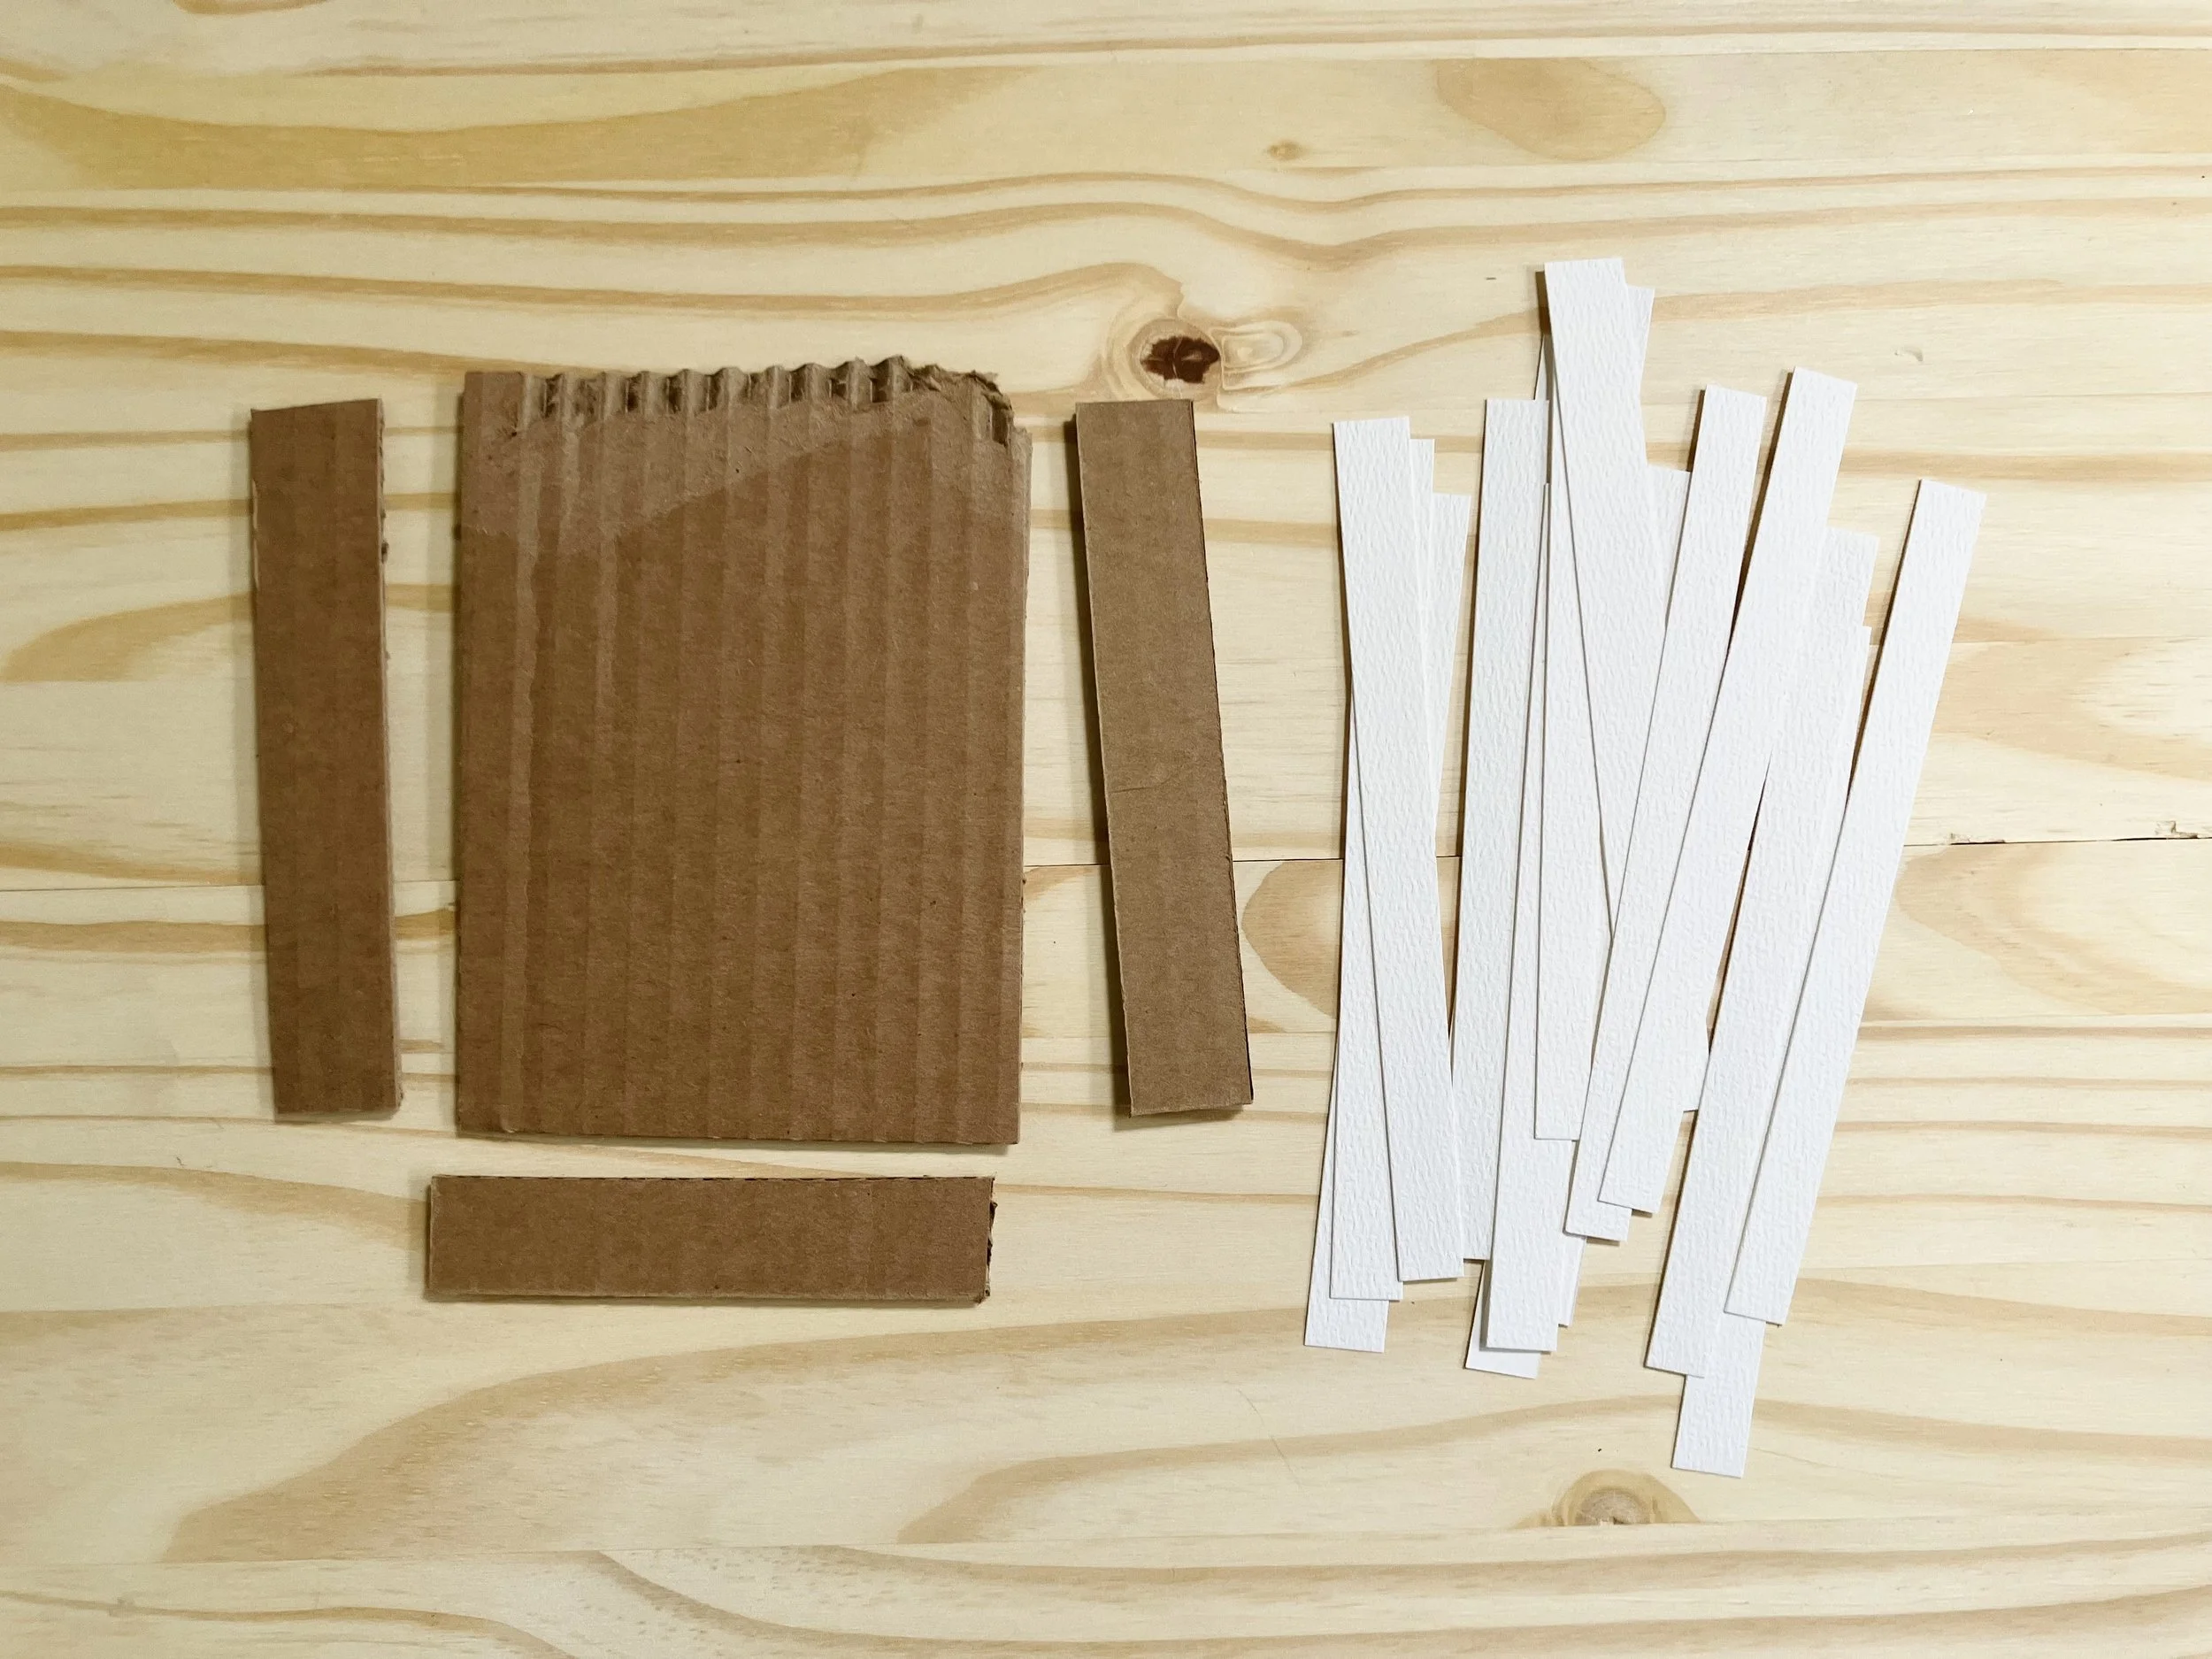
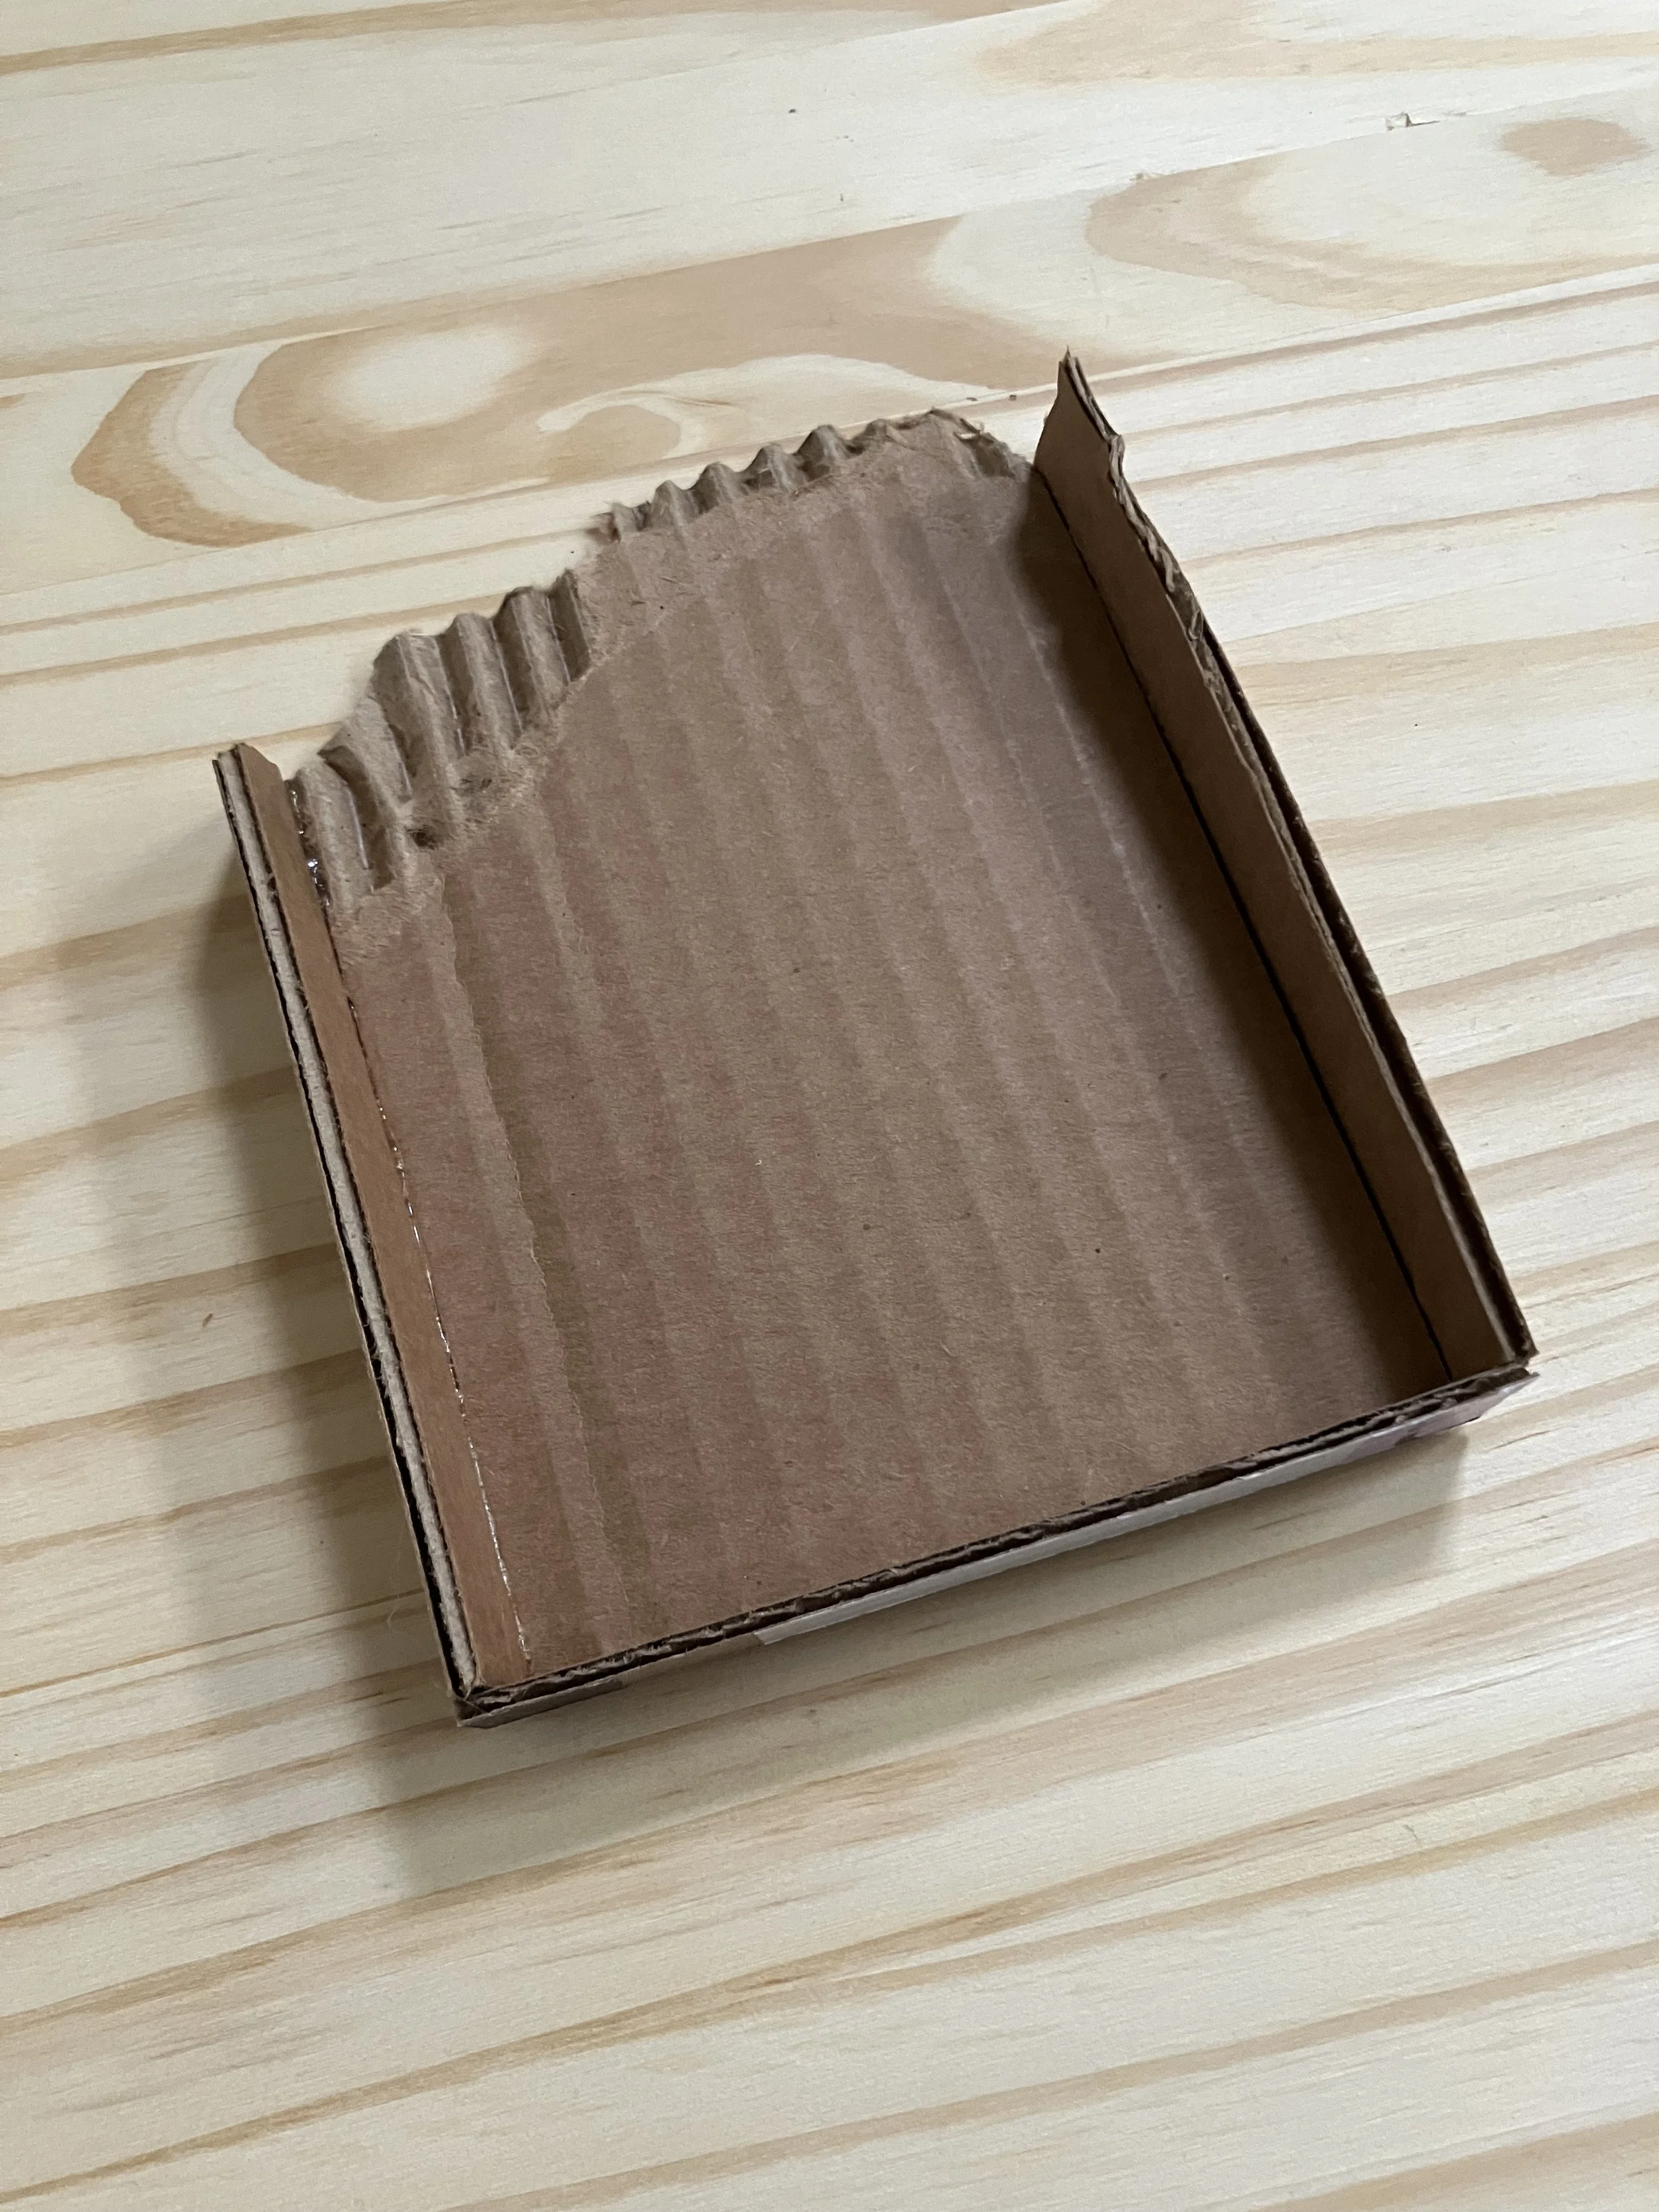
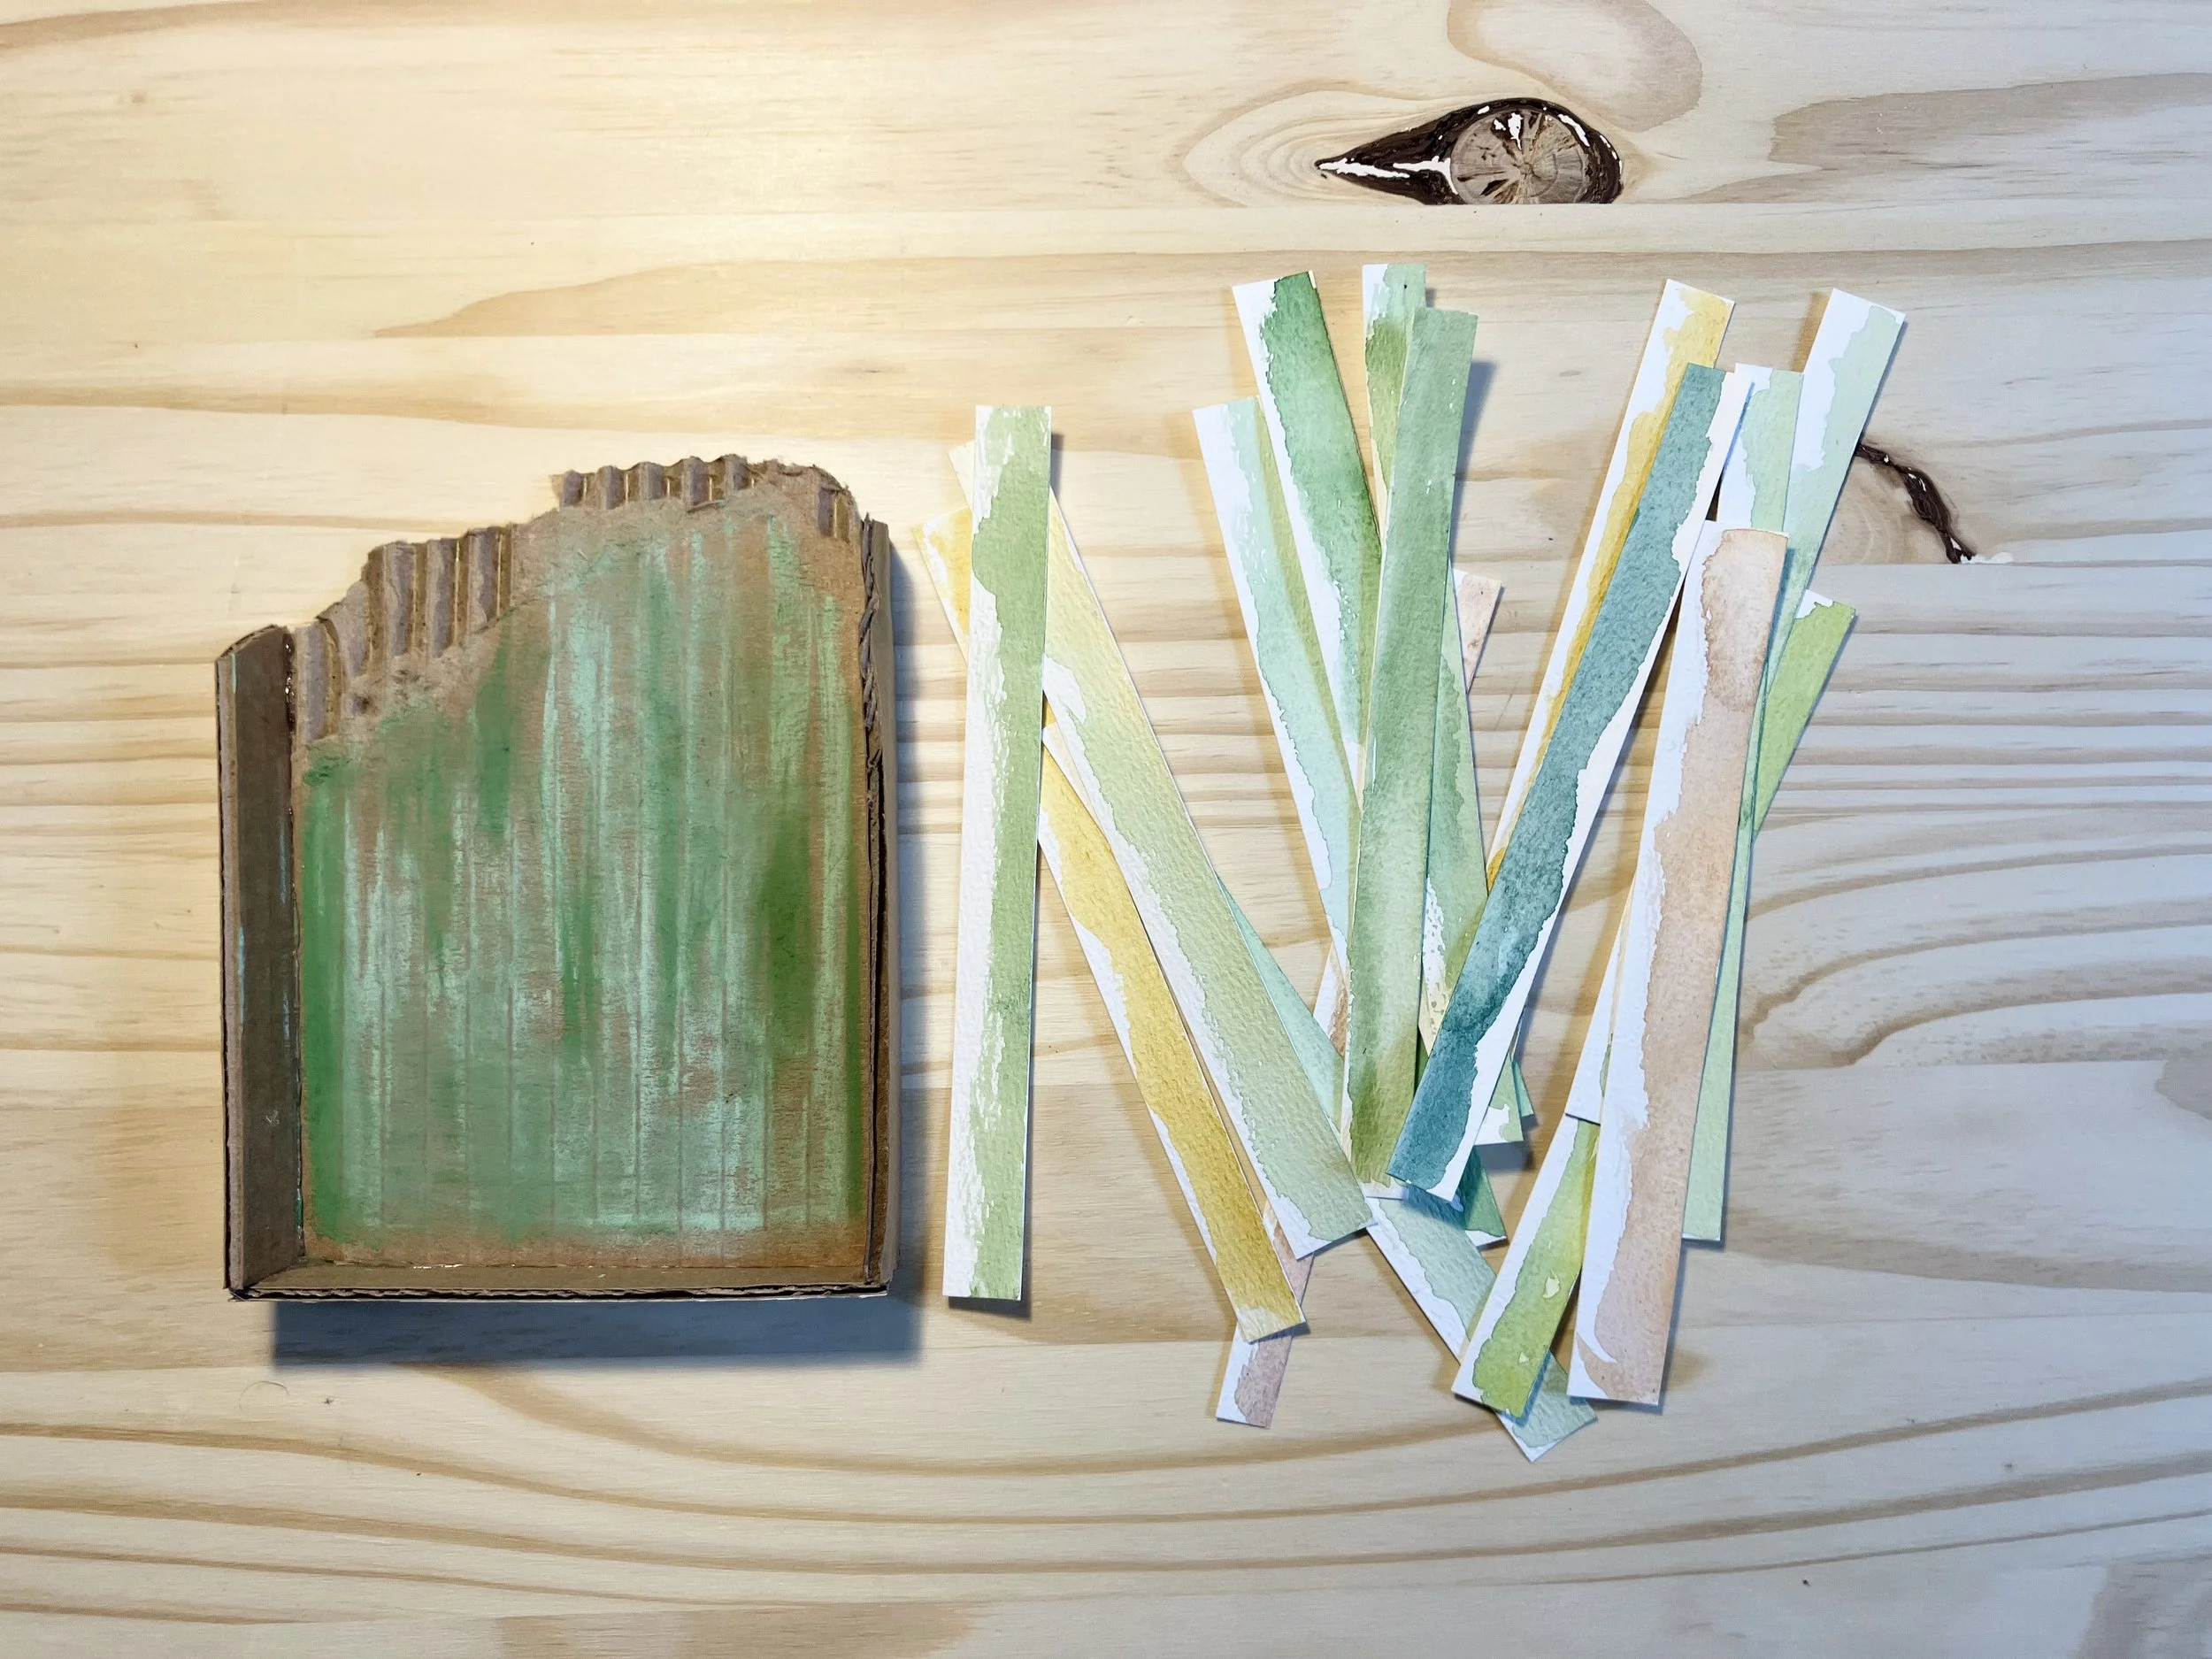
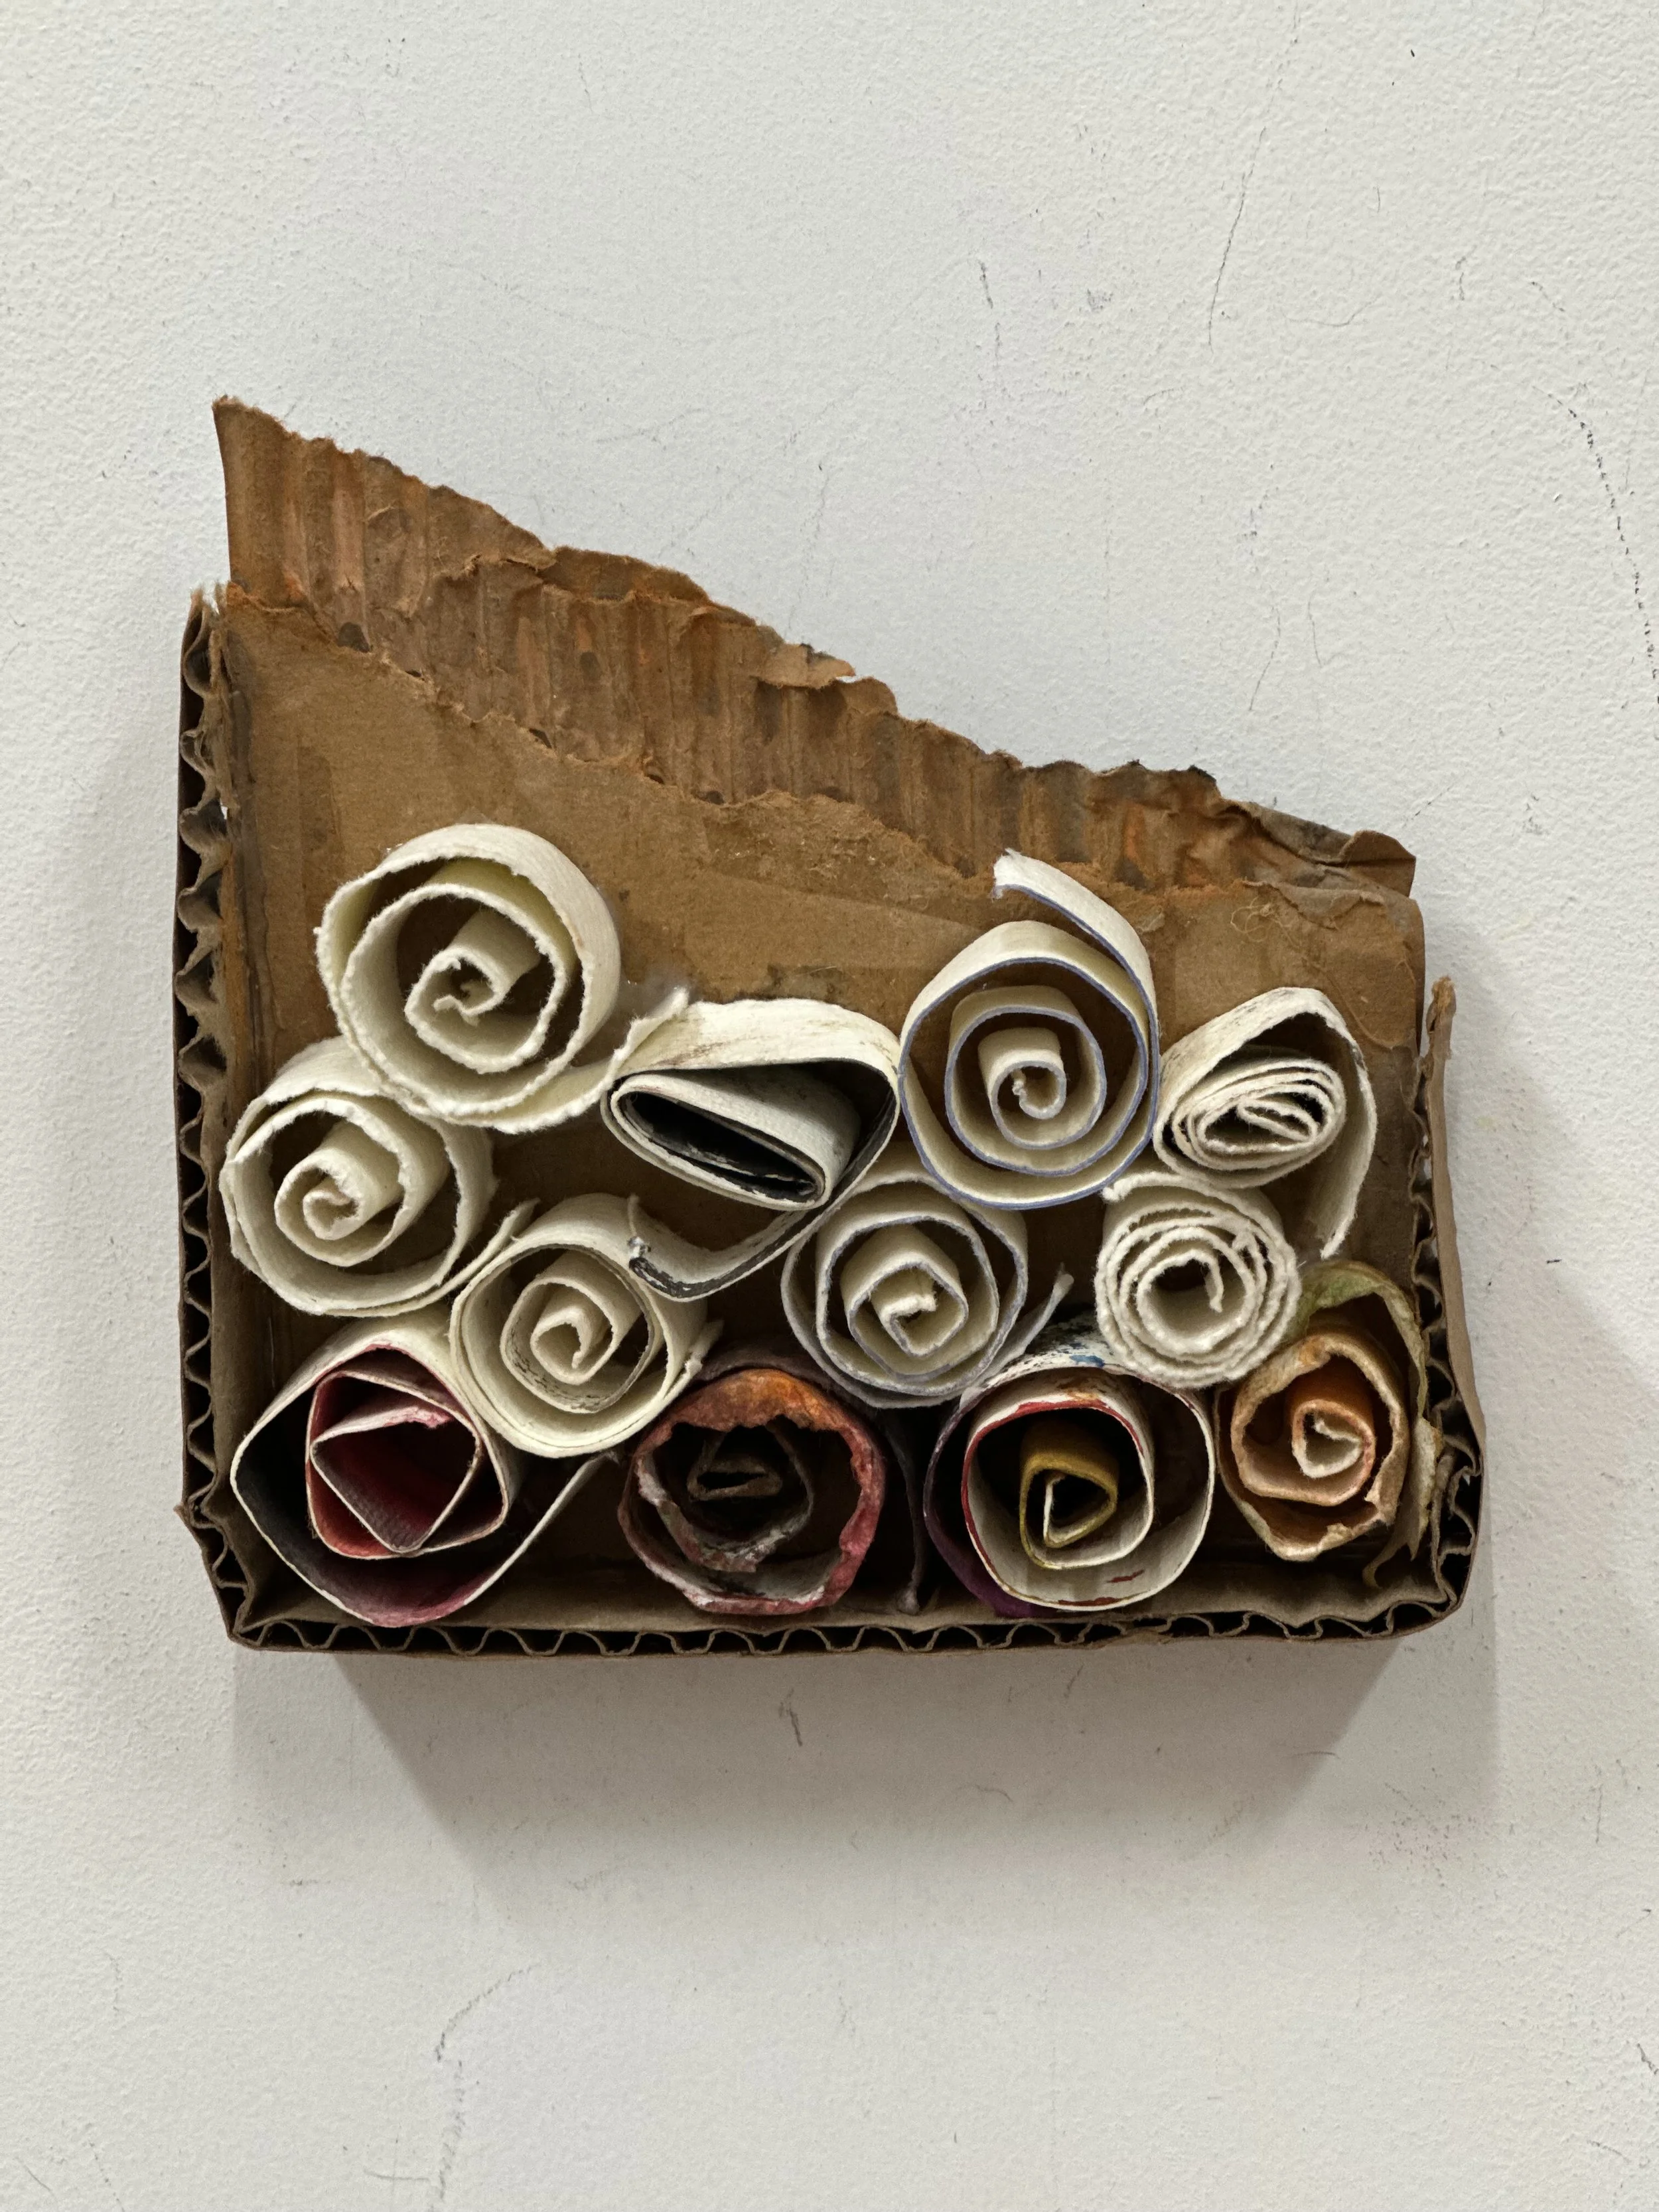
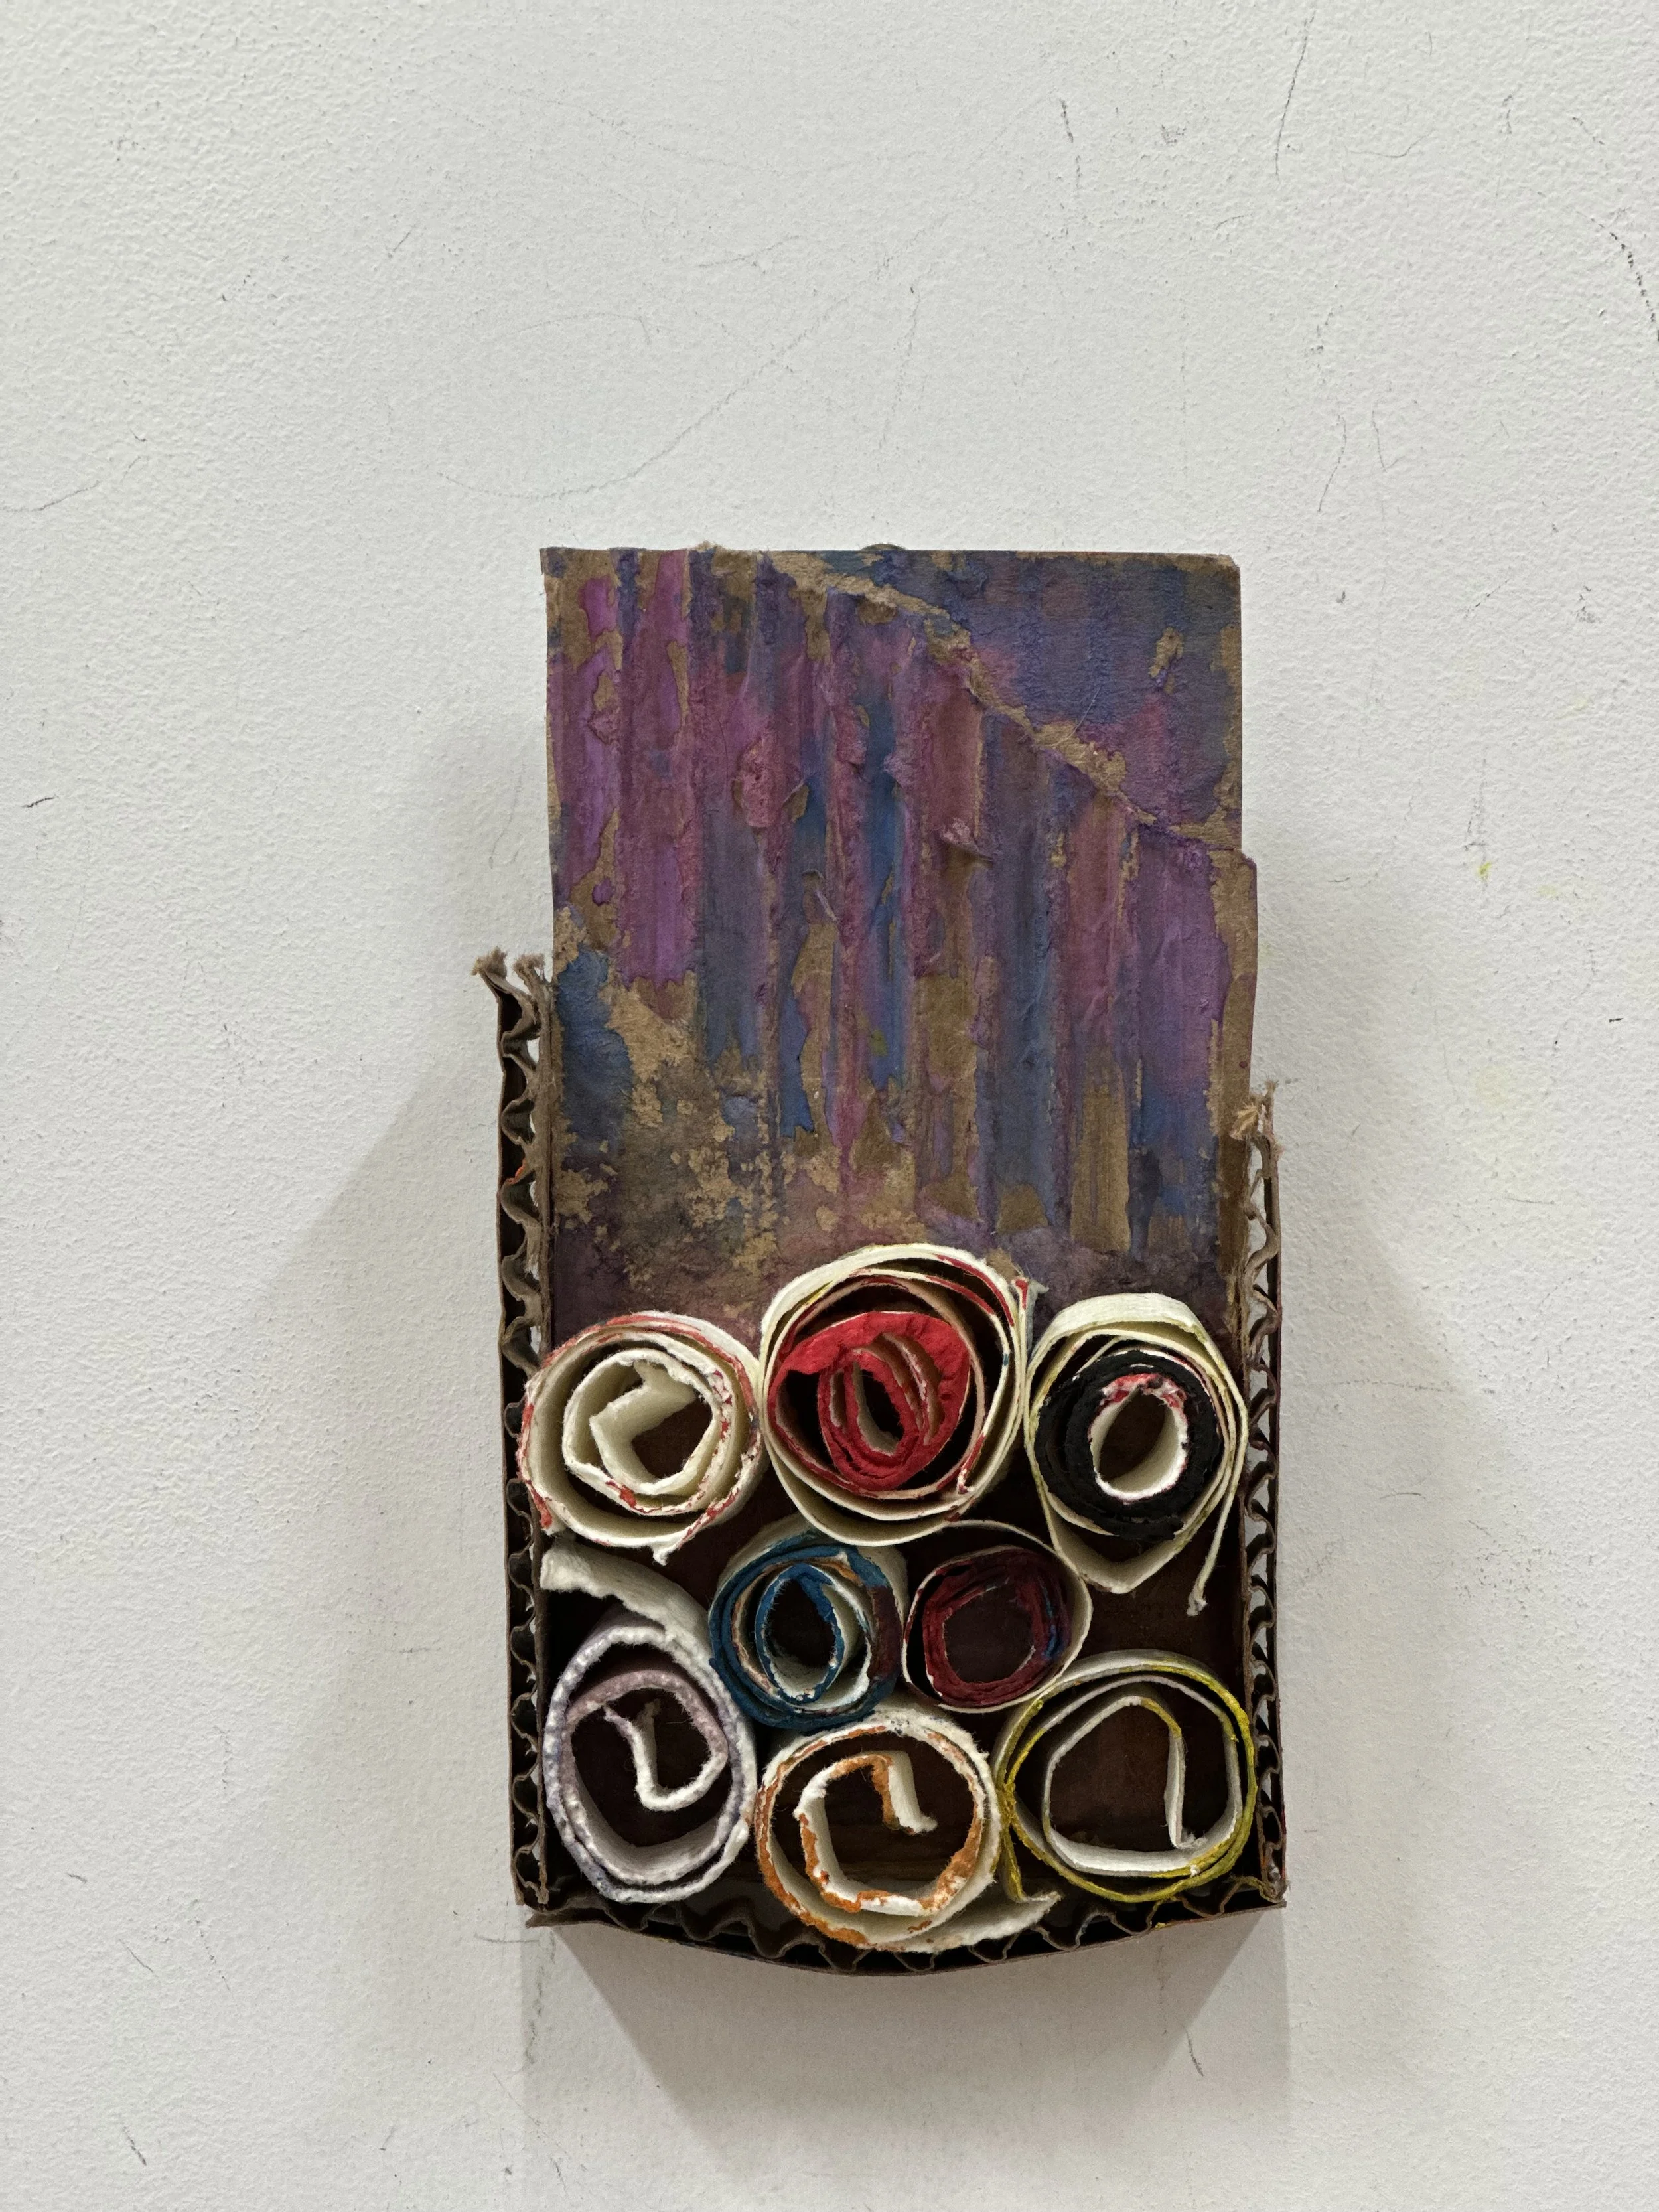
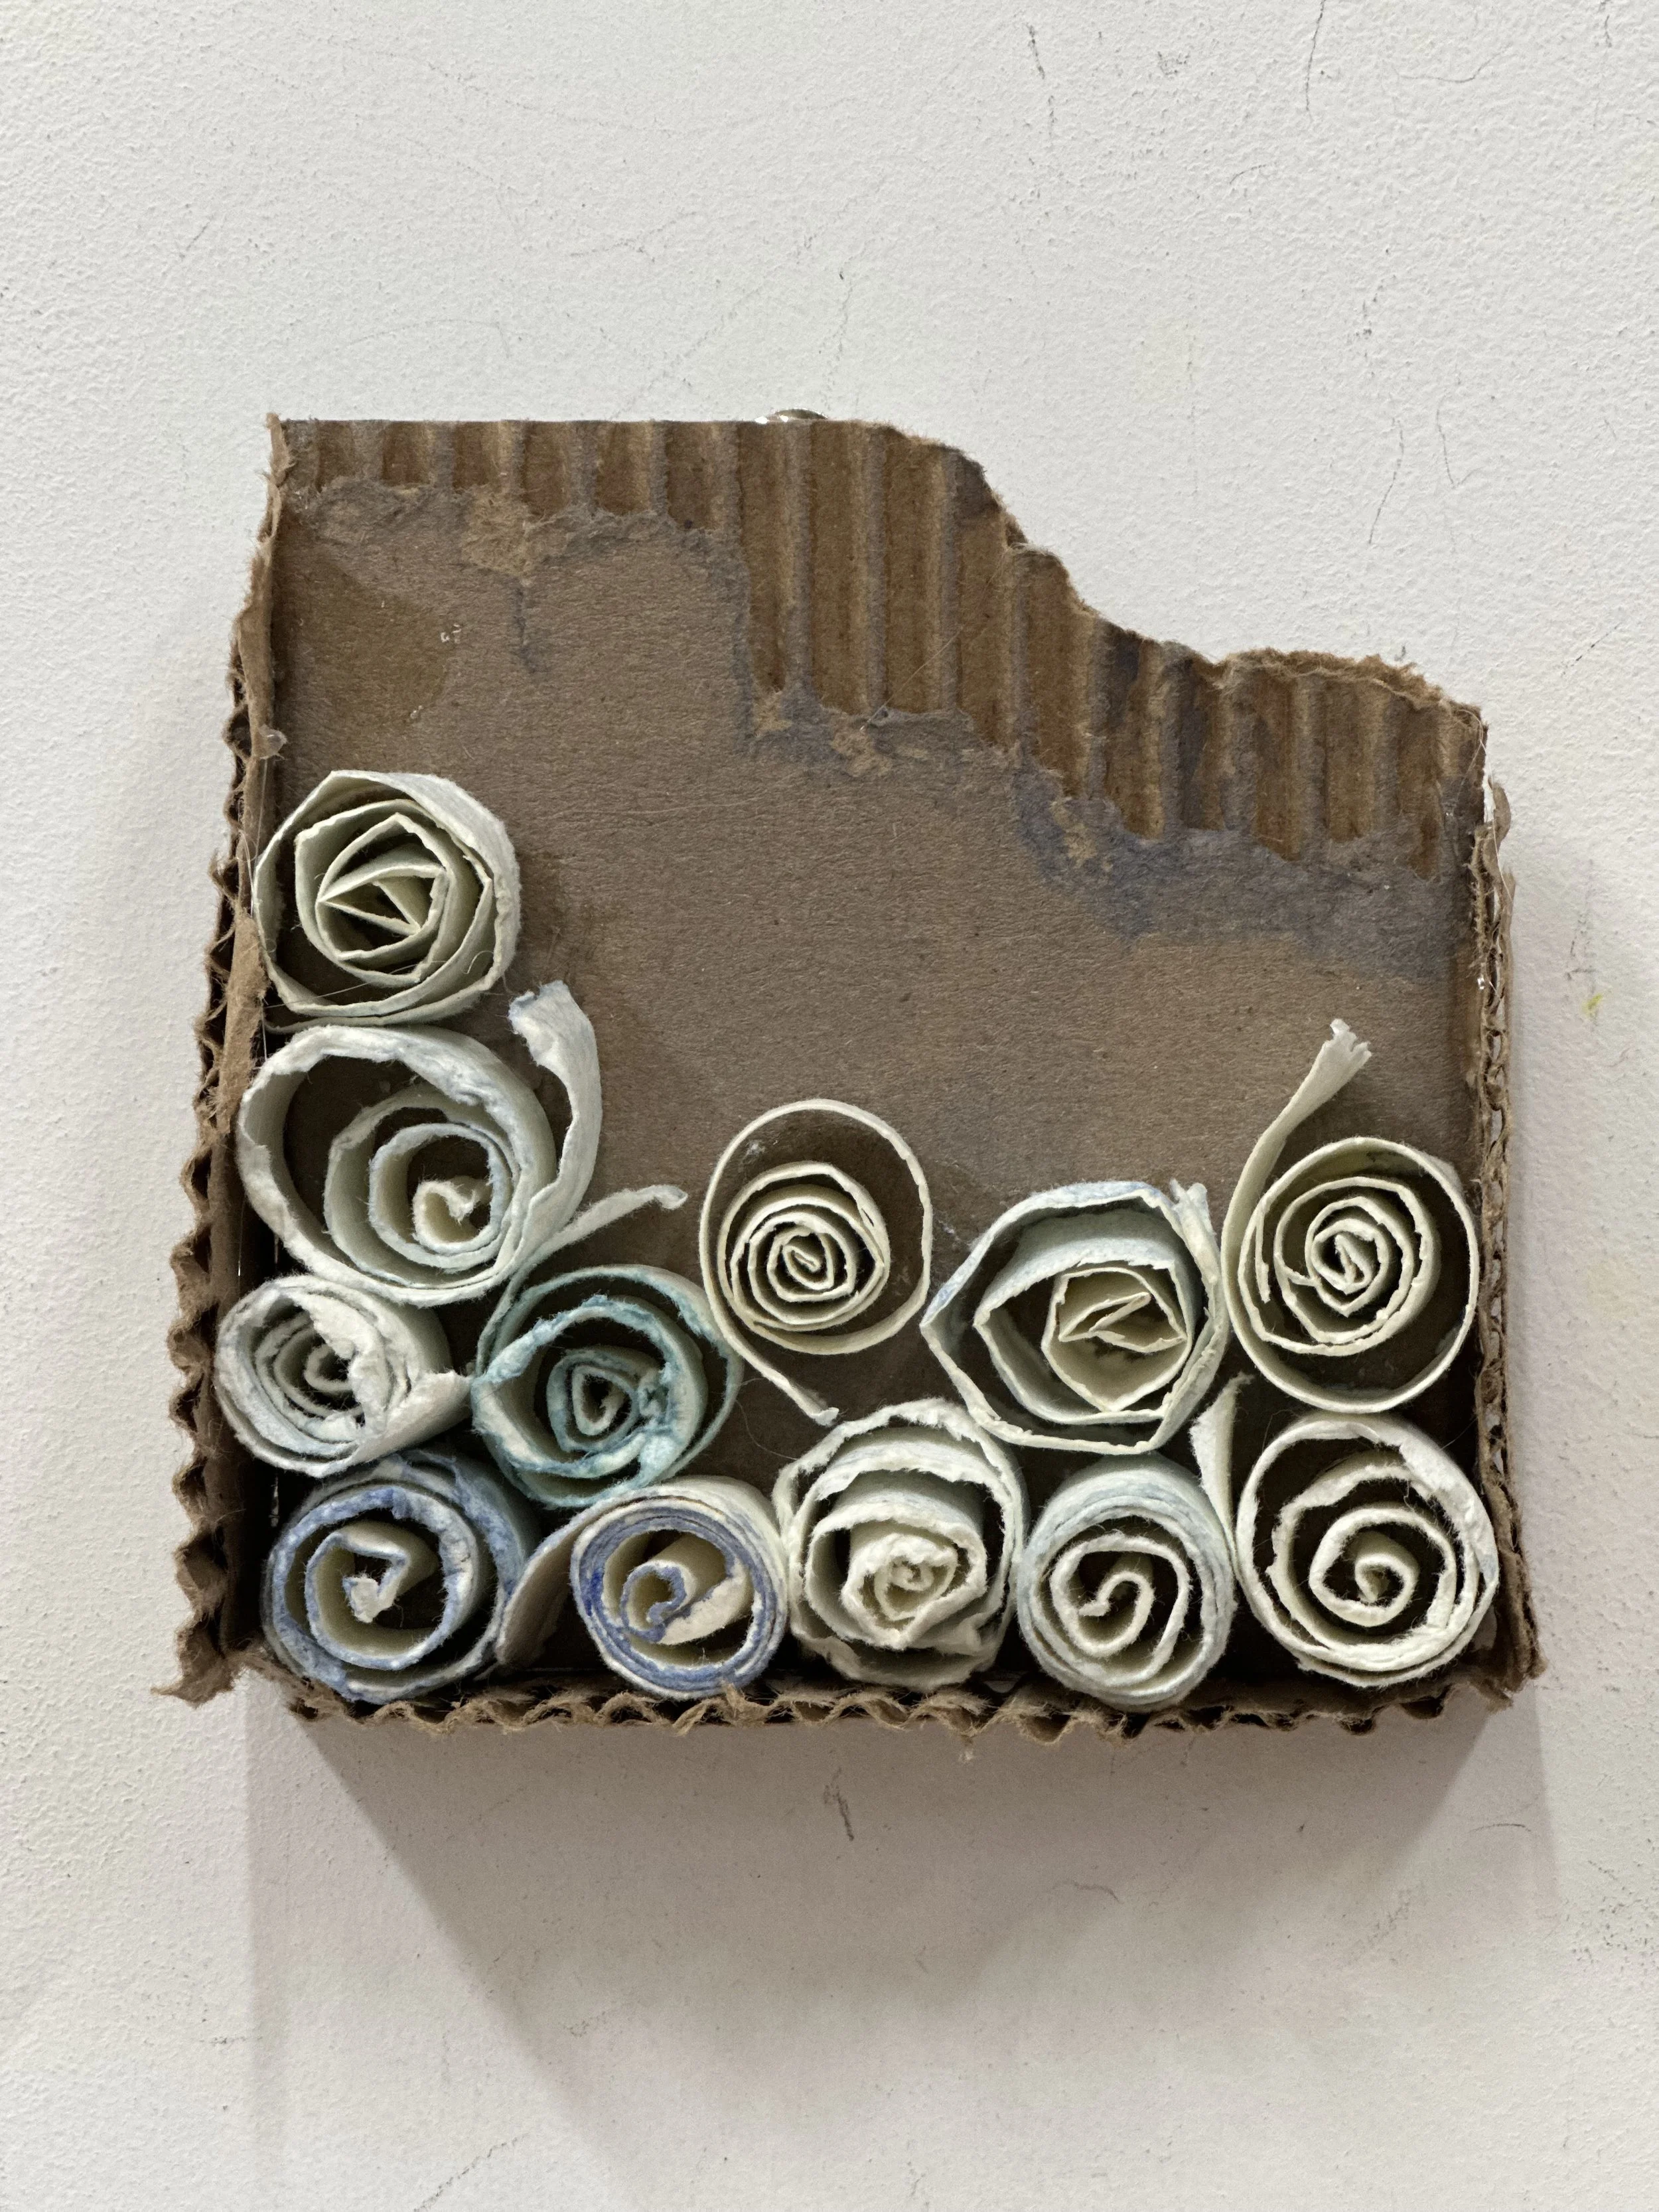
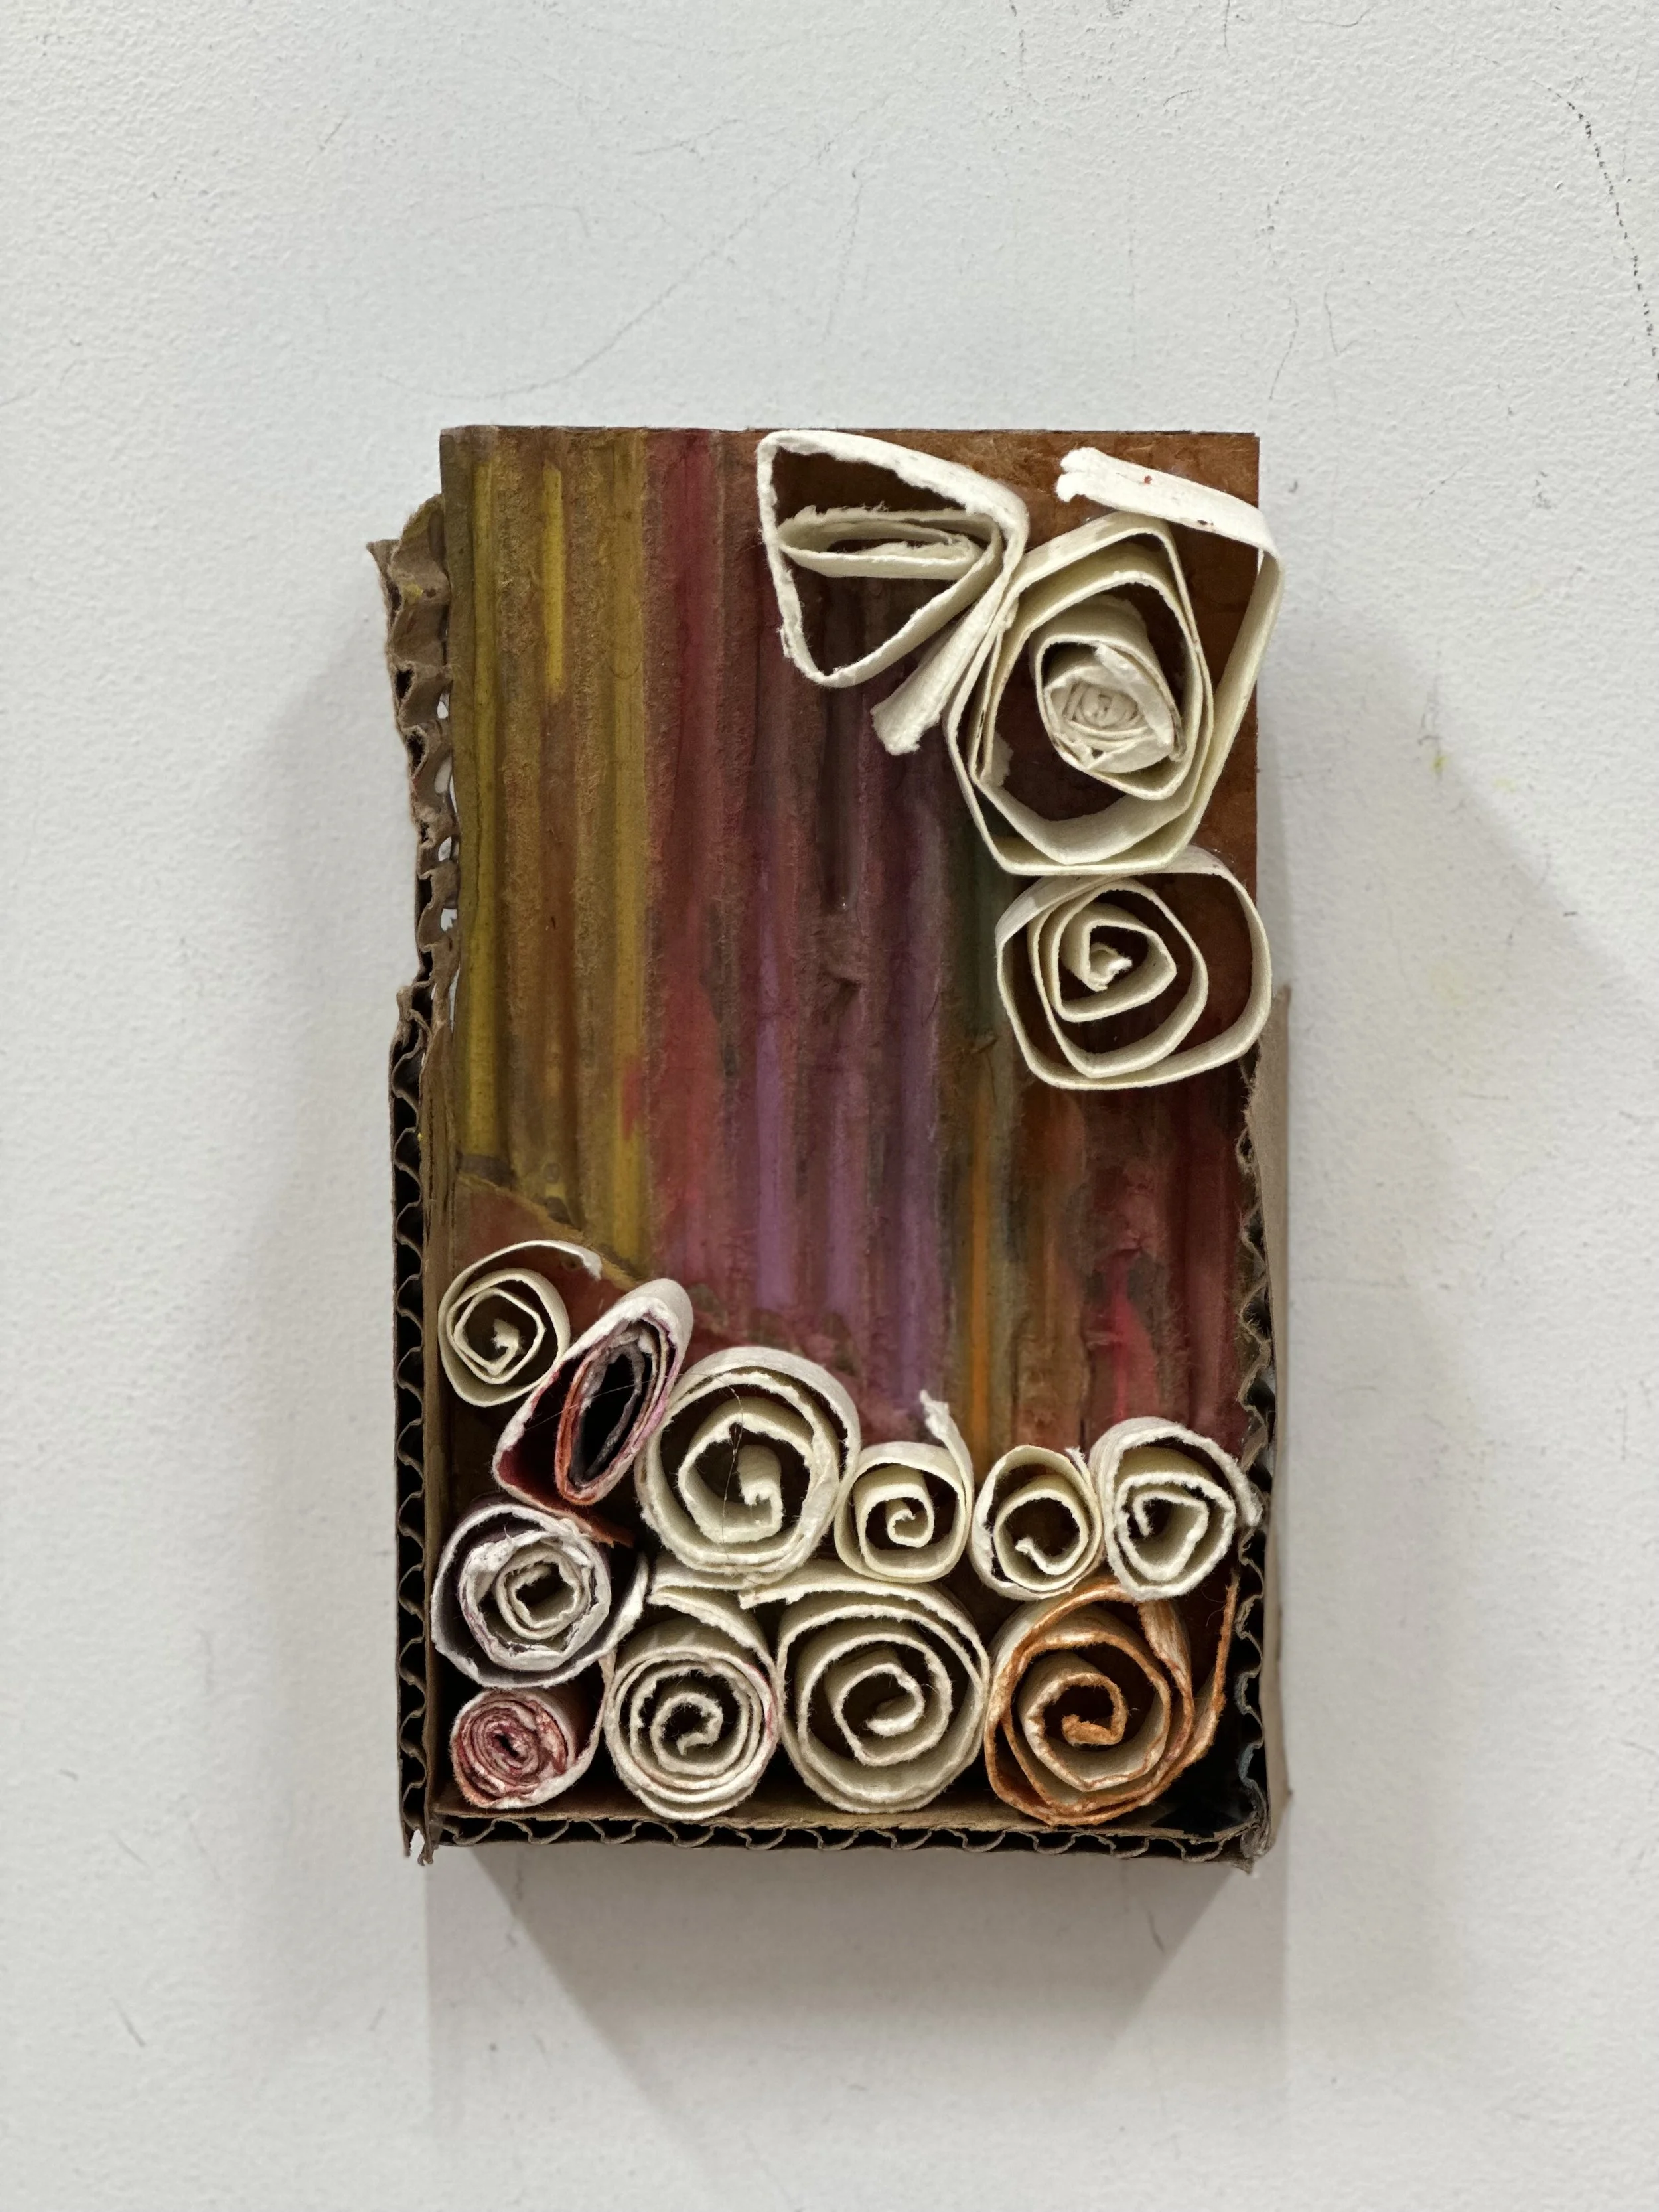
Pre-cut a piece of cardboard to approximately 5” high by 4” wide. Cut along three sides of the cardboard, then tear the fourth side to create an interesting, textured edge—this will be the top of your artwork. Think angled cuts, exposed corrugation, or layered rips for visual effect. Children can try this part!Create the Frame Strips
Cut several narrow strips of cardboard, about 0.5” wide. These will become the frame of the artwork.Measure and Tear the Frame Sides
Take two of the narrow strips and measure them against the sides of your cardboard backing. Tear them so they align with the height of the piece. Feel free to get creative with the tearing—rough edges and irregular shapes add great texture and contrast.Attach the Frame
Glue the frame strips onto the cardboard backing. Teens and adults can use a glue gun; younger children should use glue tape or white glue. (Glue tape is ideal for kids 7+ who can handle it independently—no drying time required!)Add Watercolor Paper Strips
Cut strips of watercolor paper to decorate your piece. They don’t need to be uniform—mixing different widths can add depth and interest to the final artwork.Attach a Hanging String
Cut a 7-inch piece of cotton string (or similar material) to hang your artwork. Use tape to secure both ends to the back of the cardboard.
-
1) Get our your watercolours! Here comes the fun part. Paint your watercolour strips HOWEVER YOU’D LIKE. They can be striped, they can be polk-a-dot, they can be rainbow or monochromatic! What really matters here is that you keep in mind that these will be rolled up, and one edge will be visible. You could simply dip or paint the edge, or make that edge a contrasting colour from the rest of the paper. Feeling au naturel? You can keep some (or all) strips white!
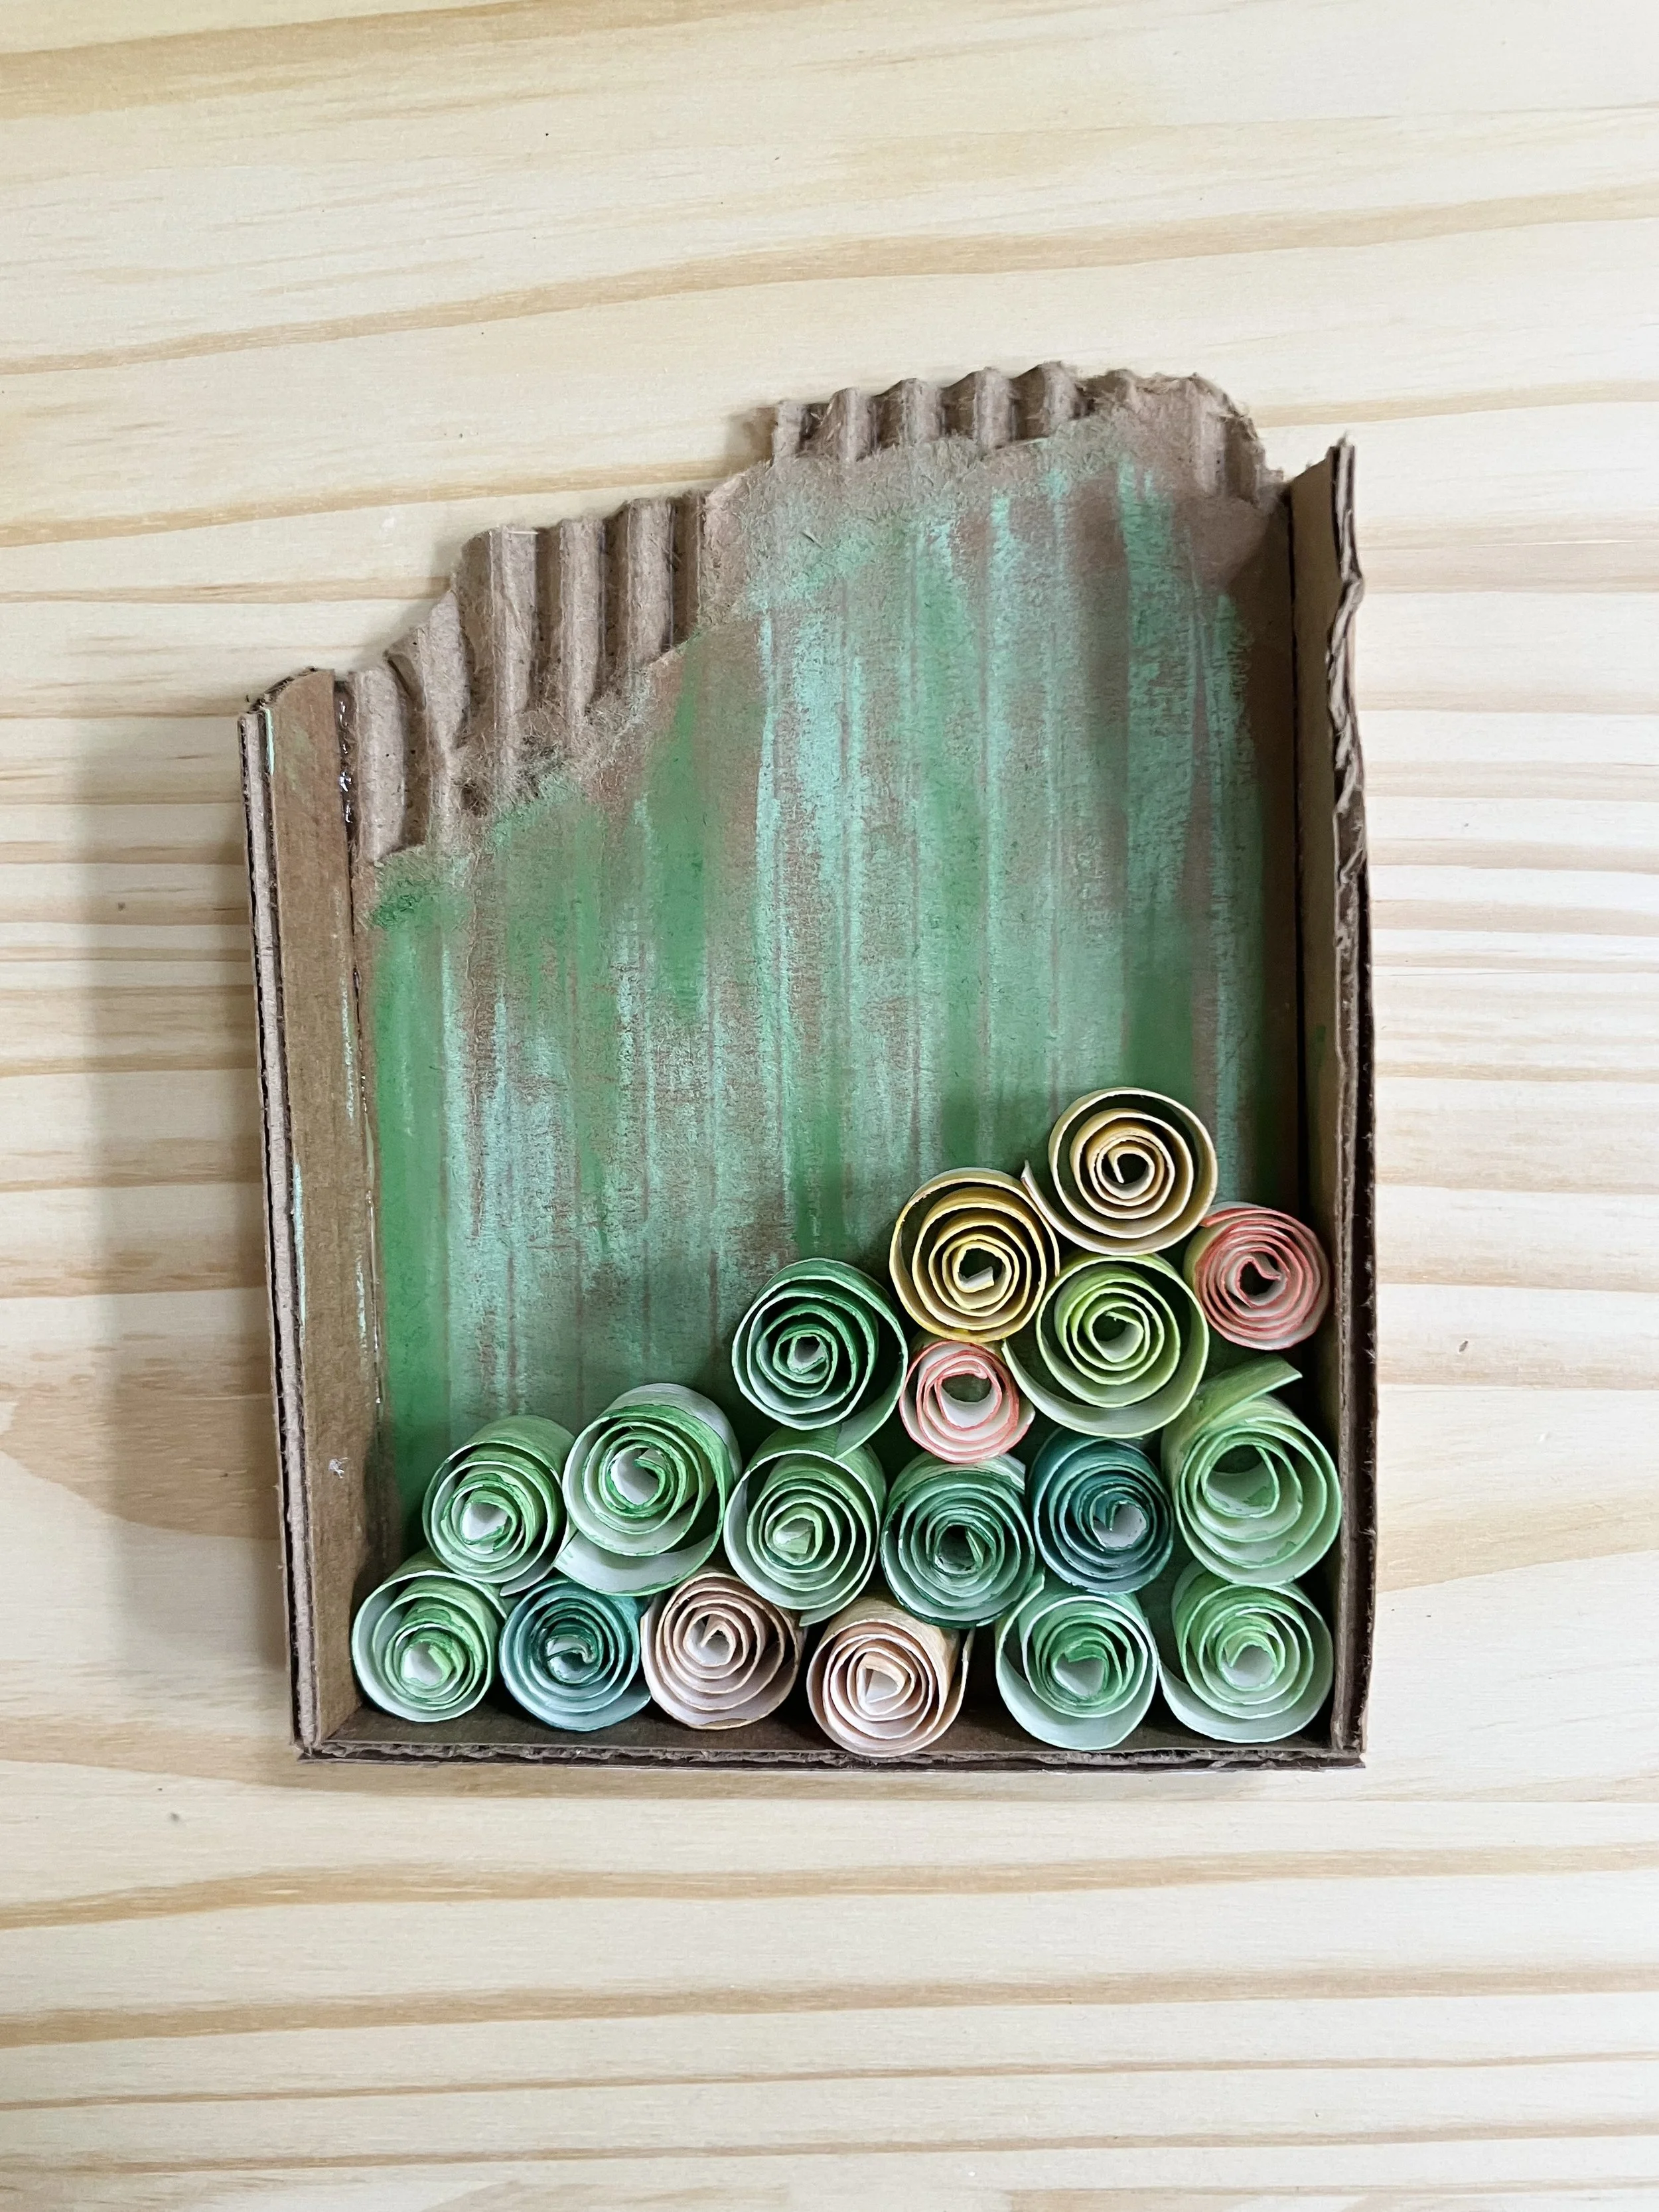
3) Determine whether or not you would like to paint your cardboard background. If so, now is the time!
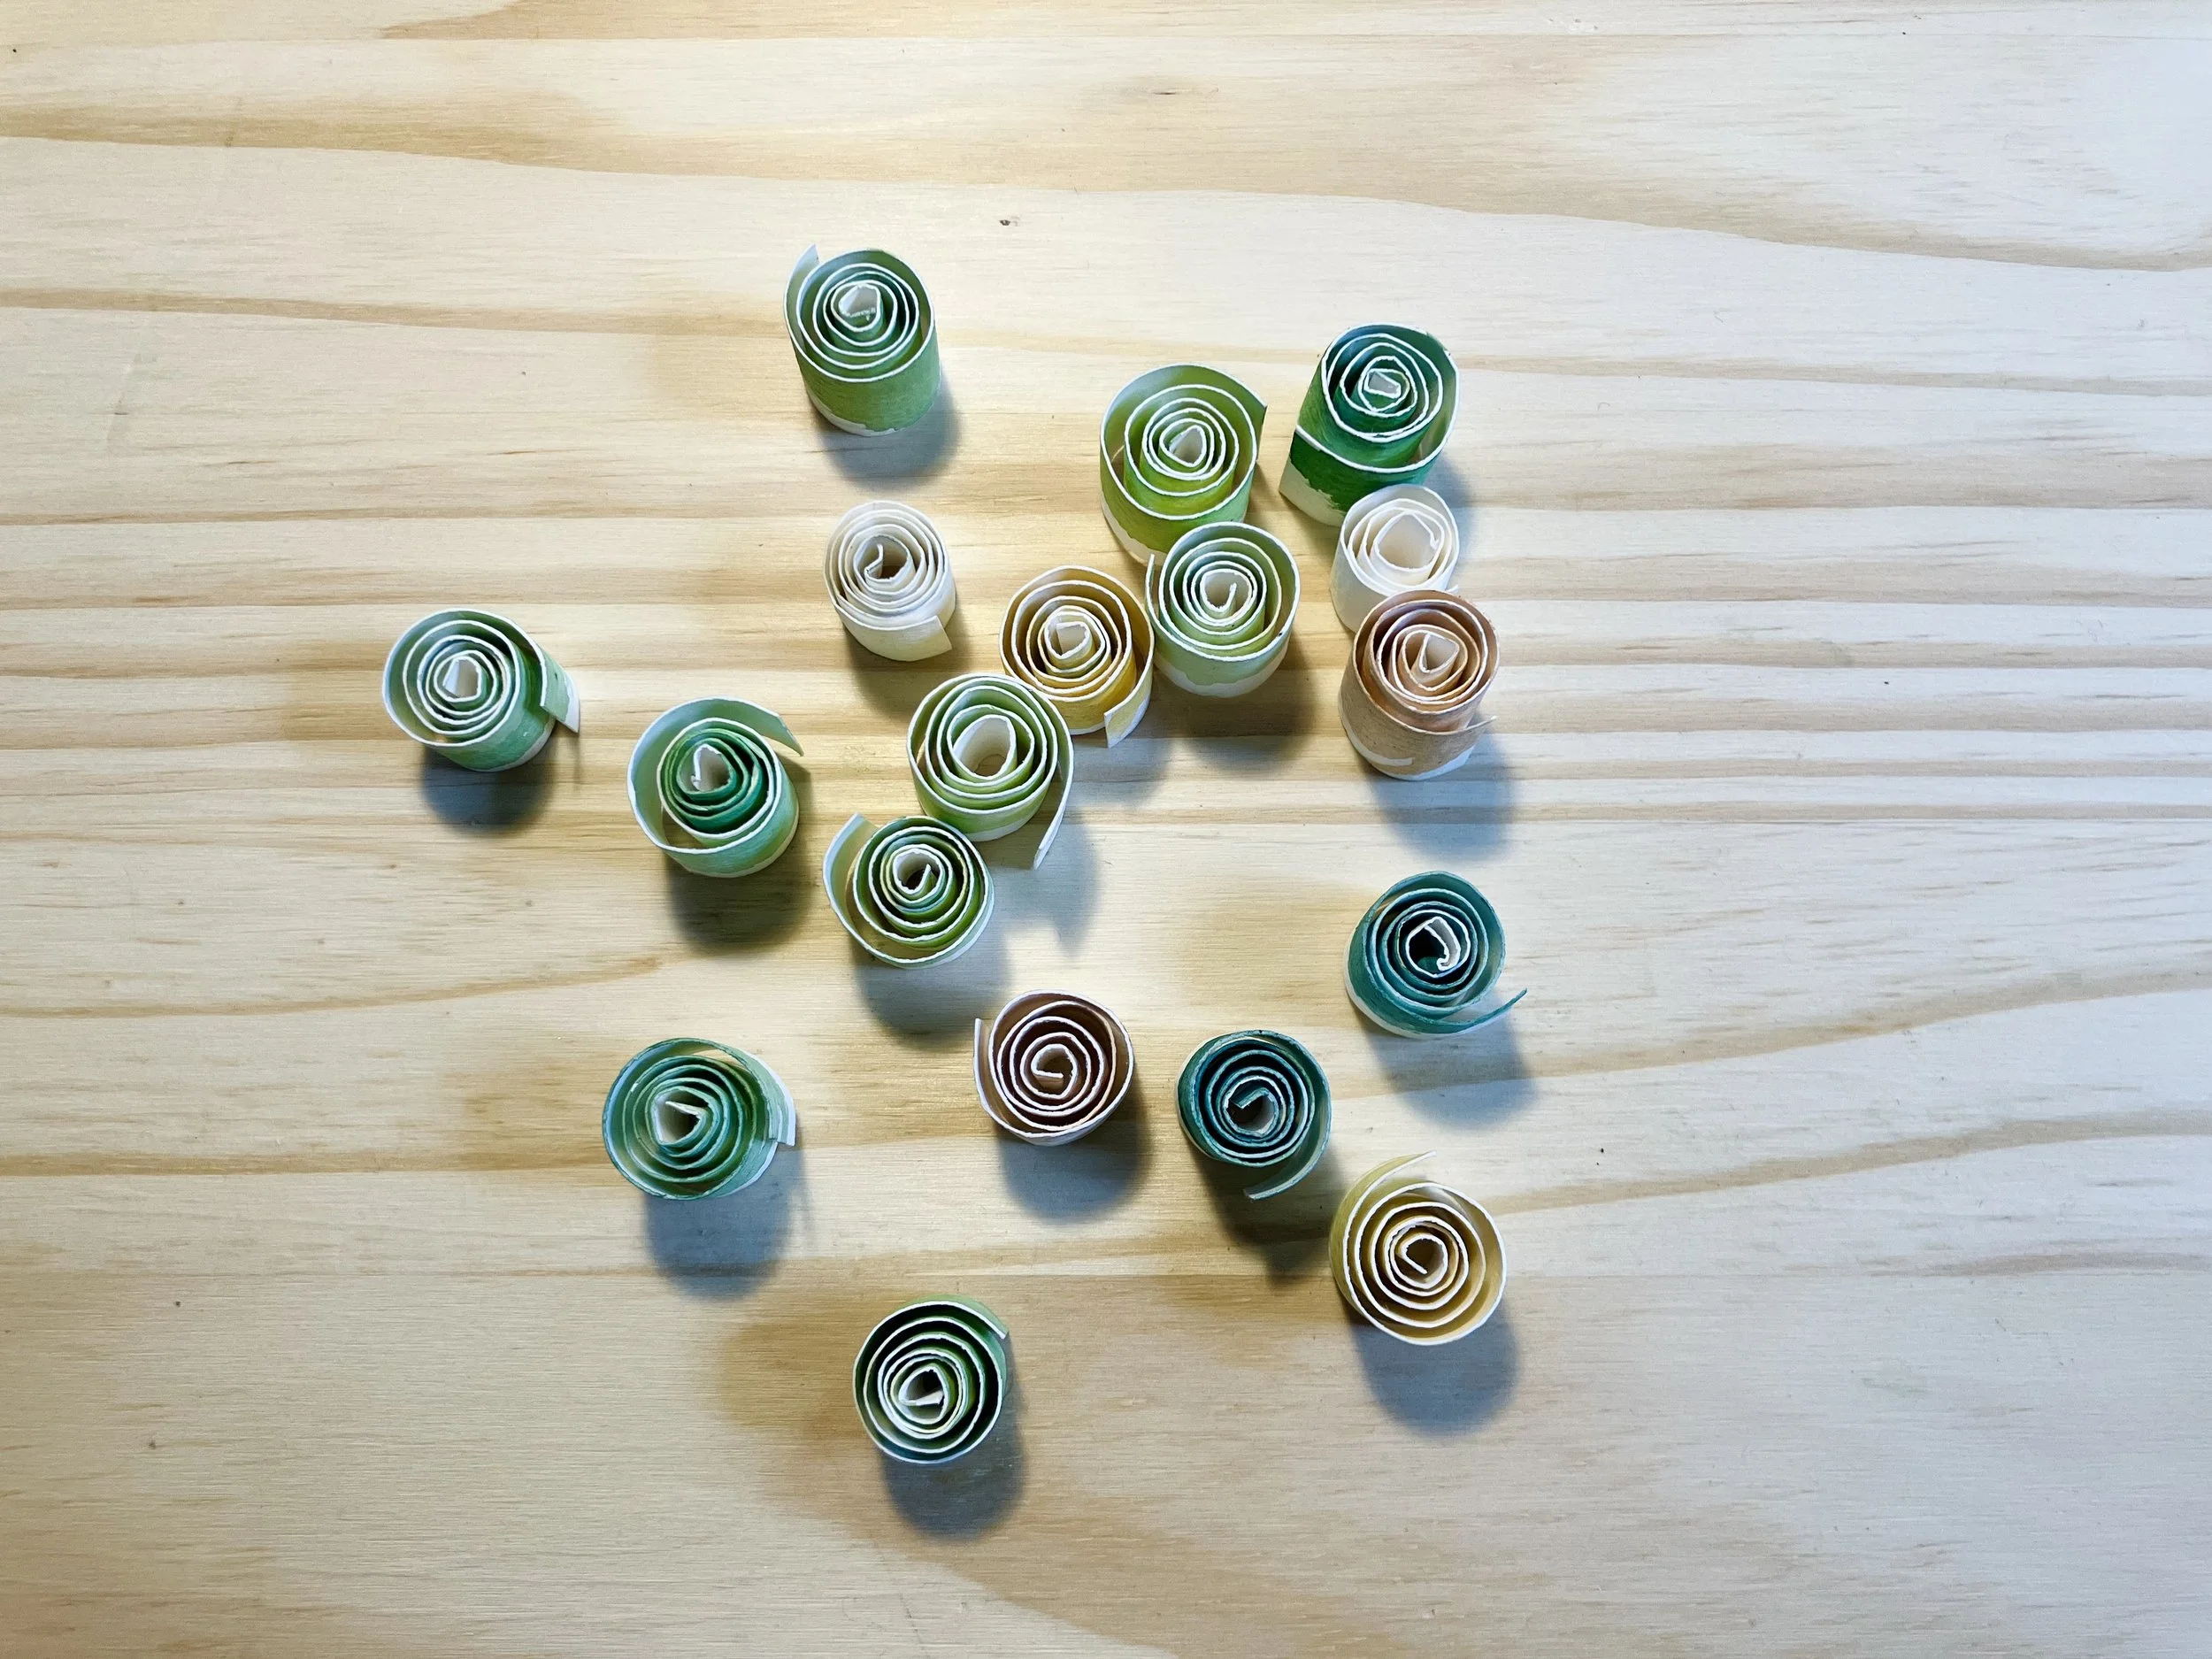
2) Get rolling! Role the painted watercolour paper strips up as tightly as you can.
3) Now that you have the strips rolled (they might have unravelled a bit, and thats fine), think of how you’d like to lay them out. All along the bottom, piled to one corner? Stacked? Falling like snow from the top and in a heap on the ground? It’s totally up to you. Think about direction of coil, colour, how tightly you’d like them placed or if you’d prefer a looser look, width of strips and whether or not you’d like that to determine placement.
4) Get gluing! White glue works fine with this, but alternatives are glue tape, glue dots, or for older artists, glue gun.
5) Let your piece dry thoroughly on a flat surface before hanging.
Enjoy & dont forget to share photos with us! @gather.make.inspire
* Please note that these pieces are quite beautiful framed in shadow boxes, backed onto a white or neutral toned matte. We’ve had families send us photos of their pieces of abstract work, framed beautifully and hanging in their forever homes.
-
Yes—paper is awesome!
This rolled paper technique is endlessly versatile, and you can experiment with all kinds of paper: different textures, weights, colors, and sizes. Try strips of magazine pages, newspaper, or even thin cardboard from cereal boxes.
You can also mount your designs on various surfaces. Like Amy Genser, you might use canvas—or get creative with whatever you have on hand.
Want to explore 3D sculpture? Decorate a small box and see where it takes you. Or drape and design on something soft, like an old muslin swaddle or kitchen towel—perfect for hanging on a wall.
Feeling detailed? Go mini! Rolled paper beads are a fun way to scale down while practicing the same technique. These bead-rolling tools are great for smaller projects, like greetings cards, but also work for creating larger coils—super handy if you’re diving deep into the world of paper rolling.
We can’t wait to see what you create!